How to Use the 30° Degree Rule

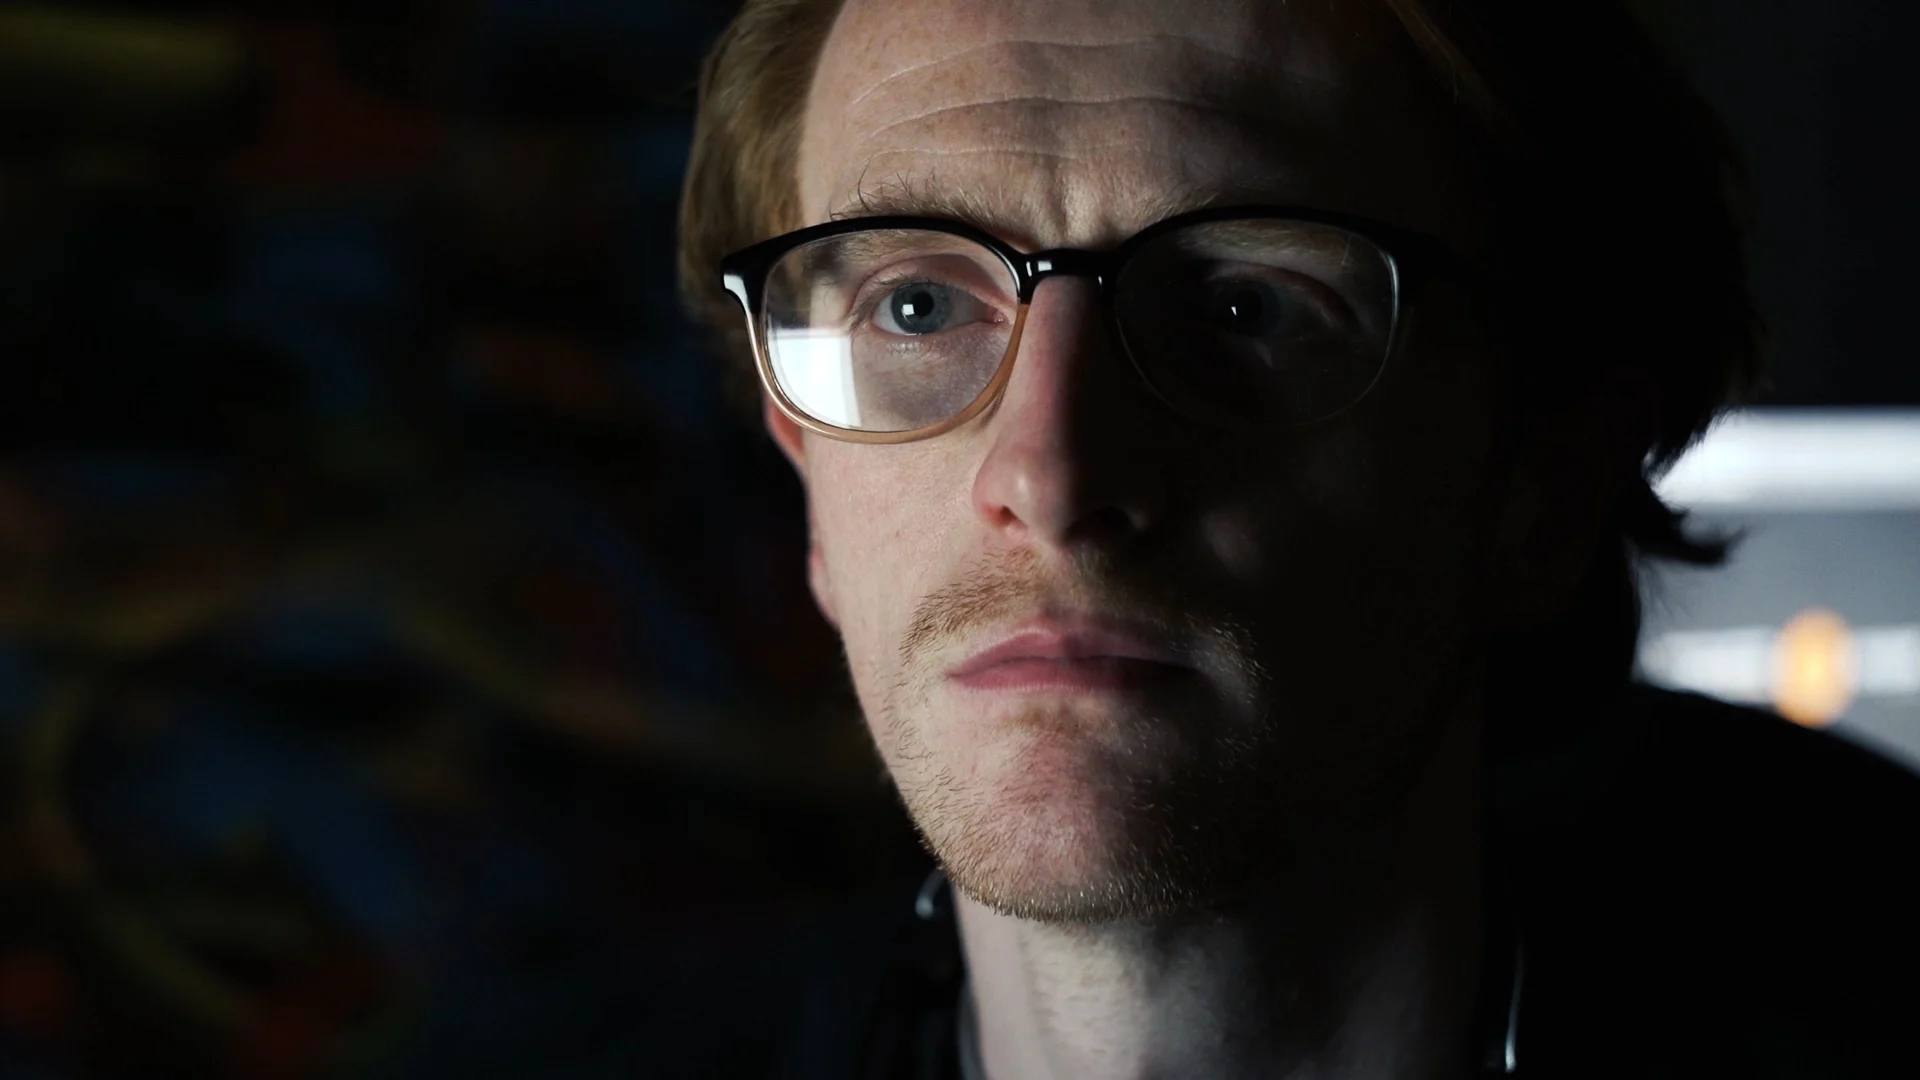
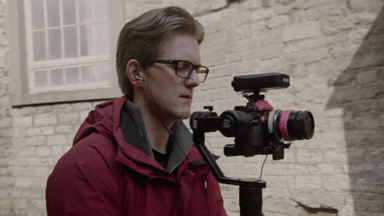
Today we are showing you how to use the 30-degree rule. A fundamental rule of filmmaking used to prevent jarring and jumpy cuts during an edit. Welcome to The Film Look.

If you are new to filmmaking, the 180-degree rule is used to make sure characters in a scene will always face the correct screen direction in relation to each other by drawing an imaginary semi-circle on set and not stepping over the straight line.

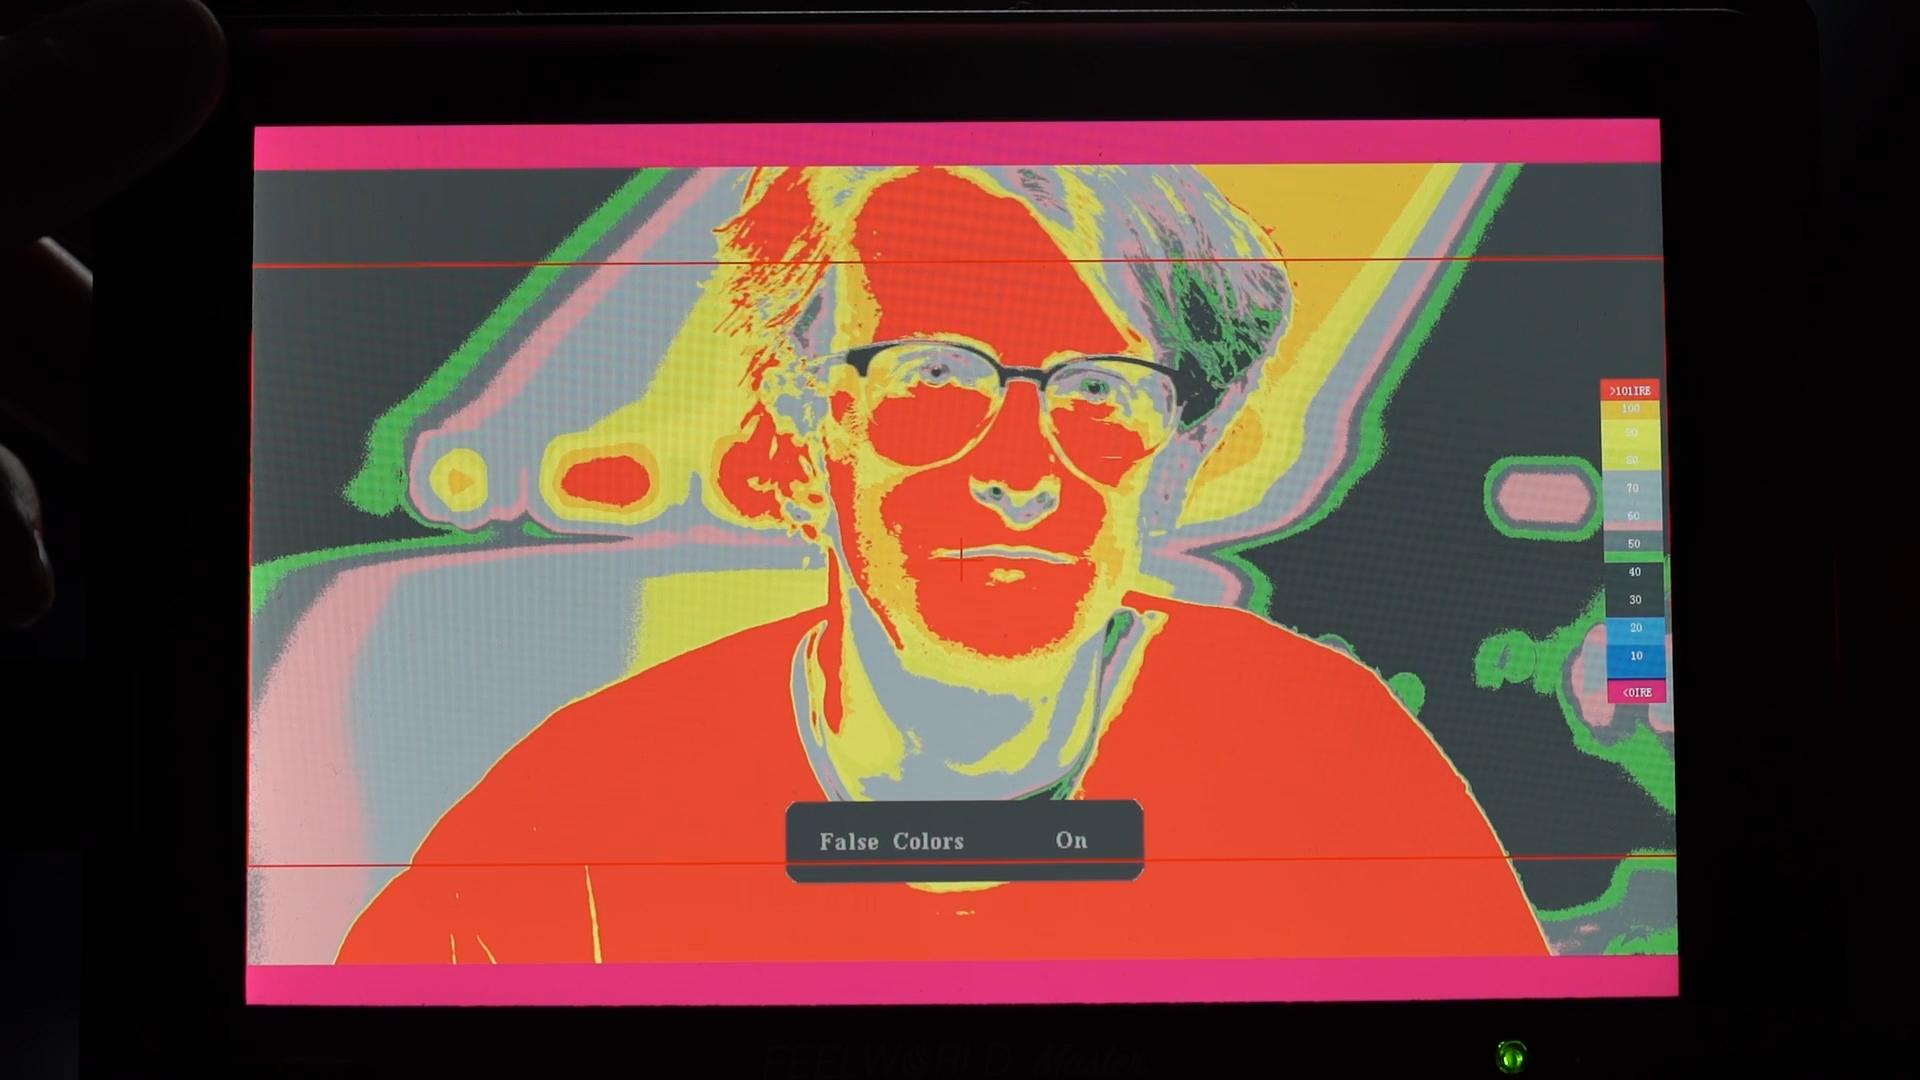
A cousin to the 180 is the 30-degree rule. It's there to make sure you don’t have a strange jarring jump when cutting from one shot to another on the same subject in a scene.

30-Degree-Rule.gif

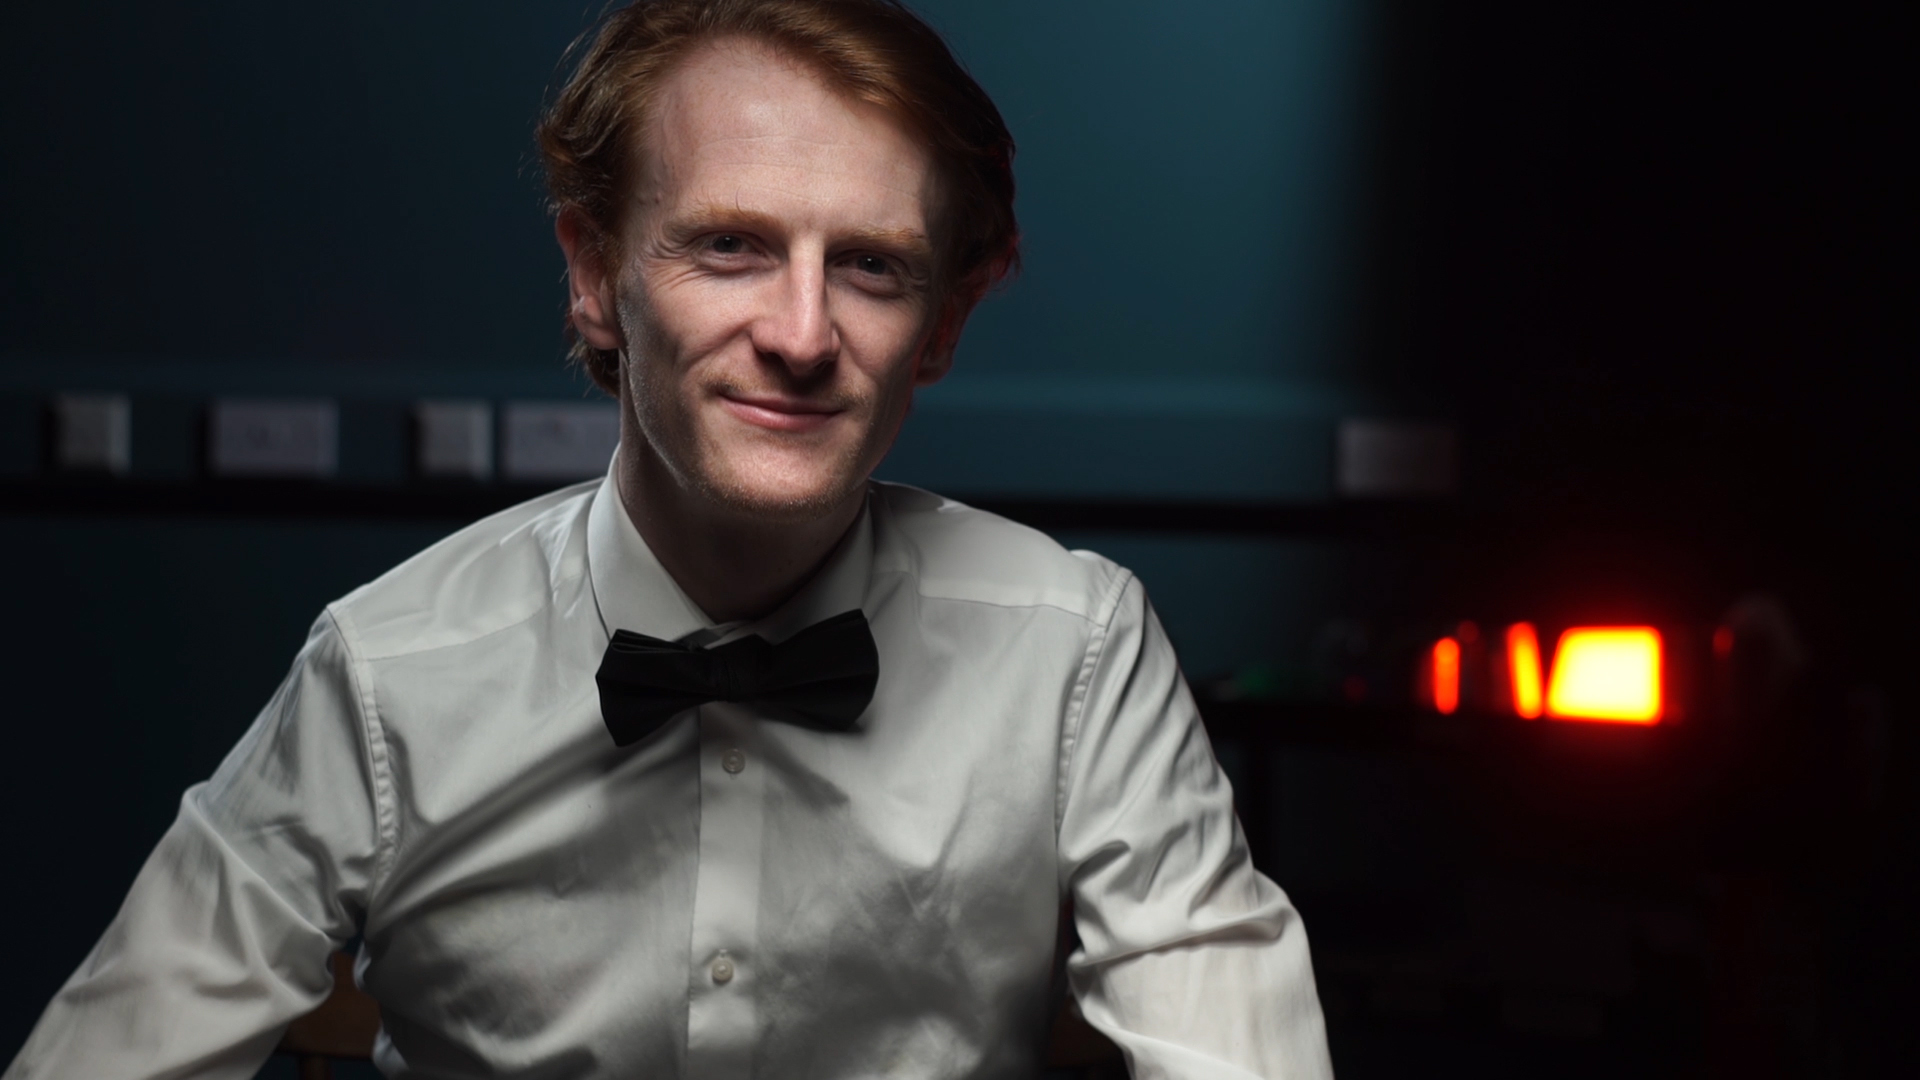
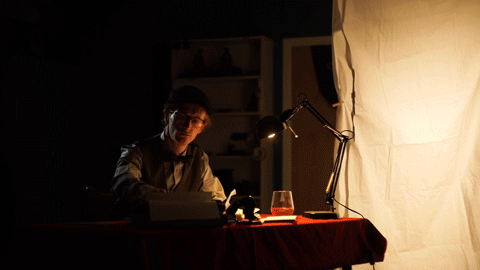
If we shoot a scene from this angle here, then decide to shoot a little bit further along, these two shots will not cut together very well because they are too similar.

Less than 30 degrees

Less than 30 degrees

It causes the cut to jump out on screen. To avoid this, you can make sure you always move the camera 30 degrees, orbiting around the subject.

More than 30 degrees

More than 30 degrees

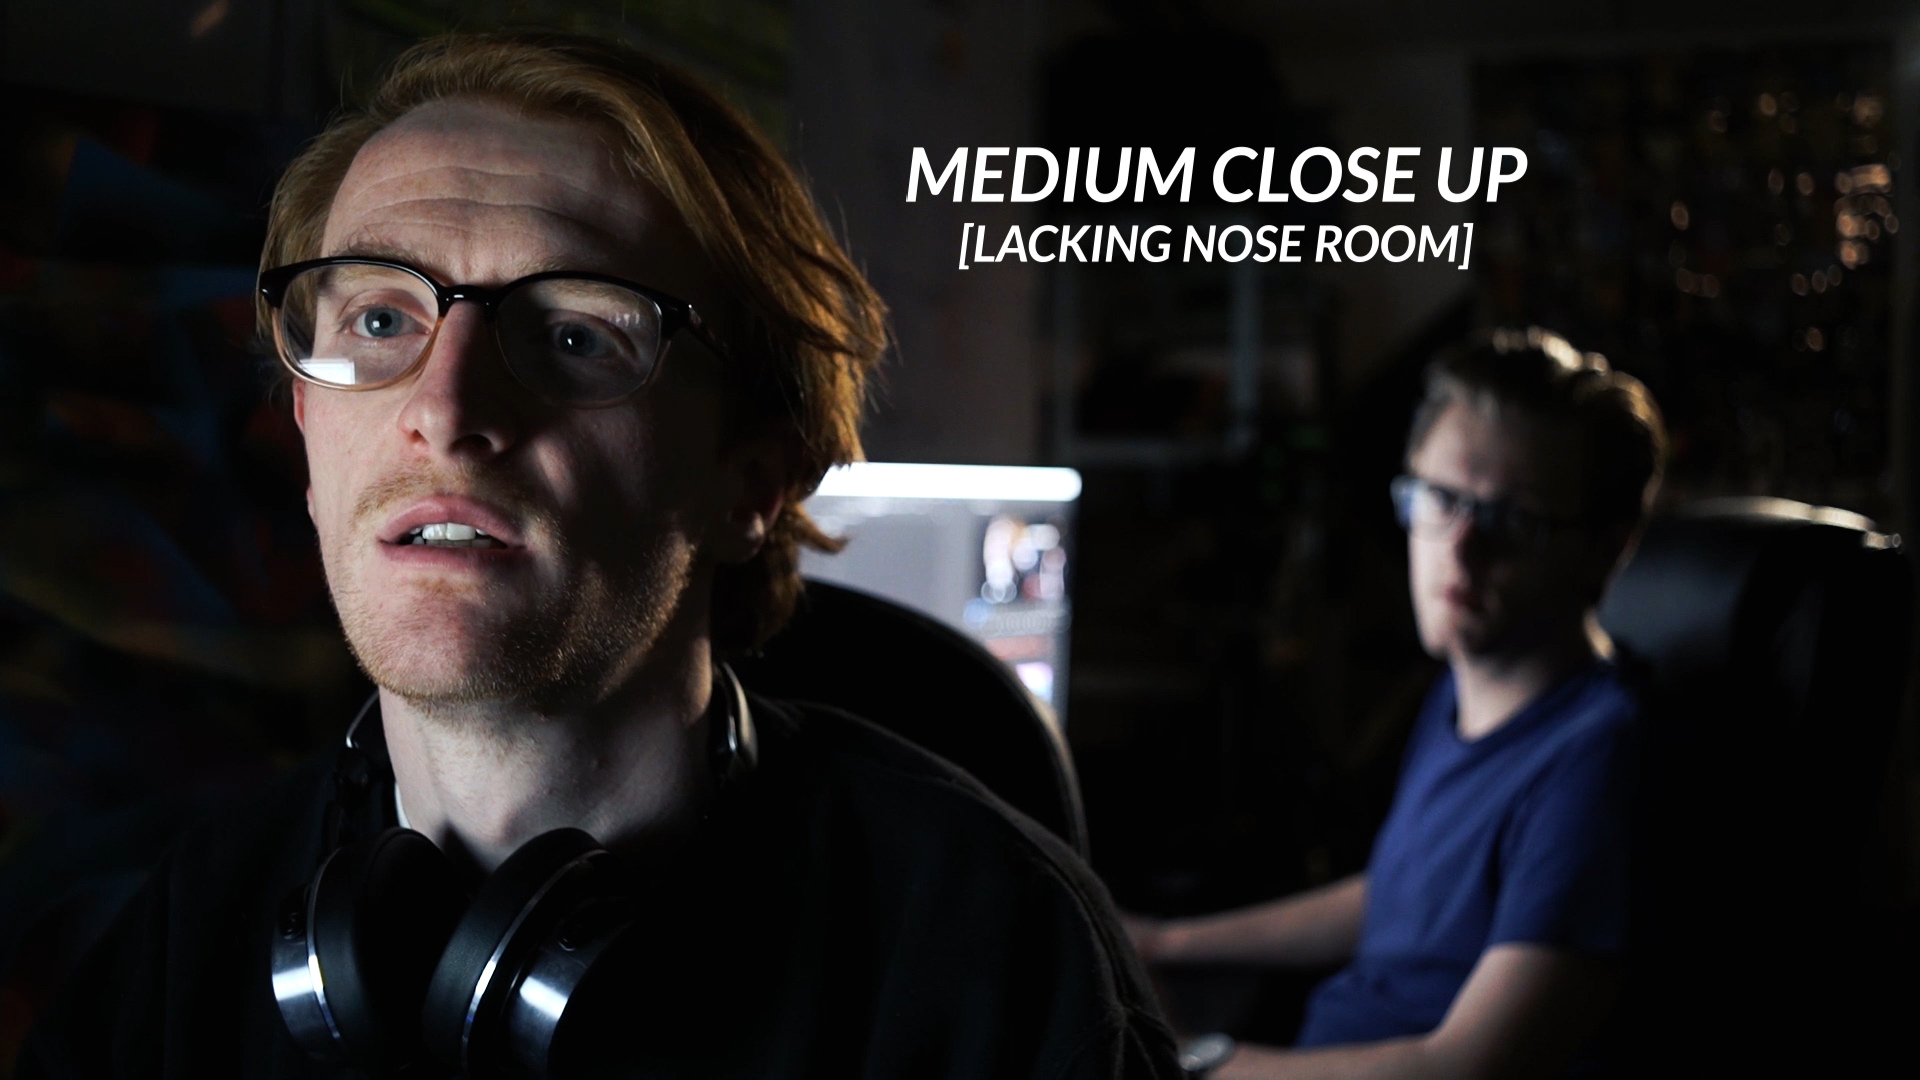
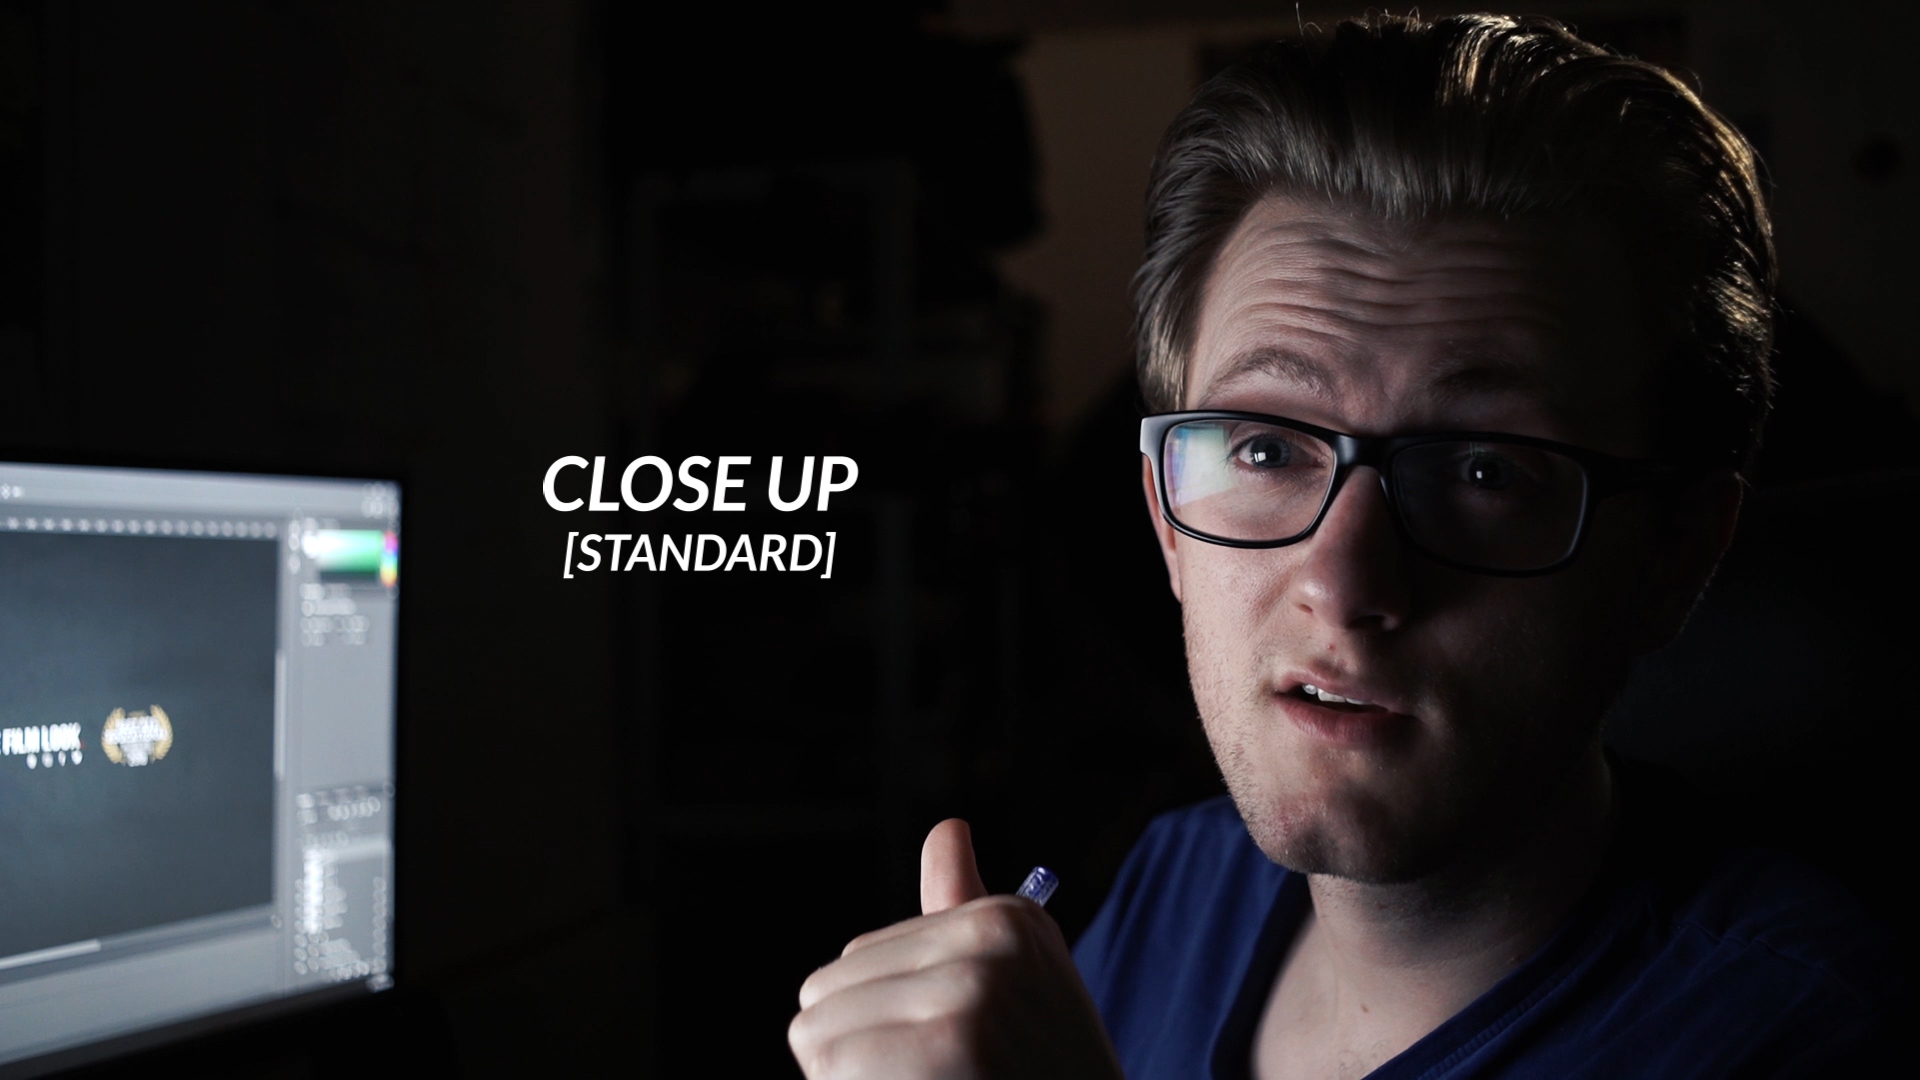
This rule applies for different shot types too. So when you are cutting from a wide shot to a medium close up, if you keep the camera in the same position it can actually look like a strange zoom effect, rather than a cut.

30-Degree-Rule4.gif

Orbit the second angle more than 30 degrees around the subject and it will prevent the weird zoom effect.

30-Degree-Rule5.gif

But you can go too far with this as well!

A wide shot from here cutting to a wide shot from here will be very disorientating to the audience. Again, causing a strange jarring effect, and really just unnecessary coverage of the scene.

30-Degree-Rule6.gif

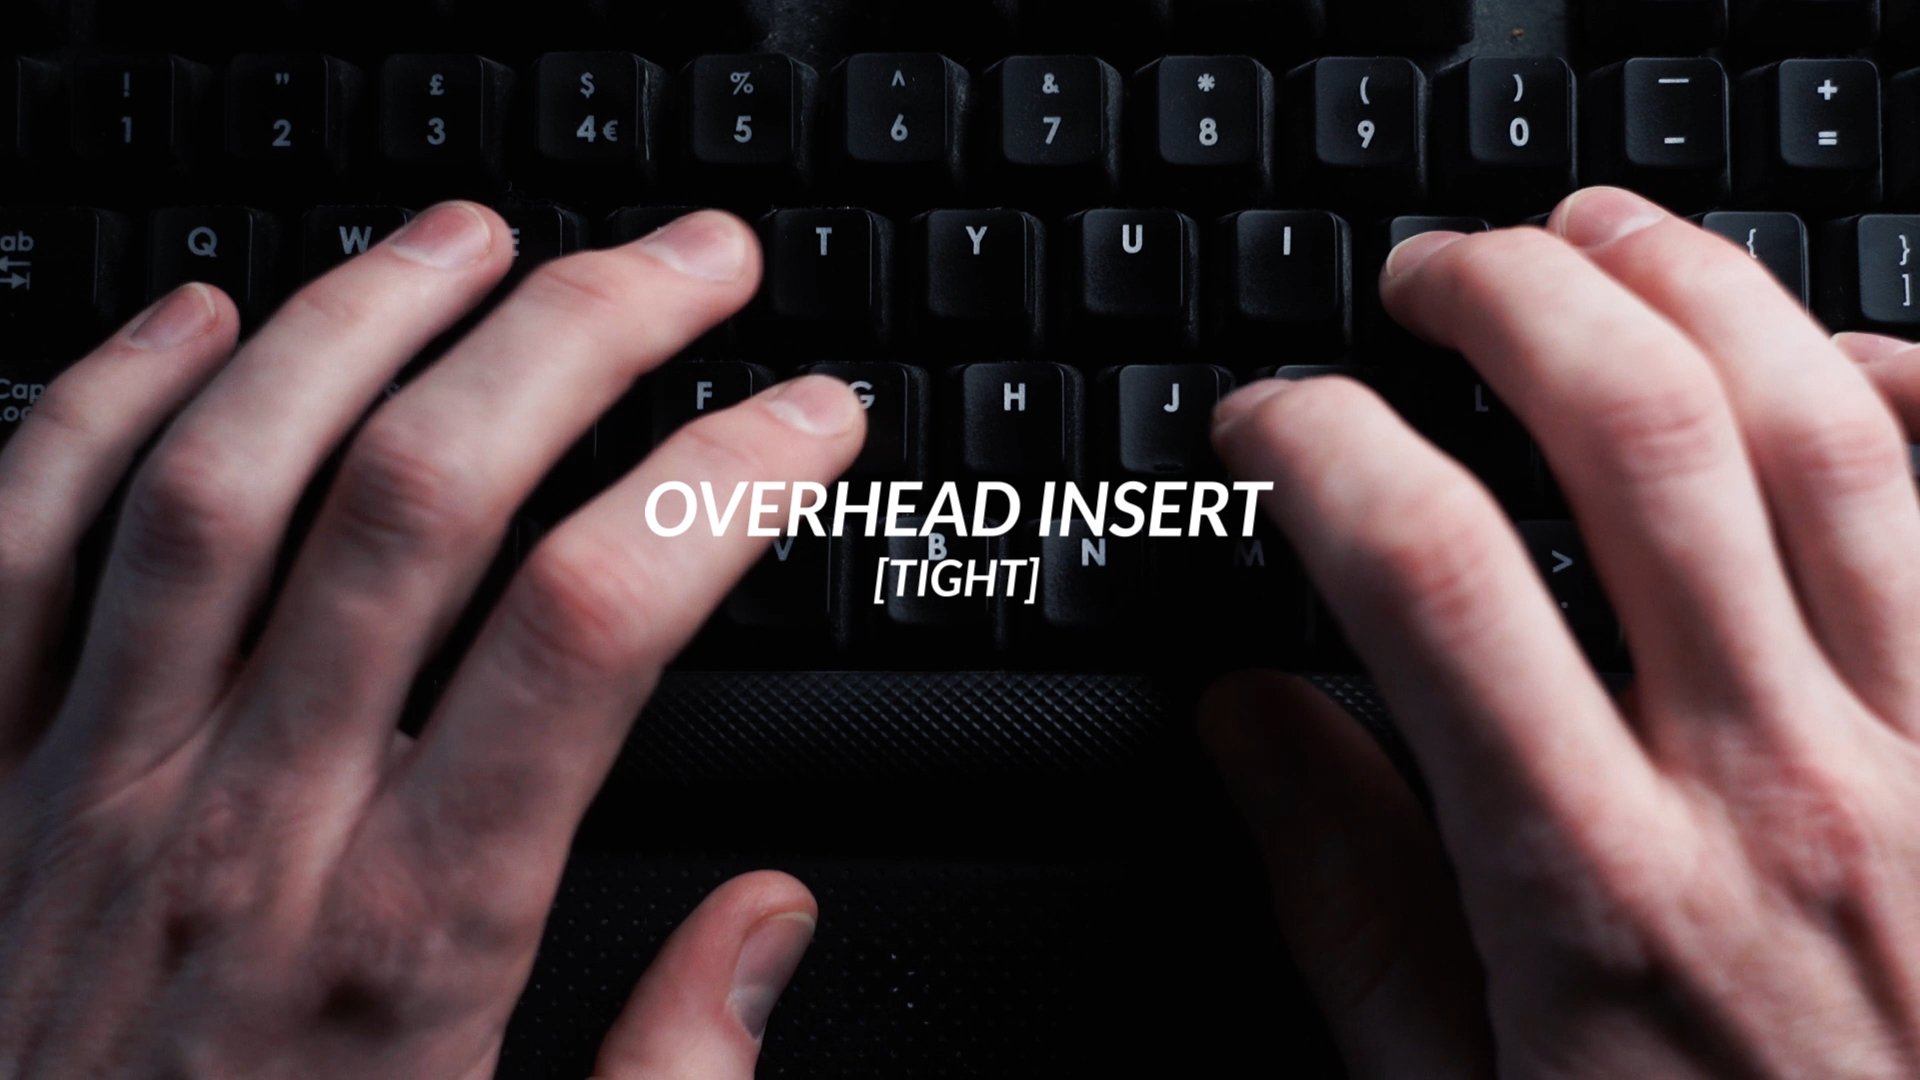
And cutting from an extreme wide shot to an extreme close up can look strange too! Unless of course you can match the motion of the subject and cut on action. 

30-Degree-Rule7.gif

We will do an episode about cutting on action very soon so get subscribed!

But, in all honesty, you could cover the whole scene in this tight close up if you really wanted to. It all depends on the type of project and your filmmaking style.

30-Degree-Rule8.gif

So, basically, the general rule of thumb is to just cut to something significantly different. Preferably, something which gives the audience a better view of the action or drama happening on screen. Just make sure that it's more than 30 degrees. 


This video will show you how to use the 30° degree rule when shooting a film. By the end of this video, you will know how to apply this rule to your films so you will have a smooth and good-looking edit.

📺 How to support the channel

🚀 bit.ly/artlistfilmlook - The music you heard in this episode is from Artlist. Click the link to receive 2 extra free months on when you purchase an Artlist subscription!

🎵 https://www.joelfamularo.com/colour - Use discount code "TFL" at checkout to get 20% off your LUTs purchase!

🎬 In case you missed it

5 Tips for Nailing the 180° Degree Rule: https://youtu.be/Fs24DBoT-C8

Centre Frame Your Shot for MORE Impact: https://youtu.be/b_913ksaKq8

🎧 Listen to our Podcast!

iTunes: https://goo.gl/hikhGF

Android: https://goo.gl/fmsp4s

📞 The Socials

Website: http://thefilmlook.com

Twitter: https://twitter.com/TheFilmLook

Facebook: https://www.facebook.com/TheFilmLook

Instagram: https://www.instagram.com/thefilmlook


DISCLAIMERS:

Some of these links are affiliate links, if you purchase gear via these links The Film Look will receive a small commission, but there will be no additional cost to you. Thank you!

The Action Hero Entrance | Motivated Camera Moves

Here at the film look, we love motivated camera moves. They look great, they are fun to pull off, and they connect the cinematography to the story. This is why today we are talking about a motivated camera move we like to call “The Action Hero Entrance”.

Action-Hero-Entrance.gif

It’s probably the most bad ass way to introduce a character on screen - but it’s also much more than that.

Let me show you why this camera move is one of the best ways to introduce a character in YOUR film. Welcome to The Film Look.

The camera move itself is actually quite simple. It begins on the floor as the subject arrives in their car. As they exit the car, the camera slowly pedestals up until it finishes on a medium close up on the subject’s face. They deliver their line then exit the frame.

The shot doesn’t need to involve a car or any dialogue as there are many variations to this camera move but we thought we would go full-on action movie style!

What’s so special about this camera move is actually how much information it delivers without ever needing to cut to another shot.

Action Hero Entrance1.jpg

At first, we have a wide establishing shot of the scene. In this case, it is clearly a back alley. And we’ve all seen enough films to know a back alley is a sketchy place to be. It sets the scene. 

A car rolls in. But what type of car? If it was a Lamborghini, you’d guess the character was a bit of a playboy. This car...is a little more modest.

Action Hero Entrance2.jpg

The character steps out and we see a glimpse of their costume - their footwear. In this case, we have a pair of black boots. They mean business. If you replaced the boots with flip flops, it would be a completely different story.

Action Hero Entrance3.jpg

Then we get a little character detail. A cigarette thrown on the ground. Why is the character smoking? Maybe to calm their nerves? But they also discard it, so whatever they plan on doing next, they need to be 100% focused.

Action-Hero-Entrance1.gif

Then we’ve got a gun and vest - Police. 

We reveal their face. A young cop - detective Rusty Johnson. And he looks nervous!

Action-Hero-Entrance2.gif

So with a single 20 second shot performing a very simple pedestal from feet to face, we give the audience an entire character bio without having to resort to any expositional dialogue, on-the-nose cut aways, or title cards.

We give the audience just enough information to want to know more about the character and the scene. But what if we changed some details?

Let’s make the location sunny this time. We can change the costume a little bit, and alter the character’s attitude. We can keep the main beats of the scene and keep the dialogue.

Let’s see how this changes an audience’s perspective of the character.

Action-Hero-Entrance5.gif

We’ve transformed the scene from something like True Detective to something more like Narcos just by re-working a few things in the frame.

Action-Hero-Entrance3.gif

And this is why this camera move is so powerful: it captures an intriguing character on screen, it grasps the audience’s attention, and sets up their expectations.

The shot literally looks the character up and down.

Action-Hero-Entrance4.gif

The equipment in this shot, we feel, is quite important. You CAN do this shot handheld, but something smooth and steady will raise the production value and won’t distract the audience from what is happening on screen.

We shot both of these scenes using a Sony a7s Mark 1 with a Takumar 35mm vintage prime. The camera was rigged up on a Zhiyun Crane 2 with a set of spring-action handle grips from Digital Foto.

We will be reviewing these spring-action handle grips in a video very soon, so get subscribed if you haven’t already. 

If you are interested in more motivated camera moves, we have a bunch on the channel. Most of which we found from this book called Master Shots by Christopher Kenworthy. It’s a great book for figuring out what types of shots you can implement for moments in your film.

I’ve put links to the book down below - we get a small kick back for every sale on Amazon, so purchasing it will also help support this channel. Thanks for watching, and remember to achieve it one shot at a time.


This video will show you how to pull off the "action hero entrance" motivated camera move for your next short film. By the end of the video, you'll know what the camera move is all about, how and when to use it, and what equipment you will need to execute it.

📺 How to support the channel

🚀 bit.ly/artlistfilmlook - The music you heard in this episode is from Artlist. Click the link to receive 2 extra free months on when you purchase an Artlist subscription!

🎵 https://www.joelfamularo.com/colour - Use discount code "TFL" at checkout to get 20% off your LUTs purchase!

🎬 In case you missed it

Slowly Building Tension: https://youtu.be/WCbTHnanYkY

Coming to a Halt: https://youtu.be/dqdxPcSr1V8

Sony a7s Review: https://youtu.be/Zez-mTmtAO8

Takumar 30mm Lens Review: https://youtu.be/YhPgrN5FtCE

Handheld Camera Gimbals Review: https://youtu.be/8O-d8hNOja4

🎥 This episode's kit/gear/equipment:

US links:

Sony a7s: http://amzn.to/2DrEdLb

Zhiyun Crane 2: https://amzn.to/2XLyBYA

Master Shots Volume 1: https://amzn.to/2tcPMlo

UK links:

Sony a7s: http://amzn.to/2DrEdLb

Zhiyun Crane 2: https://amzn.to/2XlGcbX

Master Shots Volume 1: https://amzn.to/2ln4ZMv

🎧 Listen to our Podcast!

iTunes: https://goo.gl/hikhGF

Android: https://goo.gl/fmsp4s

📞 The Socials

Website: http://thefilmlook.com

Twitter: https://twitter.com/TheFilmLook

Facebook: https://www.facebook.com/TheFilmLook

Instagram: https://www.instagram.com/thefilmlook


DISCLAIMERS:

Some of these links are affiliate links, if you purchase gear via these links The Film Look will receive a small commission, but there will be no additional cost to you. Thank you!

How to Use False Colour

False Colour: What is it, how do you use it, and why is it useful?

Today we are running you through the basics. Welcome to the film look!

So what is false colour? To put it plain and simple, it’s a feature usually found on field monitors which helps you read the exposure value of an image, very similar to Zebras or a histogram.

False-Colour.gif

So every pixel on a screen will have an exposure value from 0-100. 0 being black, 100 being white, and everything in between being shades of grey.

The field monitor will read the exposure values in every pixel and transform them into distinct bands of colour. So how do you use it?

False colour will give you a chart of the colour bands, usually on the side of the monitor, providing you with chunks of different exposure values which are easy to distinguish from each other.

False Colour.jpg

So just like how Zebras is commonly used to indicate when you’ve over-exposed to 100, or completely white, false colour gives you a whole range of indicators.

You can use this information when setting exposure during a shot. For instance! You’ve setup a scene, brought in your talent, and have started setting up lights.

The first thing you might want to do is make sure the subject has enough light on their face. It’s common to set the exposure value of people with light skin to 70 IRE. On the false colour feature we can see the 70 range shows as this light grey colour. So we can adjust the light and the settings on the camera until the majority of the subject’s face is in this colour band.

False Colour2.jpg

But it doesn’t end there! Once we’ve adjusted and are happy with the exposure on skin, we can now adjust and customise the rest of the lighting in the scene.

We might want to make the rim light on the subject a highlighted spot, say around 80 IRE, so we can adjust the brightness of the rim light until it touches on yellow. 

False Colour3.jpg

You can also do this with the background. In this case, false colour is telling us that the background is sitting very close to zero, so we’ve actually lost almost all the information in the background. We can fix that by lifting the brightness of the background using a light until it appears in the desired colour band. In this case, we want it to hit the 20-30 range, which is blue to grey.

False Colour4.jpg

This technique is great for keeping the lighting in the scene consistent.

Once you have one shot setup, you can make a note of the colour band values for each element in the scene; skin tone at 70, highlight at 80, background light at 30, and make sure each shot in the scene uses these values.

This also means you can create different looks just by how you exposure the elements in the scene.

False-Colour1.gif

If you wanted something super contrasty, like an interrogation scene, you might want to bring up the exposure on skin to the 90 range with a close hard light, drop the rim light to 30, and widen the background light.

False Colour6.jpg

The interrogation scene in The Dark Knight, for example, actually over-exposes the skin on the joker, giving off this overwhelmingly blinding top light just as Batman smashes the Joker’s head against the table.

False Colour5.jpg

We used a false colour plugin to read the exposure values from the scene in The Dark Knight and tried to re-create it ourselves.

False-Colour2.gif

So next time you want to replicate the tone of a film; get a screenshot, throw it into your editor, pop on this plugin, and match the values. 

https://timeinpixels.com/false-color-plugin/

We’ve been using false colour for a year or two now, and we wouldn’t purchase a monitor if it didn’t have it. It’s so useful and easy to use once you wrap your head around the colour band system. 

The monitor we used in this episode, the FeelWorldMA7, is a great budget monitor with False Colour included. 

We did a review on it:

Just a quick note. Because false color uses IRE to read the exposure values, it does mean that a dark t-shirt and a light t-shirt lit with the same light will read differently. False Color is not measuring the amount of light hitting an object, it measures how bright it is on screen. So if you are matching exposure of two different subjects, make sure to read something similar such as skin tone and not a dark t-shirt against a light t-shirt.


This video will teach you the basics of using the false color feature found on field monitors for filmmakers. By the end of this video, you will have an understanding of how to apply false color to your images and videos in order to correctly expose each element in the scene.

📺 How to support the channel

🚀 bit.ly/artlistfilmlook - The music you heard in this episode is from Artlist. Click the link to receive 2 extra free months on when you purchase an Artlist subscription!

🎵 https://www.joelfamularo.com/colour - Use discount code "TFL" at checkout to get 20% off your LUTs purchase!

🎬 In case you missed it

False Color Plugin: https://timeinpixels.com/false-color-plugin/

FeelWorld MA7 Review: https://youtu.be/TEjwlnNKE4U

🎧 Listen to our Podcast!

iTunes: https://goo.gl/hikhGF

Android: https://goo.gl/fmsp4s

📞 The Socials

Website: http://thefilmlook.com

Twitter: https://twitter.com/TheFilmLook

Facebook: https://www.facebook.com/TheFilmLook

Instagram: https://www.instagram.com/thefilmlook


DISCLAIMERS:

Some of these links are affiliate links, if you purchase gear via these links The Film Look will receive a small commission, but there will be no additional cost to you. Thank you!

Learn to Light like the Pros: Short Side Lighting

Today I want to share with you ONE absolutely class lighting trick that will give you the film look by simply moving your lights around. Welcome to The Film Look.

We’ve shot a lot of sit down interviews for client jobs in the past. The basic setup for a video production client interview looks like this:

Short Side Lighting.jpg
  • sit them down with some distance from the background so you can get it nice and blurry

  • Place in a key light to brighten up their face

  • Place in a fill light on the other side to reduce the shadows

  • While we are at it, we will pop in a hair light to make them pop off the background

  • And a final background bounce light to brighten UP the background

This looks great for bright, positive messages in videos from a business point of view. But it doesn’t look like a film!

So take all of your video production lighting knowledge and throw it out of the window! We’re starting from scratch and this time we are going to make it look like a movie!

So before we start changing the lighting, we will bring in some set dressing, props, and Rob is going to dress as Bobby Carrot, a criminal accountant from the victorian era.

Short-Side-Lighting.gif

Now let's set up the lights again!

  • Sit your subject down with some distance from the background

  • Frame up your shot

  • ...and place in a key light to brighten up their face…

Short Side Lighting 2.jpg

This is the first thing we can change!

It feels natural to place the light so it points in the same direction that the camera is pointing. This means the light will never end up in the shot. This is a habit grown from videography shoots, but it doesn’t look very film-like.

Short Side Lighting 3.jpg

Instead of lighting the broadside (the side where you see most of their face), we are going to move the light 180 degrees around the subject and light up the short side.

Short-Side-Lighting-2.gif

So instead of the light sitting at the 8 o’clock position to the subject, we will move it to the 2 o’clock position.

This small lighting change transforms the shot into something a lot more dark and sophisticated.

Short Side Lighting 4.jpg

It’s called short side lighting because the key light is pointing to the short side of the subject (the side where you can see less of the face).

Short-Side-Lighting-3.gif

As well as getting something which looks instantly more film-like, you also have the benefit of very little light hitting the background because the key light is facing the opposite direction. So the background stays nice and dark.

Now you know about short side lighting, you’ll notice pretty much every film or TV drama will use this type of lighting in most of their scenes.

You can achieve short side lighting with window light as well. The window doesn’t have to be in the frame, you can always frame it out, but you still achieve something with great contrast and shadows.

Let’s carry on with our setup!

  • So they are framed up

  • Lit on the short side this time

  • ...and now we can place in a fill light to reduce those shadows...

Except we aren’t going to do that!

If you asked Roger Deakins about fill light he’d probably say “Phil who!?”.

Short-Side-Lighting-4.gif

Instead, we are going to embrace these deep shadows in the shot. Filling in those shadows can spoil the film look and make it look more like a rom-com.

Short-Side-Lighting5.gif

If you need to create more shadow, you can add some negative fill by placing something like a blackout curtain or 5-in-1 reflector on the subject’s broadside.

We have an episode talking about blackout curtains if you want to find out all the different uses for them!

And if you want to add more light to the broadside of the subject, you can always position the light down the clock: so instead of 1 or 2 o’clock, put it at 3 or 4 o’clock. This will let more light cast on their broadside but will still produce a dramatic, contrasty shot without having to resort to fill lighting.

Short-Side-Lighting6.gif

Lastly, we ARE going to add an edge light in order to bring the shape of the subject back into the shot and give them some contrast from the background.

Basically, we want to create an outline using light. Otherwise, the back of the head will meld into the background because they are both very dark.

Short-Side-Lighting7.gif

Alternatively, you can light up the background, so it's brighter than the back of their head and then you can forget about the hair light. We are just looking to retain the shape of the subject.

Short-Side-Lighting8.gif

“But now we have lights in front of the camera, won’t they get in the shot when the camera moves around?” Well, this is where you can employ some movie magic.

Start with a practical light, like a desk lamp, to act as a physical light source which is in the shot. Then you can add in a sneaky key light out of frame to boost up the lamp, also known as motivating the light. This will work just as long as the colour temperature and quality of light is the same as the practical.

Short Side Lighting 6.jpg
Short Side Lighting 7.jpg
Short Side Lighting 8.jpg

In this case, we have a tungsten bulb and it’s diffused so we matched it with our production light by matching the colour temp and diffusing with a show curtain.

We have an episode of DIY diffusion:

On wider shots, the production lights can sit further back, out of frame. It’s wider, so we won’t need perfect detail on faces because we are shooting the bigger picture. In close-ups, you can bring them closer and get perfect exposure on the subject’s face.

Short-Side-Lighting9.gif

This is something which I wish my University taught me. Sadly, I had to learn this through my own trial and error. Next time you watch a film or TV show, have a look at which side the lighting is positioned. You might be surprised how often short side lighting is used!


📺 How to support the channel

🚀 bit.ly/artlistfilmlook - The music you heard in this episode is from Artlist. Click the link to receive 2 extra free months on when you purchase an Artlist subscription!

🎵 https://www.joelfamularo.com/colour - Use discount code "TFL" at checkout to get 20% off your LUTs purchase!

🎬 In case you missed it

10 Ways to use Blackout Curtains for Filmmaking - https://youtu.be/nf2Cxz8H4CU

DIY Light Diffusion: https://youtu.be/zFqAo7Ic538

How to Shoot an Interview: https://youtu.be/8TRdmj0Ao4k

🎧 Listen to our Podcast!

iTunes: https://goo.gl/hikhGF

Android: https://goo.gl/fmsp4s

📞 The Socials

Website: http://thefilmlook.com

Twitter: https://twitter.com/TheFilmLook

Facebook: https://www.facebook.com/TheFilmLook

Instagram: https://www.instagram.com/thefilmlook


DISCLAIMERS:

Some of these links are affiliate links, if you purchase gear via these links The Film Look will receive a small commission, but there will be no additional cost to you. Thank you!

Sharpen Your Dialogue with a Basic Audio Grade

Just like a film’s colour grade, adding some seasoning to the dialogue will step up your audio and make it pop alongside the image! You can achieve this with something called a basic audio grade!

Sound is something we are still learning, so we’ve asked Mark Edward Lewis of CinemaSound.com to show us how we can add a little salt and pepper to dialogue to really bring it to life.


🎬 https://www.cinemasound.com/ - check out the world's most comprehensive resource of audio-for-film education!

Check out Mark Edward Lewis' playlist of Cinema Sound examples: https://www.youtube.com/watch?v=vWgshjbVTDM&list=PL7SC3ZDg9-3-Fr8ECv_2y-v7zsE68jfYT

📺 How to support the channel

🚀 bit.ly/artlistfilmlook - The music you heard in this episode is from Artlist. Click the link to receive 2 extra free months on when you purchase an Artlist subscription!

🎧 Listen to our Podcast!

iTunes: https://goo.gl/hikhGF

Android: https://goo.gl/fmsp4s

📞 The Socials

Website: http://thefilmlook.com

Twitter: https://twitter.com/TheFilmLook

Facebook: https://www.facebook.com/TheFilmLook

Instagram: https://www.instagram.com/thefilmlook


DISCLAIMERS:

Some of these links are affiliate links, if you purchase gear via these links The Film Look will receive a small commission, but there will be no additional cost to you. Thank you!

Centre Frame Your Shot for MORE Impact

A few videos back we spoke about the things you need to know when you are making your first short film.

If you haven’t seen it you can find it here.

For that video, we had to look through some of our past films and took clips from them. I watched them back to back, which is something I’ve never done before, and it made me realise something...

In every film, we have a shot which is centre framed which always happens at a dramatic or key moment.

The masters of centred framing are directors like Wes Anderson and Stanley Kubrick.

So if you want to see some great examples of centre framing go watch and analysis their films instead of this YouTube video, but we are going to talk about it.

Welcome to The Film Look.

For our short film Road, we filmed this shot.

Centre Framing In Film 1

The inspiration for this shot was taken from the monolith in 2001: A Space Odyssey.

Which is really strange because I don’t really like that film. Hate mail in the comments below.

In our short film Road, our character wakes up in the middle of the road and throughout the film, he finds a pair of shoes, a key, and a telephone. The final thing he finds is a door which stands in the middle of the Road.

Since the road was long and straight when we see the door in the wide shot for the first time, all of the lines of the road lead to a single point, which is the door. Our character has nowhere else to go but through the door.

Cut to the next scene and all of the leading lines are gone and it is a wide open space. Now our character has no path.

I think this is where centre framing works best when you have lines in your set design that lead to a single point. The Shining from Stanley Kubrick, which I do like by the way, is all centre framed. It gives the audience a sense that something isn’t right and to make them feel uneasy.

For Road, I was hoping the audience would feel the same way because a door in the middle of a Road shouldn't be there. The tension in the film is at one of its highest peaks and centering the door right in the middle means the audience has no other distractions.

Next, for our shot film Corpse we filmed this shot.

Centre Framing In Film 2

When we were shooting the scene our actor Dan jumped off a wall, into the sea, which we weren't ready for and had to run to keep up. Since it was an action scene, we just went with it to keep the pace high, and we captured this shot.

This is the opening shot of the film, and it definitely helps to set the tone right away. I don’t think you would get if it wasn’t framed in the centre.

For the last few shots in our short film the Asylum Groove we filmed this.

Center-Framing.gif

At this point in the film, we wanted to bring back some order as our character had just been dancing around the room. Centring our character in the frame contributed to bringing back that order, along with the music, and the fact he is now strapped to an electric chair.

The centred frame also allowed us to cut on action and keep the audience's eyes on our character. They have nowhere else to look but at him.

In Mad Max Fury Road, DOP John Seale said “whatever was the centre point of that shot”, in terms of the action happening in the frame, “had to be in the centre of the frame.”

This allowed them to cut faster between each shot because the audience’s eyes don't have to shift around to follow what is happening in each frame.

I would definitely like to film an action scene in this way to see how fast you can cut between the action. So if you want to see us try and experiment doing this hit that like button.

In every film we’ve made there is always a shot or two which is centre framed. I think a few stand out shots is just enough. Centre framing at a significant moment in your film can show a character has more power than before, it can create order with leading lines, helps with fast action cutting, it can deliver impact and most of all, it tells the audience it's the most important thing in the frame by simply placing it dead centre.

There’s loads more resources online about centre framing. In the comments below I’ve added a list of other videos and articles I’ve been looking at.


📺 How to support the channel

🚀 bit.ly/artlistfilmlook - The music you heard in this episode is from Artlist. Click the link to receive 2 extra free months on when you purchase an Artlist subscription!

🎵 https://www.joelfamularo.com/colour - Use discount code "TFL" at checkout to get 20% off your LUTs purchase!

🎬 In case you missed it

Aputure Mini-20 Light Review - https://youtu.be/Pa58MhaeLlo

Power Junkie Review - https://youtu.be/UZZ-UA4r3js

How to Light an Exterior Night Scene - https://youtu.be/foEV4YGXqGU

Get the FILM LOOK with the Aputure 300d - https://youtu.be/FWThzBtyvsA

🎥 This episode's kit/gear/equipment:

🇺🇸 US links:

Ikea Jansjo USB Light - http://bit.ly/2YG2NRB

Amazon Ikea Jansjo USB Light - https://amzn.to/2YOw5hh

Blind Spot Power Junkie - https://amzn.to/2UdIVre

Sony a7s Dummy Battery - https://amzn.to/2UdwEmN

Canon 5D Dummy Battery - https://amzn.to/2HWI0oP

GH4/GH5 Dummy Battery - https://amzn.to/2uHQeZh

BMPCC4K Dummy Battery - https://amzn.to/2HWI0oP

15mm Rode Cheese Plate - https://amzn.to/2uPZQkt

🇬🇧 UK links:

Ikea Jansjo USB Light - http://bit.ly/2wf4JVe

Amazon Ikea Jansjo USB Light - https://amzn.to/2QjKQWi

Blind Spot Power Junkie - https://bit.ly/2G1uBti

Sony a7s Dummy Battery - https://bit.ly/2CTqwW4

Canon 5D Dummy Battery - https://bit.ly/2UfT0Ec

GH4/GH5 Dummy Battery - https://bit.ly/2UlX2uY

BMPCC4K Dummy Battery - https://bit.ly/2UfT0Ec

15mm Rode Cheese Plate - https://amzn.to/2CVEyqn

🎧 Listen to our Podcast!

iTunes: https://goo.gl/hikhGF

Android: https://goo.gl/fmsp4s

📞 The Socials

Twitter: https://twitter.com/TheFilmLook

Facebook: https://www.facebook.com/TheFilmLook

Instagram: https://www.instagram.com/thefilmlook

(#filmmaking #tutorials #lighting #Ikeahack)


DISCLAIMERS:

Some of these links are affiliate links, if you purchase gear via these links The Film Look will receive a small commission, but there will be no additional cost to you. Thank you!

Can You Use This $6 Light For Filmmaking

We’ve been busy working on our new YouTube studio space recently, so I do apologise that this episode is a bit simple. We were at IKEA the other day looking for furniture and I spotted this: they call it the Jansjo. It’s a USB powered LED light on a gooseneck and it’s only £2! So I thought I would see just how many ways we can use this for filmmaking.

$6-Light-For-Filmmaking-1.gif

These types of lights are meant for lighting up a laptop keyboard if you are typing away at night. Can we class this as filmmaking? Writing, maybe? There’s use number one!

POWER JUNKIE

The Power Junkie is a battery solution we use for powering the Sony a7s because the standard battery only lasts 40 minutes at best. The Power Junkie converts your battery into an NPF solution, giving you more battery life for a longer shoot.

$6-Light-For-Filmmaking-2.gif

We did a review of the Power Junkie here if you want to know more!

The Power Junkie includes USB ports as well, which means you can plug in the Jansjo light at the same time the NPF battery is powering the camera, and use it to light up hard to find microphone and headphone ports as well as rigging up a follow focus when you are working in the dark. It saves another person having to hold a light or ✔ jamming one in your mouth.

$6-Light-For-Filmmaking-3.gif

USB POWER BANK

If you don’t have a power junkie, you can always use something like a USB power bank and secure it to your camera, preferably onto a cage. It will do a similar job in terms of instant plug-in power for a work light.

But is it useful as an actual production light?

KEY LIGHT

It’s a bit of a ridiculously test, but we thought we may as well try to see if you can use this as any sort of key light on a subject.

$6-Light-For-Filmmaking-4.jpg

The Jansjo light is 10 lumens at 0.3 watts so it’s not very bright.

But we tested it in a very dark room and it didn’t do too bad! Obviously we are shooting on the Sony a7s which is known for being a beasty low light camera, but the settings were certainly not out of the realm of shooting.

$6-Light-For-Filmmaking-5.jpg

Surprisingly, it could work as a key.

EYE LIGHT

Next, we tested to see if you could use this as a makeshift eye light when the subject’s eyes have no natural eye light. From these results, it didn’t work very well!

The Jansjo is only 10 lumens so it just doesn’t pump out enough light to catch an eye...at least, not from the length of the gooseneck.

BACKGROUND BOKEH

We’ve had projects in the past when we just need a tiny little light source in the background to generate some bokeh balls. Really, just to give the background some life. With USB power like the Power Junkie, we were able to pop the light in the background and give it a bit more energy.

With some coloured gels, it's easy enough to change the colour of the background bokeh.

$6-Light-For-Filmmaking-6.gif

If you wanted to do something like this, it’s probably worth looking into the Jansjo light which comes with a clamp. It’s a lot brighter, and it much easier to rig up into a shot!

PROP

It could come in handy as a bomb defusal light or a bank heist pock picking light. Get imaginative!

$6-Light-For-Filmmaking-7.gif

BACK OF PC

What it’s actually perfect for is plugging into the back of your PC when you are swapping out ports and plugging things in. As it’s only £2, I would plug this into a spare USB socket and just leave it there.

The biggest let down of this light is the lack of on/off switch. I’d have it on a camera rig all the time if you could switch it off while keeping it plugged in. So while we carry on renovating the new Film Look studio, there’s some food for thought on a bargain product. Let us know how you’d use something like this for filmmaking, or if you think it’s an absolute waste of time!


📺 How to support the channel

🚀 bit.ly/artlistfilmlook - The music you heard in this episode is from Artlist. Click the link to receive 2 extra free months on when you purchase an Artlist subscription!

🎵 https://www.joelfamularo.com/colour - Use discount code "TFL" at checkout to get 20% off your LUTs purchase!

🎬 In case you missed it

Aputure Mini-20 Light Review - https://youtu.be/Pa58MhaeLlo

Power Junkie Review - https://youtu.be/UZZ-UA4r3js

How to Light an Exterior Night Scene - https://youtu.be/foEV4YGXqGU

Get the FILM LOOK with the Aputure 300d - https://youtu.be/FWThzBtyvsA

🎥 This episode's kit/gear/equipment:

🇺🇸 US links:

Ikea Jansjo USB Light - http://bit.ly/2YG2NRB

Amazon Ikea Jansjo USB Light - https://amzn.to/2YOw5hh

Blind Spot Power Junkie - https://amzn.to/2UdIVre

Sony a7s Dummy Battery - https://amzn.to/2UdwEmN

Canon 5D Dummy Battery - https://amzn.to/2HWI0oP

GH4/GH5 Dummy Battery - https://amzn.to/2uHQeZh

BMPCC4K Dummy Battery - https://amzn.to/2HWI0oP

15mm Rode Cheese Plate - https://amzn.to/2uPZQkt

🇬🇧 UK links:

Ikea Jansjo USB Light - http://bit.ly/2wf4JVe

Amazon Ikea Jansjo USB Light - https://amzn.to/2QjKQWi

Blind Spot Power Junkie - https://bit.ly/2G1uBti

Sony a7s Dummy Battery - https://bit.ly/2CTqwW4

Canon 5D Dummy Battery - https://bit.ly/2UfT0Ec

GH4/GH5 Dummy Battery - https://bit.ly/2UlX2uY

BMPCC4K Dummy Battery - https://bit.ly/2UfT0Ec

15mm Rode Cheese Plate - https://amzn.to/2CVEyqn

🎧 Listen to our Podcast!

iTunes: https://goo.gl/hikhGF

Android: https://goo.gl/fmsp4s

📞 The Socials

Twitter: https://twitter.com/TheFilmLook

Facebook: https://www.facebook.com/TheFilmLook

Instagram: https://www.instagram.com/thefilmlook

(#filmmaking #tutorials #lighting #Ikeahack)


DISCLAIMERS:

Some of these links are affiliate links, if you purchase gear via these links The Film Look will receive a small commission, but there will be no additional cost to you. Thank you!

Are small LED panels good for filmmaking? | NiceFoto SL-120A Review

LED video lights have come a long way in the past five or so years. We’ve been looking for a replacement to our old 160 LED lights for a while. They aren’t very bright, they are made out of flimsy plastic, and they lack color accuracy.

NiceFoto SL-210A Review.jpg

Thankfully guys over at NiceFoto sent us their SL-120A just in time to try out. Let me show you some of the features of this bad boy and how we’ve been using it so far! Welcome to The Film Look.

NiceFoto SL-210A Review1.jpg

These LED video lights from NiceFoto are going for about $90. Let me show you what you get in the box.

Firstly, a bi-colour LED light panel, ranging from 3200K to 6500K in 100K steps. It has a CRI rating of 96+ so it's got a clean looking white light. You can change the power 5% at a time so it has lots of room to dial in brightness. And it emits 1300 lumens of light.

NiceFoto SL-210A Review2.jpg

It features a backlit screen on the rear so you can see your settings, buttons on the side for adjusting up and down, a button for switching between power and colour temp, and a power button which also puts the light to sleep at a click which is really handy if you want to do a quick on/off check on a monitor. Holding the power button down will switch it off altogether.

NiceFoto SL-210A Review3.jpg

It has three ports on the bottom; two for charging, a micro USB and a USB type-C, and a mini USB to plug in the provided output cable if you want to use it as a USB power bank.

NiceFoto SL-210A Review4.jpg

Unfortunately, you can’t use it as a power bank and a light at the same time. And the power bank can only charge 1000mAh. For context, my Samsung s8 has a battery of 3000mAh, so it won’t fully charge a phone...so really this feature is useless.


It’s got two ¼ 20 threads on the back and bottom to attach it to light stands or the provided ball head mount. In all honesty, the ballhead it comes with is very flimsy. This...is probably go in the bin.

NiceFoto-SL-210A-Review.gif

It's charged via USB. It takes about 4 hours to fully charge and lasts for 1.5 hours on full power.

NiceFoto SL-210A Review5.jpg

We’ve been using it mostly in dark scenes so we haven’t felt like it's running out of juice really quickly. Sadly, the charge cable provided doesn’t turn the light into a wired device. It will continue to lose power from the battery.

NiceFoto-SL-210A-Review2.gif

It does come with 2 modifiers; a diffuser plate and a grid, both of which don’t do their job well enough to use, to be honest. I would just chuck these straight in the bin.

NiceFoto SL-210A Review6.jpg

Finally, you get a neoprene pouch so you can carry your light with you on a shoot and look cool doing it. With most budget LED lights, you don’t get a carry case, so this is a good addition for the price.

NiceFoto-SL-210A-Review3.gif

So what is this light good for? Well, because its so small, it’s ideal for placing in low profile spots, such as:

Hanging from a ceiling as a hair light or top light. It only weighs 525g so you CAN hold it up with some tape!

Hanging from a ceiling as a hair light or top light. It only weighs 525g so you CAN hold it up with some tape!

NiceFoto SL-210A Review8.jpg
Using it to motivate a small practical light in a scene

Using it to motivate a small practical light in a scene

Or using it as an emergency light in your camera bag if you are trying to find something in the dark!

Or using it as an emergency light in your camera bag if you are trying to find something in the dark!

There are many different versions of a light like this on the market right now. We’ve also been testing out the Moman LED video light, which is a limited bi-colour light that’s a bit smaller.

What i’d say is, buy the light based on the size you are after. If you need something really small to use for placing in difficult spots, you might want to go for something super small.

NiceFoto SL-210A Review10.jpg

Personally, I really like the NiceFoto light. Without the useless modifiers, it does the job you’d expect. I won’t be using it as a key light any time soon, but it is a good addition to our lighting kit and we will continue to use it on YouTube stuff as well as films in the future.


📺 How to support the channel

🚀 bit.ly/artlistfilmlook - The music you heard in this episode is from Artlist. Click the link to receive 2 extra free months on when you purchase an Artlist subscription!

🎵 https://www.joelfamularo.com/colour - Use discount code "TFL" at checkout to get 20% off your LUTs purchase!

🎬 In case you missed it

Aputure Mini-20 Light Review: https://youtu.be/Pa58MhaeLlo

LEDGO G260 Light Review: https://youtu.be/_ML9dFIoKEU

AL-360RGB Light Review: https://youtu.be/iUBJc4qeI98

Pre-Lighting and Test Shooting: https://youtu.be/ExnH2KJSJoo

🎥 This episode's kit/gear/equipment:

🇺🇸 US links:

NiceFoto SL-120A: https://amzn.to/2HcSlLt

Moman LED: https://amzn.to/30alcHY

🇬🇧 UK links:

NiceFoto SL-120A: https://amzn.to/2Jfwtlc

Moman LED: https://amzn.to/2JdFN9a

🎧 Listen to our Podcast!

iTunes: https://goo.gl/hikhGF

Android: https://goo.gl/fmsp4s

📞 The Socials

Twitter: https://twitter.com/TheFilmLook

Facebook: https://www.facebook.com/TheFilmLook

Instagram: https://www.instagram.com/thefilmlook

(#filmmaking #tutorials #lighting #NiceFoto)


DISCLAIMERS:

Some of these links are affiliate links, if you purchase gear via these links The Film Look will receive a small commission, but there will be no additional cost to you. Thank you!

The Best Lights EVER!? | Aputure Mini-20 Light Review

For the last couple of years, we have been using these 160 LED lights and these can lights which use household bulbs.

We have used these lights to shoot a lot of videos and they have been a great budget option for us, but it was time to upgrade.

In this video, we are going to review the Mini-20D and Mini-20C from Aputure and why they are the best lights we have ever used.

We have the 3-light mini 20 kit, which has two mini-20Ds with a colour temperature of 7500k, a beam angle of 20 to 80 degrees as the light has a built-in fresnel.

The colour temperature of the 20d is at the higher end of the Kelvin scale and gives you a bluer light, but in the kit, Aputure does provides gels to bring the colour temperature down to 5500k and 3200k, but it’s nice to have the option of shooting at 7500k which is something we will be doing for our next short film.

Aputure-Mini-20-Review1.gif

We have a video all about white balance here if you want to check it out.

We also have one mini-20C which has a colour of 3200 kelvin to 6500 kelvin and a beam angle of 20 to 60 degrees.

Both lights can dim down to 20%, but the mini-20c only has half the brightness of the mini-20d in both flood and spot mode. By the time you have gelled the mini-20d from 7500 Kelvin down to 3200 Kelvin, you do get about the same output of brightness.

I’ve said mini-20d and mini-20c way too many times already, so I hope you are still following along.

You get everything you need to use these lights and more in the kit.

Aputure-Mini-20-Review2.gif

First, the case is rock solid and has enough room for everything. As you can see I have labelled ours up with gaff tape so we know where everything is and should go.

The three lights sit in the middle of the case and we leave the ball heads attached to the lights so we can screw them straight to the light stands.

We have many ball heads and they are all rubbish compared to the one you get in the kit, and they make adjusting the direction of the lights so much easier. I wish every light we had used them.

The light can be powered in 3 different ways. First, via a wall plug, second via a USB power supply; your output does drop by 25% if you use this method but it’s always nice to have.

And finally, via the NPF battery plate which is the option we use 90 percent of the time.

Aputure-Mini-20-Review3.gif

The NPF battery plate attaches to a crab clamp, which then clamps to the light stand. From the NPF battery plate, you plug in the d-tap cable into the light. Then the light is ready to be used.

At first, I wondered why the battery plate was separate from the light, but after using them a bunch this setup method helps to distribute the weight of the light and make it easier to operate.

Two quick points before we get into how we have been using them. First, unlike all other Aputure lights, these can not be controlled with a remote, and the lights have a fan which turns on when they get hot.

They’re super quiet and we have not had a problem with them whilst recording audio as most other sounds are louder than the fan and our microphones are never close enough, or directed towards, the light, but it’s worth knowing.

Right, now we have all of the boring spec stuff out of the way. Why do we think these are the best lights we have ever used?

We’ve been using the mini-20s for edge and hair lights, background and to motivate other light sources.

We wanted to see if we could use them as a large soft source, and we found you can when shooting in dark situations.

When you are shooting in a large bright space like when we shoot our short film The Asylum Grove, you will need lights that are a lot stronger like the Aputure 120 or 300d’s to create a large key light.

For our next short film which is called Sixty Seconds, we wanted to have two lights that beam across the room, acting as an edge light for each character, but also shine light onto the wall across the room.

Aputure-Mini-20-Review4.gif

Before we got the Mini-20s we tried using a 160 LED with black wrap around it to help focus the light. We got the look we wanted, just about, but adjusting the brightness and direction took way longer than it should.

With a mini-20d we were able to set up the light, try different looks by adjusting the flood and spot mode, along with the barn doors in seconds and with ease.

We’ve also been using these light a lot in our studio as we can flag the light from spilling off the walls since we are shooting in a small space.

The edge light on my left now is one of our can lights and to flag it from spilling everywhere we have taped black cardboard onto the side of it. It doesn’t look pretty and it has been working, but by using one of the mini-20s I can set up and adjust this light in less time than it would take to mess around with the cardboard, gaff tape, and flag.

Now with Aputure Lights

So the whole debate on, “Does it matter what you shoot with?” goes on.

We can achieve a similar look with the budget-friendly options we have used for about 5 years, and I would highly recommend those budget-friendly options when you are just starting out.

But after using the Mini-20s I wouldn’t want to go back, as these lights give you the creative freedom to adjust how the light is affecting our image with ease, which also gives you the creative freedom to try new things and see if they work.

Aputure-Mini-20-Review5.gif

Who are these lights for?

If you don’t already have a key light source such as an Aputure 120d or 300d, LED panels and ways to diffuse them. Get those first before buying the mini-20s. If you have your keys lights sorted and want to add a creative hair light or background light, the Aputure mini-20s has a great price to quality ratio coming in at around $250 per light.

We have a set of three which are around $720, but you can start off by buying one and see how it does.


In this video, we review the Apututre Mini-20d and The Aputure Mini 20c LED light kit. We have replaced our old LED panels to these as they allow you to be more creative with ease.

🎬 In case you missed it

Cheap RGB Light | AL-360RGB Review - https://youtu.be/iUBJc4qeI98

LEDGO G260 LED RGB Light Review - https://youtu.be/_ML9dFIoKEU

Aputure 300D Alternative? | NiceFoto HA-3300B Review - https://youtu.be/P-id-55KQ4Y

How to Light an Exterior Night Scene - https://youtu.be/foEV4YGXqGU

🎥 This episode's kit/gear/equipment:

🇺🇸 US links:

Aputure Mini 20 Kit - https://amzn.to/2LyVCsR

Aputure Mini 20d - https://amzn.to/2Vf05jY

Aputure Mini 20c - https://amzn.to/2YlgJQZ

Small LED Light - https://amzn.to/2YiNq1y

RGB LED - https://amzn.to/2DXXXHr

Can Light - https://amzn.to/2DZxEAH

🇬🇧 UK links:

Aputure Mini 20 Kit - https://amzn.to/2Hcdg0e

Aputure Mini 20d - https://amzn.to/2LuYabo

Aputure Mini 20c - https://amzn.to/2LJuGXg

Small LED Light - https://amzn.to/2VoODHr

RGB LED - https://amzn.to/2Lv1DGY

Can Light - https://amzn.to/2DXxnOJ

🎧 Listen to our Podcast!

iTunes: https://goo.gl/hikhGF

Android: https://goo.gl/fmsp4s

📞 The Socials

Website: http://thefilmlook.com

Twitter: https://twitter.com/TheFilmLook

Facebook: https://www.facebook.com/TheFilmLook

Instagram: https://www.instagram.com/thefilmlook

(#filmmaking #aputurelights)


DISCLAIMERS:

Some of these links are affiliate links, if you purchase gear via these links The Film Look will receive a small commission, but there will be no additional cost to you. Thank you!

35mm Vintage Lens for $35 | Takumar 35mm Lens Review

This lens is nearly 50 years old and it is one of our favourites which we use all of the time to shoot videos for this channel and also our short film.

In this video, we are going to talk about why we think the Pentax Takumar 35mm F3.5 is still one of the best lenses out there and why you should consider getting one.

Let's start off with a history lesson. The Takumar 35mm was introduced in 1959, and they made a few different version throughout the years. The one we have was manufactured from 1971 and is called the Super-Multi-Coated.

Takumar-35mm-f3.5-Lens-Review-3.gif

We shoot everything on a Sony A7s Mark 1 in 1080p. The camera is full frame, so we get all of that 35mm focal length.

The lens has an M42 mount, so we have an M42 to EOS mount that connects to our commlite adapter which is EOS to sony e-mount.

Takumar 35mm f3.5 Lens Review.jpg

You can get an adapter that goes from an M42 Mount to Sony E-mount, but we already had these adapters and they seem to work well enough.

We use the Takumar 35mm for wide establishing shots, all the way to a Medium shot and sometimes Medium Close up, but for that and our close up shots, we would switch lanes to our Helios 58mm.

Takumar 35mm f3.5 Lens Review 2.jpg

We do this because 35mm on a full frame is quite wide, and when you start to get close to your actor, the shape of there face will look little wider and start to look unnatural. This is just a personal preference and shooting a close up at 35mm can look cool, depending on the look we are going for.

Takumar-35mm-f3.5-Lens-Review-4.gif

What’s good about switching between these two focal lengths is that they are both very close to the cone of visual Attention of the human eye. Time for a science lesson.

A 35mm lens has a field of view of 64 degrees and a 58mm lens has a field of view of 41 degrees.

The human eye has a field of view of around 55 degrees, so to obtain the same field of view as the human eye you would, need a lens which has a focal length of 43mm.

This is why a 35mm and 50mm or 58mm in our case looks so natural because this is what we see in real life.

There is a lot more science that goes into it, but I failed science in school so I don’t really understand it, but hopefully, you get the point.

The Takumar isn't the fastest lens with a maximum aperture of F3.5 and a minimum aperture of F16.

Takumar-35mm-f3.5-Lens-Review-5.gif

This is not really a problem for us as we tend to shoot at F2.8 or F4 for most things. It helps to keep your shot in focus and you still get a nice shallow depth of field.

The Bokeh on this lens is nothing to write home about. You are not going to get the same swirly bokeh as you get from the Helios-44-2 58mm F2 lens.

There are way too many numbers in that in name, but we will be making a video about why we use that lens, so if you haven't already, consider subscribing.

This lens is sharp when shooting at F3.5 in the centre of the frame, but also towards the edges. As you step down the aperture to F4, 5.6, and 8 it gets even sharper from the centre of the frame to the edges.

This lens does have a vignette, it looks very natural, but if want to shoot a clean image you might not like the vignette. For us, this is one of the characters of the lens that we really like and embrace.

It does not suffer from flaring and is very controlled which I think is down to that F3.5 aputure, not like the Helios 58mm or the Jupiter 85mm lens we have. All those do is a flare, but it looks super cool.

The focus is super smooth and has about a half a turn through from infinity to it’s micro focus which just less than half a meter.

When we are shooting a short film we use a wireless follow focus and attach a gear ring to the lens.

Takumar-35mm-f3.5-Lens-Review-6.gif

This lens is very small and we have to add gaff tape to expand the diameter of the focus ring so we can attach the gear ring. We have to do this with all of our vintage lens.

The rest construction of this lens is rock solid and is made all out of metal. Like I said at the beginning of this video, this lens is nearly 50 years old and I reckon it will last another 50 years.

I might still be using it when I’m 80 years old.

If I’m going out shooting, taking photographs, or travelling, this is the first lens I pick up. One because of the focal length and the other is the size.

If you have a Canon 50mm 1.8 it is small than that, but a lot heavier because of the metal construction.

You can pick one of these lenses up from around $30 to $70 which is great if you are on a budget. Because these lenses are so old you need to look at the condition before buying one.


In this video we review the Takumar 35mm f3.5 Lens which is nearly 50 years old. Vintage lenses are a cheap, budget friendly way to get camera lens which have a high quality for both video and photography. We use the Takumar 35mm f3.5 Lens and other vintage lenses to shoot YouTube video and short films.

🚀 http://bit.ly/artlistfilmlook - Click this to receive 2 extra free months on when you purchase an Artlist subscription!

🎬 In case you missed it

Should You Buy a Vintage Lens? - https://youtu.be/OnRhaOmHaZA

Customise Your Lens Caps - https://youtu.be/zanamT1pZds

Canon 50mm F1.8 Review (6 Years On) - https://youtu.be/a2N4_zuAnhk

Upgrade Your Camera Battery + More | Power Junkie Review - https://youtu.be/UZZ-UA4r3js

🎧 Listen to our Podcast!

iTunes: https://goo.gl/hikhGF

Android: https://goo.gl/fmsp4s

📞 The Socials

Website: http://thefilmlook.com

Twitter: https://twitter.com/TheFilmLook

Facebook: https://www.facebook.com/TheFilmLook

Instagram: https://www.instagram.com/thefilmlook


DISCLAIMERS:

Some of these links are affiliate links, if you purchase gear via these links The Film Look will receive a small commission, but there will be no additional cost to you. Thank you!

How to Shoot a Moody Computer Scene at Night

Today I’ll show you how we setup a scene like this: a moody, high contrast night time scene in front of a computer screen with two subjects. I’ll show you the coverage, composition, lighting setup, and the tools and techniques we used to get each shot consistent in the scene.

Welcome to The Film Look.

We shot this short scene for an ad spot recently and you guys seemed to like the look of it, so we thought we would show you our approach to creating it, breaking down every step along the way.

Let’s re-create the scene!

Location

The first thing you need is a location. We will be using our studio.

There are two subjects in the scene, and each of them will be sitting at their computer desks for the majority with a short movement from each subject.

Computer-Screen-at-Night.gif

180

Because the computers desks are against the wall, we are limited to shooting on just one side, so the 180 degree line is drawn between each character, using the open space of the room as our shooting space.

Coverage

The script for this scene has the following beats:

  • Subject A on their computer, frustrated by a problem they can’t solve.

  • Subject B offers a suggestion, so subject A turns around and listens for a moment.

  • Subject A then turns back to their computer as subject B runs them through the solution.

  • Subject B approaches the computer and the scene ends when they execute that solution

This is bread and butter stuff. This scene can be applied to a lot of scenarios for your films, so just take what you need and adjust it to suit your movie. Next, let’s cover the shots.

First, we have a Wide Shot in Profile of the whole scene. We need enough room for the subjects to stand without cutting their heads off so we can position the camera quite low angled slightly up. This shot will establish the location and the distance between the two characters.

Next we have a Medium Close Up of Subject A, lacking nose room, fitting subject B in the space behind. This shot will put Subject A in a tight box around the frame, emphasising his frustrated situation.

This shot also doubles as a 2-shot at the end of the scene as they both look into the same screen. This shot will finish the scene, so shooting a 2-shot means we can receive both of their reactions to the success or failure at the same time without having to cut between single close ups. It also puts both characters on par with each other.

Then we have a Close Up of Subject A when they turn around to face subject B. This shot also includes a short camera pan to compliment the chair spin, giving it a overly-dramatic/comic feel.

We have Close Ups of each subject at their computers. These are your standard rule of thirds close ups with plenty of nose room in front of the characters.

And to finish it off we have an overhead angle of typing on the keyboard.

Overall, this gives us 7 different shots from 5 main angles, so the lighting setup alters only slightly between each angle, which we’re going to cover now!

Lighting

We are shooting this night time scene during the day, so we blocked out the sunlight by fixing a blackout curtain against the window.

E-_Work_Projects_The-Film-Look_YouTube_Tuesday-Show_One-off-Episodes_Computer-Screen-at-Night_Export_GIFs-and-JPEGS_MCU11.gif

We have a video about all the many different uses of blackout curtains here:

Key Light

Next is the key light on each subject. We are going for a dark and dramatic look so we lit only the short side of the subjects to add dark shadows to their faces. We used the available light from the computer monitors and loaded up a blank word doc to make it as white as possible. The white balance of the camera is set to daylight to make the light from the monitors appear more blue.

E-_Work_Projects_The-Film-Look_YouTube_Tuesday-Show_One-off-Episodes_Computer-Screen-at-Night_Export_GIFs-and-JPEGS_MCU_monitor_light.gif

With the monitors that are in shot, we pulled up a Photoshop window, which is dark grey, to prevent overexposure. We didn’t want a big block of white in the shots. This is something we couldn’t avoid in the wide but we fixed in the close ups.

Using photoshop in window.jpg

Hair Light

To add some colour contrast to the scene we added a warm hairlight using an Aputure Mini 20 set to 3200K shared by both subjects as they are facing the same direction for the majority of the scene.

Aputure.jpg

The only time we moved the hair light was for this shot here when Subject A turns around. We simply positioned it on the opposite side, behind subject A.

We closed the barn doors to create a long, sharp stream of light to cut the light from spilling onto the wall.

E-_Work_Projects_The-Film-Look_YouTube_Tuesday-Show_One-off-Episodes_Computer-Screen-at-Night_Export_GIFs-and-JPEGS_MCU_Barn_doors.gif

Background Light

To prevent the background from looking like a black void we clamped a small LED light to the lighting fixture, this one is from NiceFoto; its called the SL-120A. It was set to 3200K to match the hair light and bring up the background. The light it provides in the background also serves as physical motivation for the hairlight on the subjects, so it doesn’t seem like a random light coming from nowhere.

NiceFoto light.jpg

Exposure

To set exposure and keep it consistent between the shots, we firstly matched the exposure of the skintones for each subject. We used the false color function on our FeelWorld Master MA7 [we did a review here] to place the subject’s faces at approximately 70 IRE, which is a good exposure level for skin on pale faces. Using false colour, we were able to adjust the exposure settings until the subject’s skin showed this grey colour, representing 70 on the scale.

70 IRE.jpg

Using the same method, we could make sure the highlight from the hairlight wasn’t too hot, sitting at around 20.

E-_Work_Projects_The-Film-Look_YouTube_Tuesday-Show_One-off-Episodes_Computer-Screen-at-Night_Export_GIFs-and-JPEGS_MCU_false_color.gif

And the exposure of the background light was so low it didn’t even read on the false colour function. So we just eyeballed it, lighting it just enough to make a difference to the background.

Inserts

To light the inserts, we angled the computer monitor down towards the keyboard, and lit it from one side only, giving us some contrast and preventing it from looking completely flat.

Keyboard.jpg

Camera & Lenses

We shot this scene on the Sony a7s with a standard picture profile. We used a couple of vintage prime photo lenses; the Helios 44-2 which is a 58mm, a Takumar 35mm, as well as a Canon 24-105mm for the wide establishing shot.

24-105.jpg
Takumar.jpg
Helios.jpg

https://www.storyblocks.com/TheFilmLook - In this video, we show how to use a computer screen as a key light to help light a nighttime bedroom or studio scene. We talk through the process of setting up each shot, how we established the 180-degree line, and show all of the other lighting equipment we used to light the scene. We used an Aputure Mini 20c, Aputure Mini 20d, and also a small USB LED light from NiceFoto.

🎥 This episode's kit/gear/equipment:

🇺🇸 US links:

Aputure LS-mini Kit - https://amzn.to/2XCcujw

Aputure LS-mini 20D - https://amzn.to/2UJkjCo

NiceFoto SL-120A LED - https://amzn.to/2GxDwBK

FEELWORLD Master MA7 Monitor - https://amzn.to/2GxebIi

🇬🇧 UK links:

Aputure LS-mini Kit - https://amzn.to/2UGbIAe

Aputure LS-mini 20D - https://amzn.to/2UJkjCo

NiceFoto SL-120A LED - https://amzn.to/2IWk7gw

FEELWORLD Master MA7 Monitor - https://amzn.to/2XIGWZo

🎬 In case you missed it

5 Tips for Nailing the 180° Degree Rule! - https://youtu.be/Fs24DBoT-C8

Pre-Lighting & Test Shooting - https://youtu.be/ExnH2KJSJoo

10 Ways to use Blackout Curtains for Filmmaking - https://youtu.be/nf2Cxz8H4CU

Our YouTube Presenting Setup - https://youtu.be/hEjDyw_aimw

🎧 Listen to our Podcast!

iTunes: https://goo.gl/hikhGF

Android: https://goo.gl/fmsp4s

📞 The Socials

Website: http://thefilmlook.com

Twitter: https://twitter.com/TheFilmLook

Facebook: https://www.facebook.com/TheFilmLook

Instagram: https://www.instagram.com/thefilmlook

(#filmmaking #tutorials #lighting)


DISCLAIMERS:

Some of these links are affiliate links, if you purchase gear via these links The Film Look will receive a small commission, but there will be no additional cost to you. Thank you!

What You NEED to Know When Making Your First Short Film

When you first start making films they may look like this and you might be 10 years old and look like this.

Or you might start a little later, when you’re 21, and realise filmmaking is something you want to do.

Whatever age you start making films you’re going to have no experience, equipment, or money. None of this matters though, the only thing that does is going out there and shooting something cool with your friends.

Making-Your-First-Short-film-1-.gif

These clips are from some of the first films we made when we had no experience, very little equipment and money.

These films were the building blocks and the testing ground to see if filmmaking was for us.

Without them, we would not have the experience we do now, filmmaking equipment, or money.

Well we still don’t make a lot of money, but we know making films is the only thing that we want to do.

So your first short films are going to suck, don’t worry about it, everyone's does. They will most likely not turn out how you imagined them in your head, but again everyone feels the same way.

For example, my short film Road, which isn’t technically my first short film, but a film which I class as my first proper short film, where I had a script and a clear goal.

Only 50% of it came out how I imagined it in my head, but I am proud of that 50%.

The poster still hangs on the wall and I see it every day.

Which is a little tip, make a poster for each one of your films, print it off, and stick it on your wall. It will remind you of what you have achieved.

Making-Your-First-Short-film-2.gif

If you want to watch the short film Road, you can find it here.

You will worry if the project is going to be any good, and have self-doubt. Can you do it? What happens if you fail? Well, you will fail, but so what.

Learn from that experience, the good and the bad.

Making-Your-First-Short-film-3.gif

Workout what you could have done better and build on that, but also work out what you did right  and build on that.

With your first short films, you don’t need to worry about getting everything right, 50% of a 7-minute  film isn't bad when you are making your first short films.

Making-Your-First-Short-film-4.gif

With every film you make, you will improve and learn from the experience, and this goes for whatever you shoot. Filmmaking or filmmaker is a broad term, and making films will allow you to work out what type of filmmaker you are.

Do you want to be a traditional filmmaker? Where you work from a script, have actors, a set, props. You might find you hate camera gear and like the producing side more than the technical side.

Or you might find out that you want to be a content creator, a vlogger, filming interesting stories about your life. They can cross over but there is a difference between the two.

You might find you like one more than the other, but the only way you are going to find this out is by making something and getting it finished.

Making-Your-First-Short-film-5.gif

Having a film finished so other people can watch it is the most important part of filmmaking. Even if you think it’s not perfect, finished is better than perfect.

Once people can watch it, you can receive feedback from the audience, good and the bad.

The good helps to encourage you, and the bad helps you to learn. You will get nasty comments, but no one likes those people, so don’t worry about it.

On the topic of other people, work with others to make to help make your films. Friends, Family, whoever is interested. They don’t need to be filmmakers, but having people to work with is a lot more fun. Plus you can’t make a lightsaber fight film by yourself.

When you make your first films you will be the writer, director, DOP, 1st AC/AD, sound Recordist, costume and props department, and do every other role. This is a good thing, it will allow you to learn the basics about each role, and work out which one you like the most.

Doing everything will also mean you will have to compromise when making your film because you will have to concentrate on so many things at the same time.

When I made my final year film for University, I didn’t get anyone to read over a draft of the script, help me shoot it, or look over an edit before I screened it.

Making-Your-First-Short-film-6.gif

At the time I didn’t want people seeing what I was making because didn’t think it was going to be very good.

This was a mistake I made. Working with other people will make your films better and you’ll have a lot more fun doing it.

Even though I might not like watching this film back, it’s finished, exported, people have seen it. Finishing this film allowed me to make the next film, the film after that, and the film after that.

If you are out there and you need some advice about your film idea, script, or short film, put it in the comments below or send it to us at thefilmlook@gmail.com with the subject line of Feedback.

If you send something the feedback might not be instant, but we will get back to everyone.

If I am giving advice on making your first short films, I have to talk about filmmaking equipment. The general advice on YouTube is to not worry about filmmaking equipment.

Well I can’t give that advice because it’s easy to say that when you have a good camera, lenses and microphones, like most other people who are giving this advice.

Over the space of about 5 years we’ve built up our camera equipment, but when we had very little equipment, we wanted to get a slider, a gimble, better lights. You will learn that the right equipment can improve the quality of your film and there is nothing wrong with wanting it.

What is wrong is not going out and shooting your first short films, because you don’t have the right equipment. We shot one of our short films, Corpse on a Canon 600D, 24-105mm lens, a tripod and a 5 in 1 reflector. Equipment which we still use.

Links to Corpse can be found here.

Not having a slider, gimbal, or better lights, actually made shooting Corpse easier, because we didn’t have to worry about setting up lots of equipment and making sure it was perfect.

Not having the right equipment allows you to learn about what equipment you could have used to make your film better.

For example if you’re shooting a walk and talk but you don’t have a shoulder rig or gimbal and you just have to use your hands. The footage is going to be shaky and distracting to the audience, but don’t worry about it It’s not wrong or a mistake, put it in your film and get the film finished.

Making-Your-First-Short-film-7.gif

Now you have the experience of shooting a walk and talk you now know something like a gimbal will help stabilise your camera. You will learn that the right piece of filmmaking equipment can make your film that 10% better, so get the right equipment when and if you can.

And if you just want to, don’t get into debt for it and have a good reason to buy it first, but buy filmmaking equipment if you want. Filmmaking equipment is super cool and there is no such thing as a minimalist filmmaker, you kind of need a lot of camera bits.

So remember when you are making your first short films they are going to suck but everyone’s does. Make shooting your short films fun and get it done, work with others, and filmmaking equipment doesn’t matter but it also kind of does.

If you have just started making films or you’ve made 50, comment below with some advice you would give to other filmmakers about starting out.

And if you want to see me watch my student film for the first time in 7 years let us know, Even though I really don’t want to.


🎬 In case you missed it

Road Short Film: https://youtu.be/f2FUmXcpoDE

Corpse Short Film: https://youtu.be/leZmhn6KWvE

The Key to Editing Suspense: https://youtu.be/NQOdd4kWSAo

Get CINEMATIC by Connecting YOUR Shots!: https://youtu.be/5Tkg2hwB3n0

🎧 Listen to our Podcast!

iTunes: https://goo.gl/hikhGF

Android: https://goo.gl/fmsp4s

📞 The Socials

Website: http://thefilmlook.com

Twitter: https://twitter.com/TheFilmLook

Facebook: https://www.facebook.com/TheFilmLook

Instagram: https://www.instagram.com/thefilmlook


DISCLAIMERS:

Some of these links are affiliate links, if you purchase gear via these links The Film Look will receive a small commission, but there will be no additional cost to you. Thank you!

Do you NEED to shoot Log?

Today we’ll find out if shooting a flat image like Log is worth the extra effort or just a waste of time. Welcome to The Film Look.

For those who are new to flat picture profiles such as log, let me give you a quick rundown.

Dynamic range is the name given to the number of steps between black and white. More dynamic range means more shades of grey between black and white, which in photography equates to an image which retains more detail in the shadows and the highlights at the same time.

For a colour image, you have red, green, and blue channels, and they all have a range between black and white, so it works for colour too.

Shooting-Log.gif

A “flat image” retains more information in the highlights and shadows - the shadows are lighter and the highlights are darker, giving you an image which lacks contrast, it looks “flat”.

Episode.00_01_28_02.Still004.jpg

So if you are shooting an image with harsh sunlight and dark shadows in the same frame, a flat picture profile will help the image retain information on both ends of the spectrum, giving you more room to expose both the shadows and highlights correctly.

On most cameras, zebras will tell you when you’ve gone too far. If you are seeing stripes on your monitor, you’re capturing nothing but a block of white - no information - no detail - that is something which can’t be fixed in post.

Episode.00_01_54_03.Still007.jpg

For our short film The Asylum Groove, we shot in Cine4, which is a flat profile.

We were having trouble battling the overblown windows whilst also trying to expose for the subject, so we switched to a flat profile in order to protect the highlight information, and we brought in some large soft lights to correctly expose the subject.

Out of the camera, a flat image looks milky; it lacks contrast and colour and doesn’t look very cinematic. This is where grading comes in. Because you’ve shot the image “flat”, you need to give it some contrast in order to make it pop.

But this begs the question: “why bother shooting flat if you are just going to put contrast back into the image later on?”

Well, this is because of the extra information you get. The final image may not present ALL of that information in the end (like if it’s been heavily graded), but it's still there if you need it in post-production.

Think of it like bonus information at the back of a book: you might not even read it, but it's there if you desperately need it.

Shooting a flat picture comes with extra work and you may even need extra equipment to handle the workflow.

Log is a VERY flat picture profile which retains a hell of a lot of contrast information in the image.

Log is so flat it can become difficult to properly judge a shot because you are looking at something which looks so milky and lacking in colour.

In this instance, an external monitor will help.

Episode.00_03_16_09.Still014.jpg

With an external monitor, you can adjust the settings to simulate a graded contrast-heavy image and use it as a shooting reference while capturing flat footage on the card.

On higher-end monitors, you can install LUTs, which are fancy image filters that give you a range of cool and colourful styles. Pick something which you think suits your film and use it as a guide when capturing a flat image.

Image Courtesy of Joshua Martin Studios: https://www.youtube.com/channel/UChrlpVf3YqafEkYBtbWDN-Q

Image Courtesy of Joshua Martin Studios: https://www.youtube.com/channel/UChrlpVf3YqafEkYBtbWDN-Q

You may also find that log profiles will increase the minimum available ISO so in order to expose correctly in bright light, you need an ND filter if you want to keep a 1/50 shutter and a fairly shallow depth of field.

Shooting-Log2.gif

Alternatively, you may want to choose a different flat profile which doesn’t affect the ISO so drastically, such as Cine4 which is on the Sony a7s. It’s not as flat as Log but only pushes the minimum ISO from 100 to 200.

Episode.00_03_51_16.Still018.jpg

There are LUT packs found online which are designed for specific picture profiles. These LUTs can be applied to your LUT-capable monitor and used in post-production. They do a good job bringing your flat footage back to reality, reducing the milky colourless image, and getting it ready for applying a funky colour grade.

So if you need the dynamic range when shooting, LUTs are the best starting point if you don’t have a lot of experience with grading.

If you shoot in S-Log on the Sony, check out these Phantom LUTs by Joel Famularo.

Phantom LUTs: https://www.joelfamularo.com/colourUse discount code “TFL” for 20% off at checkout!

Phantom LUTs: https://www.joelfamularo.com/colour

Use discount code “TFL” for 20% off at checkout!

He’s got LUTs for a bunch of Alexa Looks and a Film Looks on his website, and all of the graded S-Log footage in this episode has one of his phantom LUTs applied. Joel has also supplied us with a 6-month limited discount code if you want to buy them.

But this doesn’t mean to say you NEED to shoot a flat picture profile in order to get wicked-looking footage.

Episode.00_05_26_16.Still024.jpg

You may find it easier to capture a good-looking contrasty image straight out of the camera, or your camera may not have the option at all. Shooting without a flat profile is actually what we do with our YouTube videos. We usually shoot under controlled lighting, so we so we very rarely have to battle blown out highlights or shadows.

The standard picture profile on the Sony is actually a little bit flat. It’s mostly just adding contrast and balancing the images in the sequence, which takes about 5 minutes per episode.

So, shooting flat is not a hard and fast rule - it's a technical choice. If you need the safety of capturing more dynamic range or love the look you get from colour grading flat footage, go ahead and shoot it flat.


🚀 https://artlist.io/artlist-70446/?artlist_aid=TheFilmLook_370&utm_source=affiliate_p&utm_medium=TheFilmLook_370&utm_campaign=TheFilmLook_370 - Click this to receive 2 extra free months on when you purchase an Artlist subscription!

🎵 https://www.joelfamularo.com/colour - Use discount code "TFL" at checkout to get 20% off your LUTs purchase!

🎬 In case you missed it

Joshua Martin's Channel: https://www.youtube.com/channel/UChrlpVf3YqafEkYBtbWDN-Q

Feelworld Master MA7 Review: https://youtu.be/TEjwlnNKE4U

Get the Film Look with the Aputure 300D: https://youtu.be/FWThzBtyvsA

Upgrade Your Camera Battery with the Power Junkie: https://youtu.be/UZZ-UA4r3js

🎧 Listen to our Podcast!

iTunes: https://goo.gl/hikhGF

Android: https://goo.gl/fmsp4s

📞 The Socials

Website: http://thefilmlook.com

Twitter: https://twitter.com/TheFilmLook

Facebook: https://www.facebook.com/TheFilmLook

Instagram: https://www.instagram.com/thefilmlook


DISCLAIMERS:

Some of these links are affiliate links, if you purchase gear via these links The Film Look will receive a small commission, but there will be no additional cost to you. Thank you!

Upgrade Your Camera Battery + More | Power Junkie Review

Power, power, power. You always need to make sure you have enough power and batteries whilst shooting.

Smaller cameras have smaller batteries, which don’t last very long, and you need to have lots of them when shooting all day.

NPF Batteries Vs Sony A7s Battery

This is why we use NPF batteries to power our cameras, as they give you hours of battery life. The problem is the NPF batteries don’t fit into our cameras.

Blind Spot has sent over their Power Junkie to solve this problem.

Blind-Spot-Power-Junkie-Review-2.gif

The power junkie is a battery plate that allows you to power filmmaking equipment via NPF batteries. You can do this either via the 2 USB ports or a DC output.

With the DC output, you can plug a dummy battery into the Power Junkie and power your camera.

You can get dummy batteries for all types of camera, so just find the one that fits your camera.

You can also get them from Blind Spot when you buy a Power Junkie. You can find links in the description below to all of the products.

Blind-Spot-Power-Junkie-Review-1.gif

We use a Sony A7s Mark 1, and with an NPF 750 battery, we get around 5 times more power than we would if we used a Sony A7s battery.

The USB ports work like any USB port. They can be used to power cameras like a GoPro without a dummy battery, LED lights that take USB power, and also audio recorders like the Tascam DR-70d.

What's also good about it is that you can charge your phone with the NPF batteries. A simple thing, but super useful. I’ve been able to charge my phone 3 times with a single NPF 750 battery.

When you are not powering filmmaking equipment you can also use the Power Junkie to charge the NPF batteries, via USB type C or Micro USB. Again, this is super convenient when you are charging all of your NPF batteries for the next shoot.

Blind-Spot-Power-Junkie-Review-3.gif

The Power Junkie is made out of plastic, but it is super tough and it’s not going to break easily.

There is a battery indicator on the side which shows how much power you have left.

We’ve had a battery in there for over a week, and the indicator lights have not reduced the power of the battery.

To mount the power junkie on to your camera there is a quarter 20 thread and a cold shoe attachment on the bottom. In the box, Blind Spot provides a couple of different screws to help secure it onto your cameras cold show or cage.

Blind-Spot-Power-Junkie-Review-4.gif

The base of the power junkie is rubber so you can get the screw super tight.

The way we have been mounting ours is by using this 15mm rod cheese plate we had going spare. It screws on to the bottom of the power Junkie, then you can mount it on to a 15mm rod.

Both of our cages for the Sony A7s mark 1 have a 15mm rod mount built onto the cage.

Blind-Spot-Power-Junkie-Review-5.gif

Once you have mounted it onto your camera, you can plug in your dummy battery and feed the wire to the power junkie. We taped it up so it doesn’t move around.

Then you are ready to use it to shoot.

We did create a video a while back about our DIY external battery setup, which has been working, but was velcroed on to a cheese plate. The DIY battery plate was only around $10, with the dummy costing around about $15.

So the DIY solution was cheaper, but sometimes the power drops and you have to wiggle the battery and wires to get it working again.

Now I have used the Power Junkie, I wouldn’t recommend building your own DIY version. The Power Junkie can do a lot more than the DIY version can and just works straight out of the box.

Blind-Spot-Power-Junkie-Review-6.gif

With the power junkie, you don’t need to rely on lots of different power sources. You can invest in buying lots of NPF batteries for all your power needs when you have the Power Junkie.


DISCLAIMERS:

Some of these links are affiliate links, if you purchase gear via these links The Film Look will receive a small commission, but there will be no additional cost to you. Thank you!

1 Tip for Syncing Your Footsteps FASTER

Syncing footsteps can be a pain. Let’s be honest, they aren’t the most exciting part of sound editing, but you can’t deny how vital they are to an immerse film.

Let me show you a quick trick which will help get YOUR footstep sounds in the right place much quicker. Welcome to The Film Look.

I’m going to be using Adobe Audition today but this trick can be achieved in any sound editing application which uses markers.

Foosteps Sync.jpg

I’ve imported a shot from one of our films BACKSTAGE, and I want to begin by adding some footsteps because the production audio is noisy and unclear, have a listen…

I’ve also imported some footstep sound effects from our FOOTSTEP SOUND PACK. Here I have “Sneakers on Pavement” which should work well with our character walking in an exterior car park.

The shot I’m working with today actually has decent scratch audio to aid syncing footsteps. But let's pretend we don’t have that luxury. I’ll go ahead and delete it. What do we do now?

This is where markers can come in handy.

Foosteps Sync1.jpg

In audition you can place a marker on the timeline using the M key. We can use markers as a guide for cutting and placing in our footsteps.

Foosteps-Sync.gif

If you notice someone walking or running, they tend to keep a steady pace if they are moving for more than a second or two. We can study their pace, find their rhythm, and literally tap out the markers along with their stride.

Foosteps-Sync1.gif

I like to tap out the footsteps on my desk while watching the clip. I’ll do this a few times until I can roughly predict the rhythm. Then, once I’m ready, I hit the M key and add markers to the pace of the character on screen.

Foosteps-Sync2.gif

Once we have some markers on the timeline, we can zoom in and do some fine tuning. Most of the markers should be in-sync, but we can always go frame by frame and adjust any markers which are obviously too early or too late.

Foosteps-Sync3.gif

A footstep sound effect is made up of two major parts - attack and decay. The attack is the actual step sound itself and the decay is the tail end which fades out.

With all the markers set to the rhythm of the footsteps, we can grab our footstep sounds, trim them down, and place the attack right on the marker.

Trim the decay of each sound before it hits the next marker and then go ahead and place in the next footstep sound. Do this for all of your footstep sounds on each marker.

As you place in the sounds, make sure to extend the left side of the sound effect, known as the pre-attack, and cross-fade it into the decay of the previous sound. This will smooth over each sound effect and prevent any hard stops.

Next is fine tuning the sync; this is done mostly by your eyes and your ears. We have placed in our ground work using the markers, so we can delete these as they are no longer needed. Now it's just a case of watching the shot, listening to the footsteps, and looking out for any late or early steps.

This will take some tinkering, but if you do happen to have a scratch track from the video file with the original production audio, you can always listen to the take and try to match them.

If you can see the character’s feet, find the moment they make contact with the ground, and try to match each footstep sound to the image.

But, I find this doesn’t always work. Sometimes it’s better to just watch the edit and follow along. You’ll probably notice when a footstep is too early or too late.

Foosteps-Sync4.gif

You also might notice some footstep sounds are too strong or weak sounding for the step in the image. This is a simple fix. Just look for a step which has a stronger or weaker attack sound and replace the ill-fitting step.

Obviously right now the footsteps themselves don’t sound very realistic. They are very tappy. You can add a bit more grit to a footstep by adding a very subtle shuffle sound underneath.

Our FOOTSTEP SOUND PACK includes shuffle sounds on every surface using most footwear. Links in the description.

Foosteps Sync2.jpg

Here you can see I have essentially layered the shuffles under the footsteps. This will stop the footsteps from sounding so tippy tappy and will give us a sense of rubble or grit on the ground in the car park.

To quickly finish off the scene here, I have added a touch of reverb to the footsteps, added some street noise, a car door sound, and mixed it together.

Let me know if you found this video helpful in the comments below. I will be producing more episodes like this one in the future, so get subscribed if you haven’t already. And remember to achieve it one shot at a time.


🚀 https://www.thefilmlook.com/store - Step up your sound game with our FOOTSTEPS SOUND PACK. It features 200+ sounds, 9 surfaces, and 6 types of footwear, perfect for your next film project.

🎬 In case you missed it

How to Build a DIY Foley Pit: https://youtu.be/zO2hx7iToNY

$600 Mic vs $60 Mic: https://youtu.be/2VK6lYkK2AM

How to Mix Sound for a Short Film: https://youtu.be/7x5SnoftgUw

How to Record BETTER Footstep Sound Effects: https://youtu.be/vQ8bnF-OWSA

🎧 Listen to our Podcast!

iTunes: https://goo.gl/hikhGF

Android: https://goo.gl/fmsp4s

📞 The Socials

Website: http://thefilmlook.com

Twitter: https://twitter.com/TheFilmLook

Facebook: https://www.facebook.com/TheFilmLook

Instagram: https://www.instagram.com/thefilmlook


DISCLAIMERS:

Some of these links are affiliate links, if you purchase gear via these links The Film Look will receive a small commission, but there will be no additional cost to you. Thank you!

5 Tips to STEP UP your Foley Game!

Foley is the dark horse of filmmaking. It turns your film from “pretty good” to “polished”.

After creating foley for the last 5 films on this channel, I’ve learned a few tricks which will help YOU record some great foley for your films. Welcome to The Film Look.

DIY-Foley-Pit2.gif

Number one: footsteps are never alone.

If you’ve done any foley for your film, I imagine you’ve recorded or edited some footstep sounds. Footsteps are the most obvious run-of-the-mill sound effects to add into your scene, and usually I will tackle these first, but they always sound better when they are layered with other foley.

What I like to do is breakdown the possible sound elements associated with each character in the scene. Let's take this example called “Lost in the Forest” which we filmed for this foley series!

The character produces sounds from his footsteps, his coat, his backpack, and his map. These are all moving as he walks and they will produce their own sound effects, so if we record each of them and layer them into the scene, it turns it from this into this.

Recording-Foosteps2.gif

Which brings me onto Number two: how to record clothing foley!

When I first started recording foley, I used to wear the clothing and try to move around and mimic the character on screen. This doesn’t produce a clear enough sound to layer in with everything else. I found you need to exaggerate the noise to be effective.

5-Tips-to-STEP-UP-your-Foley-Game!1.gif

So take off the coat and bunch it up into a loose ball in front of the mic. Instead of mimicking the actual steps, just mimic the swing and movement of the character.

5-Tips-to-STEP-UP-your-Foley-Game!.gif

The clothing will produce some unique sounds depending on how you handle it, so experiment and try to find something which fits the scene.

Number three: accurate handling!

The next thing we need to record is the paper map. A prop like this can produce a million and one different sounds just by the way it's being handled. A map being crushed sounds very different to a map being folded, so this is where accurate mimicking comes in!

5-Tips-to-STEP-UP-your-Foley-Game!3.gif

If the character has the map out on display and is climbing down the hill, mimic that movement as close as you can by opening up the map and lightly bounce it up and down. If the character holds the map out and swings it, do the same thing. Don’t record generic foley; it never sounds good! Get particular and mimic the actions as accurately as possible.

5-Tips-to-STEP-UP-your-Foley-Game!4.gif

Number four: beefing up the props!

With something like a backpack, it would be easy enough to grab an empty rucksack and shake it around in time with the character on screen. This may sound okay, but it doesn’t sound at all interesting.

5-Tips-to-STEP-UP-your-Foley-Game!5.gif

Instead, you can beef up the sound of the prop by adding weight. This will help create a great sound when it swings around because of things like velocity and inertia.

That’s right - science is audible!

5-Tips-to-STEP-UP-your-Foley-Game!6.gif

Then, add some items inside it. For rucksack sounds, I like to take a set off mess tins and place them at the top of the pack. They will rattle around and add some extra dynamic kinetic audio.

And if the straps are producing an annoying flappy sound when you record, just tuck them in! Sound design is your choice, so if you find the sound can be annoying, chances are the audience will find it annoying too.

5-Tips-to-STEP-UP-your-Foley-Game!7.gif

Number five: environmental interaction

If your character interacts with the environment, nine times out of ten it will produce a sound, so don’t ignore these!

5-Tips-to-STEP-UP-your-Foley-Game!8.gif

In the scene “Lost in the forest” you can clearly see our character causing a bunch of dry leaves to roll down the hill as he steps down. Yes, we have footstep sounds, but the sound of leaves falling down a hill will produce something very different. So grab some dead leaves, dry them out, and record brushing and moving them with your hand. This subtle sound effects will really help sell the effect that the audio is real.

Number six (bonus): Don’t forget your atmos!

The final element to add into a scene to help ground in reality and trick the audience into believing these sounds were recorded on the day is the ambient noise from the location. If it’s inside you can use room tone, and if it’s outside, you’ll need some atmos.

5-Tips-to-STEP-UP-your-Foley-Game!9.gif

For the “Lost in the Forest” scene we recorded atmos at the location but it sounded horrible. That horrible droning wind is actually the sound of the cars on the motorway over a mile away. So instead, I found a track from https://freesound.org/people/bajko/

Adding atmos into the scene will help smooth over the otherwise moments of silence between sound effects.


🚀 https://www.thefilmlook.com/store - Step up your sound game with our FOOTSTEPS SOUND PACK. It features 200+ sounds, 9 surfaces, and 6 types of footwear, perfect for your next film project.

🎬 In case you missed it

How to Build a DIY Foley Pit: https://youtu.be/zO2hx7iToNY

$600 Mic vs $60 Mic: https://youtu.be/2VK6lYkK2AM

How to Mix Sound for a Short Film: https://youtu.be/7x5SnoftgUw

How to Record BETTER Footstep Sound Effects: https://youtu.be/vQ8bnF-OWSA

🎥 This episode's kit/gear/equipment:

US links:

The Sound Effects Bible: https://amzn.to/2sSWEUy

UK links:

The Sound Effects Bible: https://amzn.to/2DD9ZXc


DISCLAIMERS:

Some of these links are affiliate links, if you purchase gear via these links The Film Look will receive a small commission, but there will be no additional cost to you. Thank you!

How to Record BETTER Footstep Sound Effects

Last week we showed YOU how to setup a DIY Foley Pit for recording footsteps at home or in a small studio. This week we are showing you how to record them. Everything from microphone placement to mimicking the image for a perfect sync.

I suppose you can call this episode a step by step guide. Let’s record some footsteps! Welcome to The Film Look.

This episode was inspired by The Sound Effects Bible by Ric Viers. We aren’t being paid to talk about the book, we just think its a great resource for those who want to step up up their sound game.

US link: The Sound Effects Bible: https://amzn.to/2sSWEUyUK link: The Sound Effects Bible: https://amzn.to/2DD9ZXc

US link: The Sound Effects Bible: https://amzn.to/2sSWEUy

UK link: The Sound Effects Bible: https://amzn.to/2DD9ZXc

So before we hit record there are a few things we need to do in order to prepare for recording footstep Foley.

The first thing we need to do is identify the sound source and its properties by looking at the edit.

Recording-Foosteps2.gif

The scene we are referencing is this short sequence we filmed in a forest. By studying the scene, you can see that we need the following:

  • Packed earth for the foundation of the pit

  • Crunchy dried leaves and twigs to cover the packed earth

  • And a pair of walking boots to stomp in

To simulate the packed earth, we bought a bag of top soil and patted it down until it was nice and compact. Then we grabbed a bunch of dried leaves from the location and sprinkled them on top. Then we matched the footwear, selecting a pair of walking boots to record in.

Recording-Foosteps3.gif

Now we’ve built up the surface and chosen matching footwear, we can think about sound-proofing our clothing so we only record the sound of footsteps.

Recording-Foosteps4.gif

Quiet clothing is a must when you record foley. Sweatpants are the preferred bottoms, but you can also wear jeans as long as they don’t rub or make noise when you move around. As for your top; cotton t-shirts, wool sweaters, but nothing too loose as it might flap around and make a noise.

Recording-Foosteps5.gif

Avoid anything made of vinyl, polyester, or nylon, as they tend to make crispy, rubbing sounds when you move. Strictly no jewellery, and if you have any zips or laces, get them taped down!

Recording-Foosteps6.gif

And if your trousers rub against the ankle on a pair of boots, tuck them in or roll them up to minimise unwanted rubbing noise.

Recording-Foosteps7.gif

Also, don’t turn up to a foley session hungry (or too full). Your stomach grumbles will be picked up by the microphone, and if you’ve eaten too much, you might...you know...fart.

Recording-Foosteps8.gif

Next we have the position of the microphone. This is an important one, because if its too far away you may lose a lot of detail in the recording and pick up the acoustics of the room. The same goes if the microphone is too close; you risk kicking the mic during a recording, and you may end up capturing more toe than heel or even excess bass during a footstep impact.

The ideal position we’ve found for the microphone is in front of your feet, in the middle between each foot, around 1-2 feet away and 1-2 feet off the floor. This will give you a nice loud recording of the relatively quiet footsteps.

How you mount the microphone is also important. If you are recording in a bedroom or small studio like we are, it’s likely you are standing on some form of wooden floorboard. Because floorboards are a little bit bouncy and hollow underneath, they can produce rumble.

We have the microphone on a mic stand supported with a shock mount. This will greatly reduce the rumble effect and give you a cleaner recording.

Recording-Foosteps9.gif

In the last episode we also spoke about padding under the foley pit. We use a stack of EVA foam jigsaw panels to pad out the floor underneath the tray. They are firm but bouncy so they soften a hard step just enough to prevent unwanted shock, rumble, and noise.

Next up we have levels. Get your microphone in position and try walking on the spot. Set your levels so each step hits around -6dB, also known as recording warm. -6dB will give you a little bit of wiggle room in case a step is louder than usual. It’s loud, it’s clean, and it’s safe.

Recording-Foosteps10.gif

Once you are ready to record, make a note of the following:

  • Your footwear

  • The surface

  • And the project name

When you hit record, you will want to very clearly state each of these. For example, “Walking boots on packed earth with dry leaves. Footstep Foley for project: LOST IN THE FOREST”.

Like using a clapperboard for syncing production audio to the film, this is called “Slating the clip”.

Recording-Foosteps11.gif

With video, you have the use of thumbnails and can jog through a clip to see what it is. With audio, you don’t have the luxury of a thumbnail and scanning doesn’t really work, so instead you must preface each clip with clearly state information so you can organise your clips with ease.

After listening to a hundred recordings, you will be happy you didn’t mumble or waste time at the start of the clip.

Now it's time to hit record and mimic the image. For project specific foley, you will want to set up a copy of the edit playing back in front of you. We like to have the edit looping on a laptop.

Recording-Foosteps12.gif

You can begin the foley session by mimicking the entire scene, I call these “Run-Throughs”. Run through’s will get you warmed up, it will help you practice mimicking the pace of the subject and match the strength of the impact.

With headphones on, you will also be able to hear if you need to adjust the way you step to create the right sound.

I tend to record 5 takes of run through’s for each character in each scene on every surface, trying my best to match their footsteps.

Next are “singles”. Now you’ve warmed up, it’s time to record a lot more footsteps. Only this time you won’t be mimicking the subject in the scene.

Recording singles is easy. You take a single step then wait for the sound to decay into near silence. Then you take another step. And another...and another hundred until you are completely bored of the sound.

Recording-Foosteps13.gif

Then change how you step. Step harder, step lighter, step with a slight shuffle, go heel to toe, stomp, jump! With each version of these footsteps, try to record at least 60 seconds before changing your stepping method, and try to separate the sound out so you can cut around the silence later on.

By this time, you will have burned off your dinner, so you won’t regret the meal you wolfed down in order to stop your stomach from grumbling!

You will notice that the way you step will drastically change the way a step sounds. When you start mixing, you may notice a footstep doesn’t sound quite right in the scene. Maybe it’s too hard or too quick or needs a shuffle.

This is why you record a ton of singles. You can think of these like footstep b-roll: emergency footsteps which can replace anomalies in the mix, and can be added to your sound library for future projects.

There are three main parts which will determine the way a footstep sounds: the surface you stand on, the type of footwear you choose, and the way you perform a step. Everything else is formatting, etiquette, and quality assurance.


🚀 https://www.thefilmlook.com/store - Step up your sound game with our FOOTSTEPS SOUND PACK. It features 200+ sounds, 9 surfaces, and 6 types of footwear, perfect for your next film project.

🎬 In case you missed it

How to Build a DIY Foley Pit: https://youtu.be/zO2hx7iToNY

$600 Mic vs $60 Mic: https://youtu.be/2VK6lYkK2AM

How to Mix Sound for a Short Film: https://youtu.be/7x5SnoftgUw

🎥 This episode's kit/gear/equipment:

US links:

The Sound Effects Bible: https://amzn.to/2sSWEUy

UK links:

The Sound Effects Bible: https://amzn.to/2DD9ZXc


DISCLAIMERS:

Some of these links are affiliate links, if you purchase gear via these links The Film Look will receive a small commission, but there will be no additional cost to you. Thank you!

How to Build a DIY Foley Pit

Today we’ll show YOU our DIY foley pit for recording footstep sound effects. This is something that requires no big tools or heavy building experience, all the parts can be purchased online or found around the house, and can be assembled in less than 30 minutes.

DIY-Foley-Pit.gif

Let’s setup a DIY foley pit! Welcome to the film look.

With every film project we’ve made, we’ve always recorded footsteps on location. After the shooting has wrapped, we head back to the location on another day with a copy of the edit, setup the microphone, watch the scene, and mimic the movement of the actors.

DIY-Foley-Pit2.gif

But this doesn’t always work. A noisy environment isn’t the ideal location for recording footsteps, and if your shooting location is busy, loud, or now inaccessible, this is where a foley recording studio setup comes in.

So we thought it was time to build a foley pit!

Because we have such a small studio, we needed the foley pit to be cheap, easy to clean, and quick to assemble and disassemble. And because we know a lot of you guys are young filmmakers, we wanted to make something which didn’t require any heavy tools or building experience so you can set one up at home too.

DIY-Foley-Pit3.gif

The first thing you need is a quiet room. A clothing closet, a bedroom, or a small room with a carpeted floor will work best. Carpets are important because they absorb sound, and we want the footstep recordings to sound as dry as possible; we don’t want any excess echo or reverb in the audio because we may want to add some in to match the scene later.

You can find out which room will work best by standing in the centre and clapping. You’ll notice a small room with carpets and furniture will absorb more sound than a big staircase exit.

We will be using our studio which thankfully has carpeted floors.

DIY-Foley-Pit4.gif

There are a few free mobile apps which help you get an idea of how much echo a room produces. I have this one downloaded called RT by AppAcoustic. You simply place the phone on the ground, hit start, give a strong clap, wait a moment, then hit stop. The readings aren’t 100% accurate but are certainly a starting point.

So try out a bunch of rooms in your house and see which one will give you the best results! Just look for room acoustic apps on your app store.

Next thing we can do is acoustically treat the room. This sounds fancy, but it doesn’t have to be. The first thing you can do is switch off any electronic devices. TVs, computers, speakers; basically anything which might hum or buzz. Then find a load of curtains, duvets, blankets, towels, even couch cushions, and find a way to hang them up in the room, covering your walls, doors, and windows.

DIY-Foley-Pit5.gif

We have a bunch of black out curtains which did the job, so we made a blanket fort with the help of some C-stands and some clips.

Basically, anything with a flat surface will reflect sound, and that’s what we want to avoid, so make sure you cover any flat smooth surface with some rugs, blankets, or even a pile of clothes.

DIY-Foley-Pit6.gif

In order to see what I’m about to do next, I’m gonna take the blanket fort back down for the rest of the episode. Just try to imagine it's still up.

DIY-Foley-Pit7.gif

So, the pit itself. We can start with a gardening tray. This one is 60x60cm so its large enough for footsteps, it has a short 7cm lip which means it won’t cause any reverb (preventing the sound you’d get if you stuck your head in a bucket), but is high enough to contain messy materials, and it is made out of tough plastic so it's waterproof, lightweight, and easy to clean!

If you are recording upstairs on wooden floorboards like we are, you will want to cushion underneath the tray to prevent any excess rumble during recording. We picked up a pack of these EVA foam jigsaw panels to pad out the floor underneath the tray. They are firm but bouncy so they soften a hard step just enough to prevent a Godzilla-sounding footstep.

DIY-Foley-Pit8.gif

We recorded some samples based on a scene we shot in a forest. This is how it sounds.

A lot of ideas for this video came from The Sound Effects Bible by Ric Viers. We aren’t being paid to talk about the book, but think its a wicked resource for budding sound artists who want to set up their game. There’s an affiliate link in the description if you want to buy the book and help out the channel.

DIY-Foley-Pit9.gif

A setup like this can also be used for recording other foley work such as clothing movement and prop handling, which we will be talking about next week! So if you are looking for more sound advice, hit subscribe, hit the bell, and remember to achieve it one shot at a time.


🚀 https://www.thefilmlook.com/store - Step up your sound game with our FOOTSTEPS SOUND PACK. It features 200+ sounds, 9 surfaces, and 6 types of footwear, perfect for your next film project.

🎥 This episode's kit/gear/equipment:

US links

Gardening Tray: https://amzn.to/2SXPSIt

EVA Foam Mats: https://amzn.to/2MALywk

The Sound Effects Bible: https://amzn.to/2sSWEUy

UK links

Gardening Tray: https://amzn.to/2QT0eY1

EVA Foam Mats: https://amzn.to/2Sa9pbr

The Sound Effects Bible: https://amzn.to/2DD9ZXc


DISCLAIMERS:

Some of these links are affiliate links, if you purchase gear via these links The Film Look will receive a small commission, but there will be no additional cost to you. Thank you!

FOOTSTEPS SOUND PACK is here!

Need footsteps for your next film project? Look no further!

The Film Look FOOTSTEP SOUND PACK features over 200 sounds, on 9 surfaces, in 6 types of footwear, giving you a plethora of available sound types to choose from when mixing the sound for your film.

All sound effects have been recorded in a low noise environment giving you a clean, loud sound for every single footstep. They have also been recorded as dry as possible, meaning there is no reverb baked into the sound so you can add reverb in the mix to replicate the scene on screen perfectly.

These sounds have been exclusively recorded as “singles”, meaning each step is completely individual so you can cut in and match up the steps without having to worry about creating more space between the sounds.

Every single set of footwear of every single surface has multiple performance types: light, standard, heavy, heel-to-toe, shuffles, and jumps. These have been created so you can match the performance of the actors on screen.

Is your character walking? Standard is all you will need. Are they running? Maybe go for heavy to match the high impact!

As well as creating this pack, we have also create a short series of videos showing you how we setup and recorded the footsteps, so if you want to create your own library of footsteps, go ahead!

The first video in the series shows you how to setup a DIY Foley Pit: a small pit for dumping your surface materials so you can record in messy stuff in a clean way!


1 Tip for Filming a Genuine Performance

Faking it is what filmmaking is all about, but one of the things you can not fake is your actor being out of breath.

This might seem like a strange thing to talk about but stick with me.

Welcome to The Film Look.

If you have a scene or a moment in your film where your actor needs to look and sound out of breath, flustered, or red-faced, you need to get your actors up and moving around before the shot so you can capture something which is genuine.

Keep-Your-Actors-Moving-1.gif

We learnt this from our actor friend Liam R. Angus, but it wasn’t until after the shoot and looking at the behind the scenes footage.

In our short film Keep the Change, Liam's character Stu had to deliver a pizza, but his car had just broken down. If he doesn’t get it there on time, he is going to lose his job, so he decides to run there.

He gets there in time and goes into the building to deliver the pizza.

You-Can't-fake-out-of-breath-2.gif

Let’s pause the film there.

If you haven't seen Keep the Change, I’ve just spoiled it but you can find it right here if you want to watch it.

Inbetween these two shots where he runs into the frame, and this shot where he approaches the door and enters the building, there was about 15 to 20 minutes of setup time.

This meant our actor was no longer out of breath, therefore breaking the continuity between the two shots.

This was not actually the case because of what our actor Liam did. Right as we were setting up the shot, messing around with the camera and lights. He was running around, keeping himself active, so he could run straight into the scene out of breath.

You-Can't-fake-out-of-breath3.gif

As I said, I did not realise he was doing this because I was so concentrated on setting up the shot, so without him and this BTS footage I wouldn’t have learnt this lesson.

And this is still one of my favourite Film Look behind the scenes shots.

This goes for if you are recording foley sounds as well. To sound realistic, before you start to record those out of breath sounds, do 20-star jumps, or 50 if you’re in better shape.

You-Can't-fake-out-of-breath4.gif

This will sound better than if you try and fake it. Faking it requires you to think about what it should sound like, when you could easily just record the real thing.

This might seem simple or obvious, but we feel it’s another thing worth knowing. It’s one of those things you could easily forget about when shooting because of all of the other things that you have to do.

So if you need your actors to be out of breath, ask them to jog around.

Let us know in the comments below of something of the simple but effective things you have learnt whilst shooting a film. I’m going to sit down now after all of those star jumps, but remember to achieve it one shot at a time.


DISCLAIMERS:

Some of these links are affiliate links, if you purchase gear via these links The Film Look will receive a small commission, but there will be no additional cost to you. Thank you!