Syncing footsteps can be a pain. Let’s be honest, they aren’t the most exciting part of sound editing, but you can’t deny how vital they are to an immerse film.
Let me show you a quick trick which will help get YOUR footstep sounds in the right place much quicker. Welcome to The Film Look.
I’m going to be using Adobe Audition today but this trick can be achieved in any sound editing application which uses markers.
I’ve imported a shot from one of our films BACKSTAGE, and I want to begin by adding some footsteps because the production audio is noisy and unclear, have a listen…
I’ve also imported some footstep sound effects from our FOOTSTEP SOUND PACK. Here I have “Sneakers on Pavement” which should work well with our character walking in an exterior car park.
The shot I’m working with today actually has decent scratch audio to aid syncing footsteps. But let's pretend we don’t have that luxury. I’ll go ahead and delete it. What do we do now?
This is where markers can come in handy.
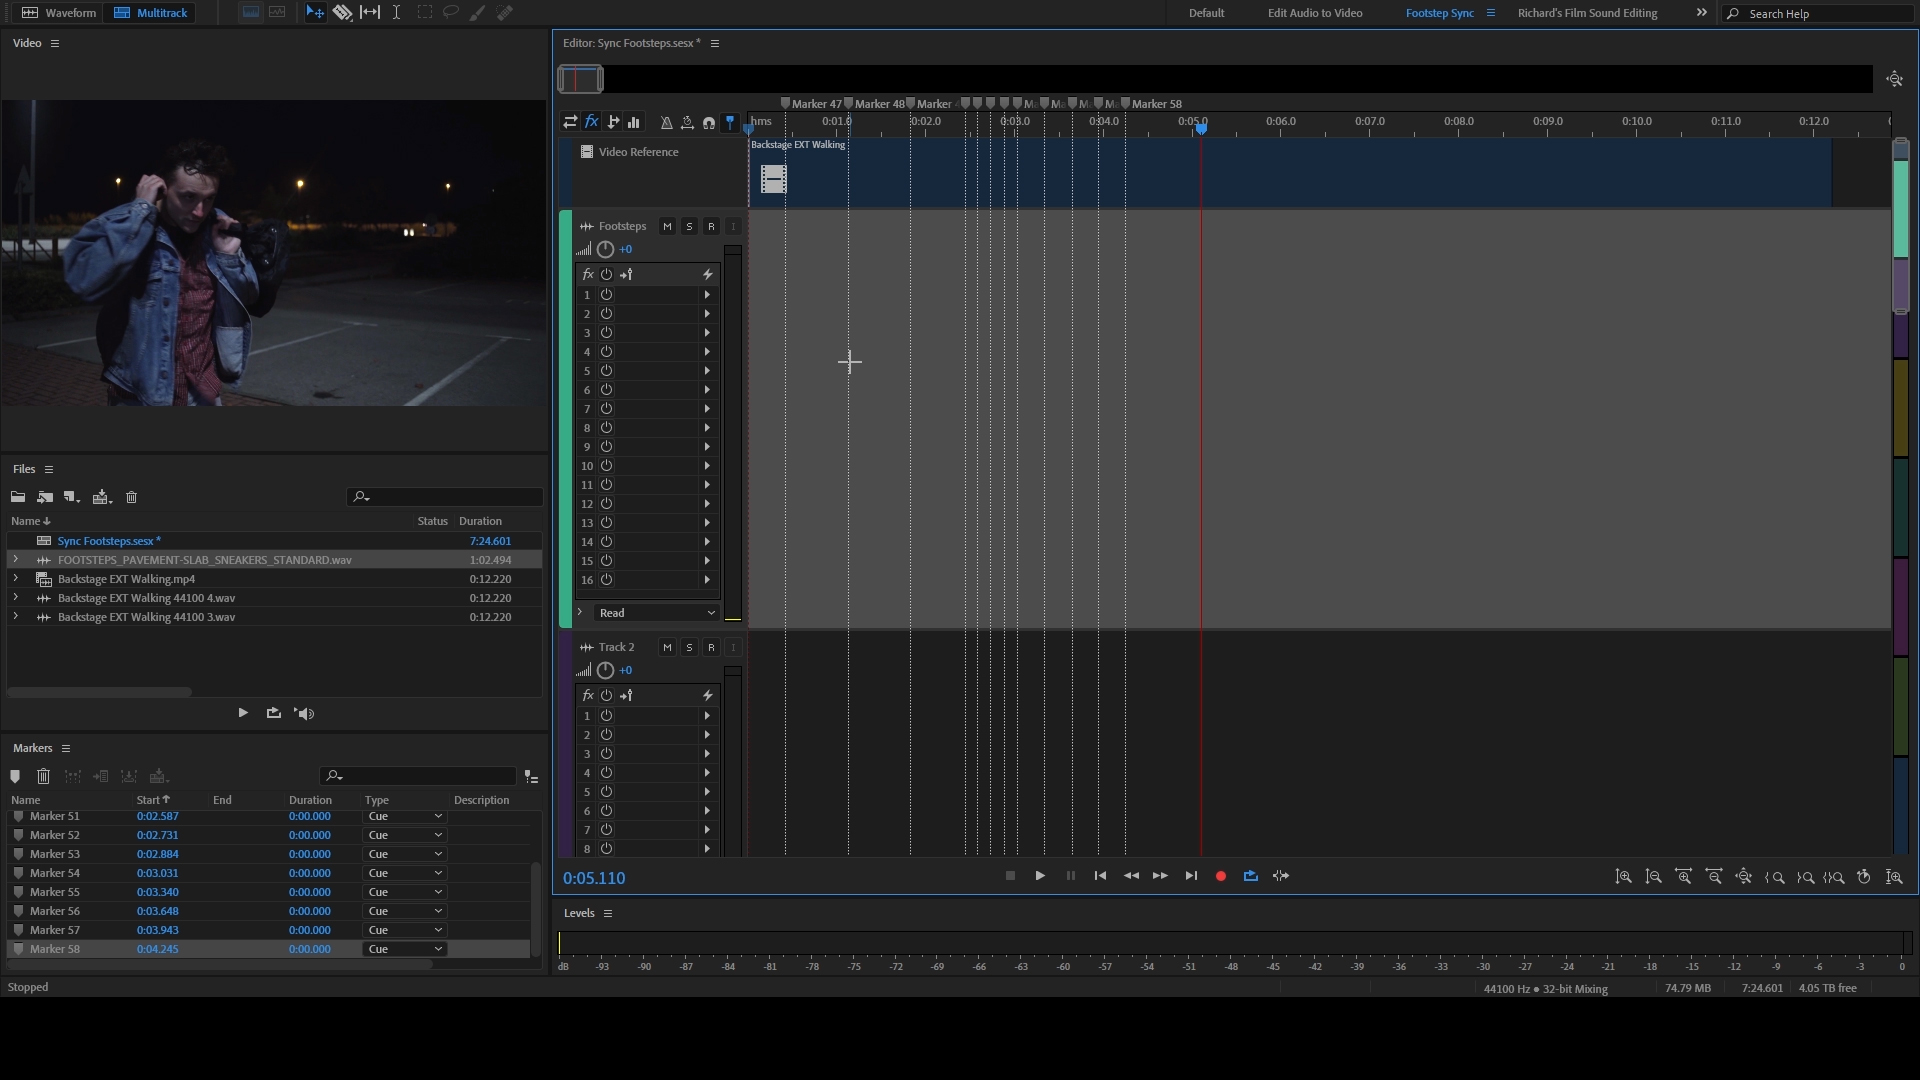
In audition you can place a marker on the timeline using the M key. We can use markers as a guide for cutting and placing in our footsteps.
If you notice someone walking or running, they tend to keep a steady pace if they are moving for more than a second or two. We can study their pace, find their rhythm, and literally tap out the markers along with their stride.
I like to tap out the footsteps on my desk while watching the clip. I’ll do this a few times until I can roughly predict the rhythm. Then, once I’m ready, I hit the M key and add markers to the pace of the character on screen.
Once we have some markers on the timeline, we can zoom in and do some fine tuning. Most of the markers should be in-sync, but we can always go frame by frame and adjust any markers which are obviously too early or too late.
A footstep sound effect is made up of two major parts - attack and decay. The attack is the actual step sound itself and the decay is the tail end which fades out.
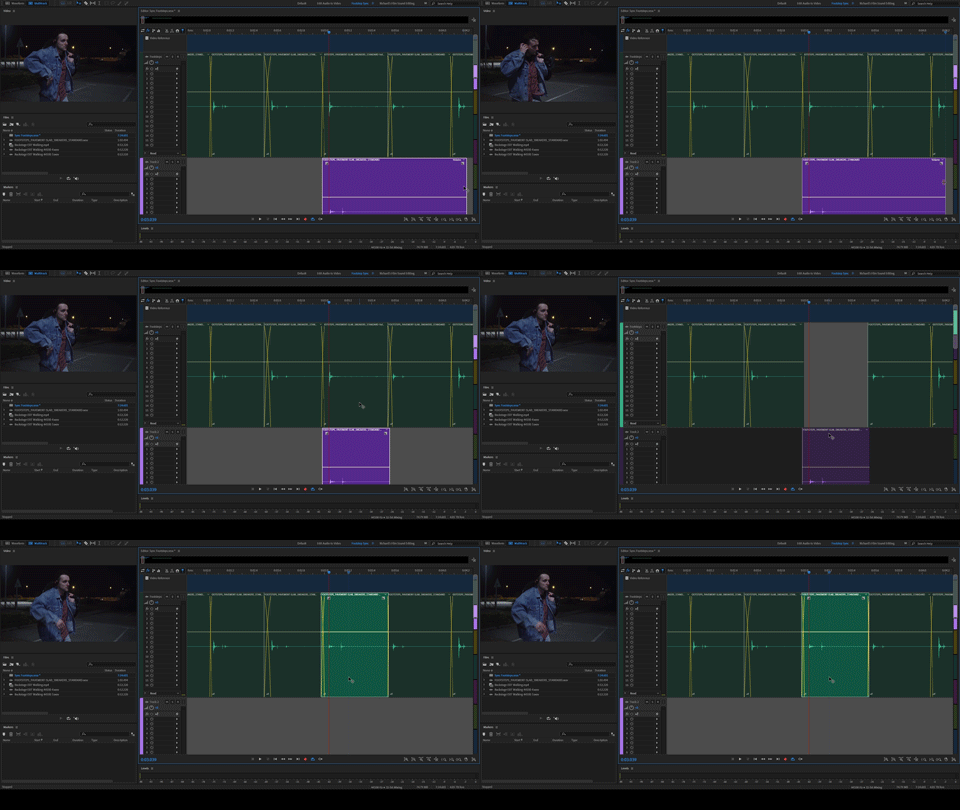
With all the markers set to the rhythm of the footsteps, we can grab our footstep sounds, trim them down, and place the attack right on the marker.
Trim the decay of each sound before it hits the next marker and then go ahead and place in the next footstep sound. Do this for all of your footstep sounds on each marker.
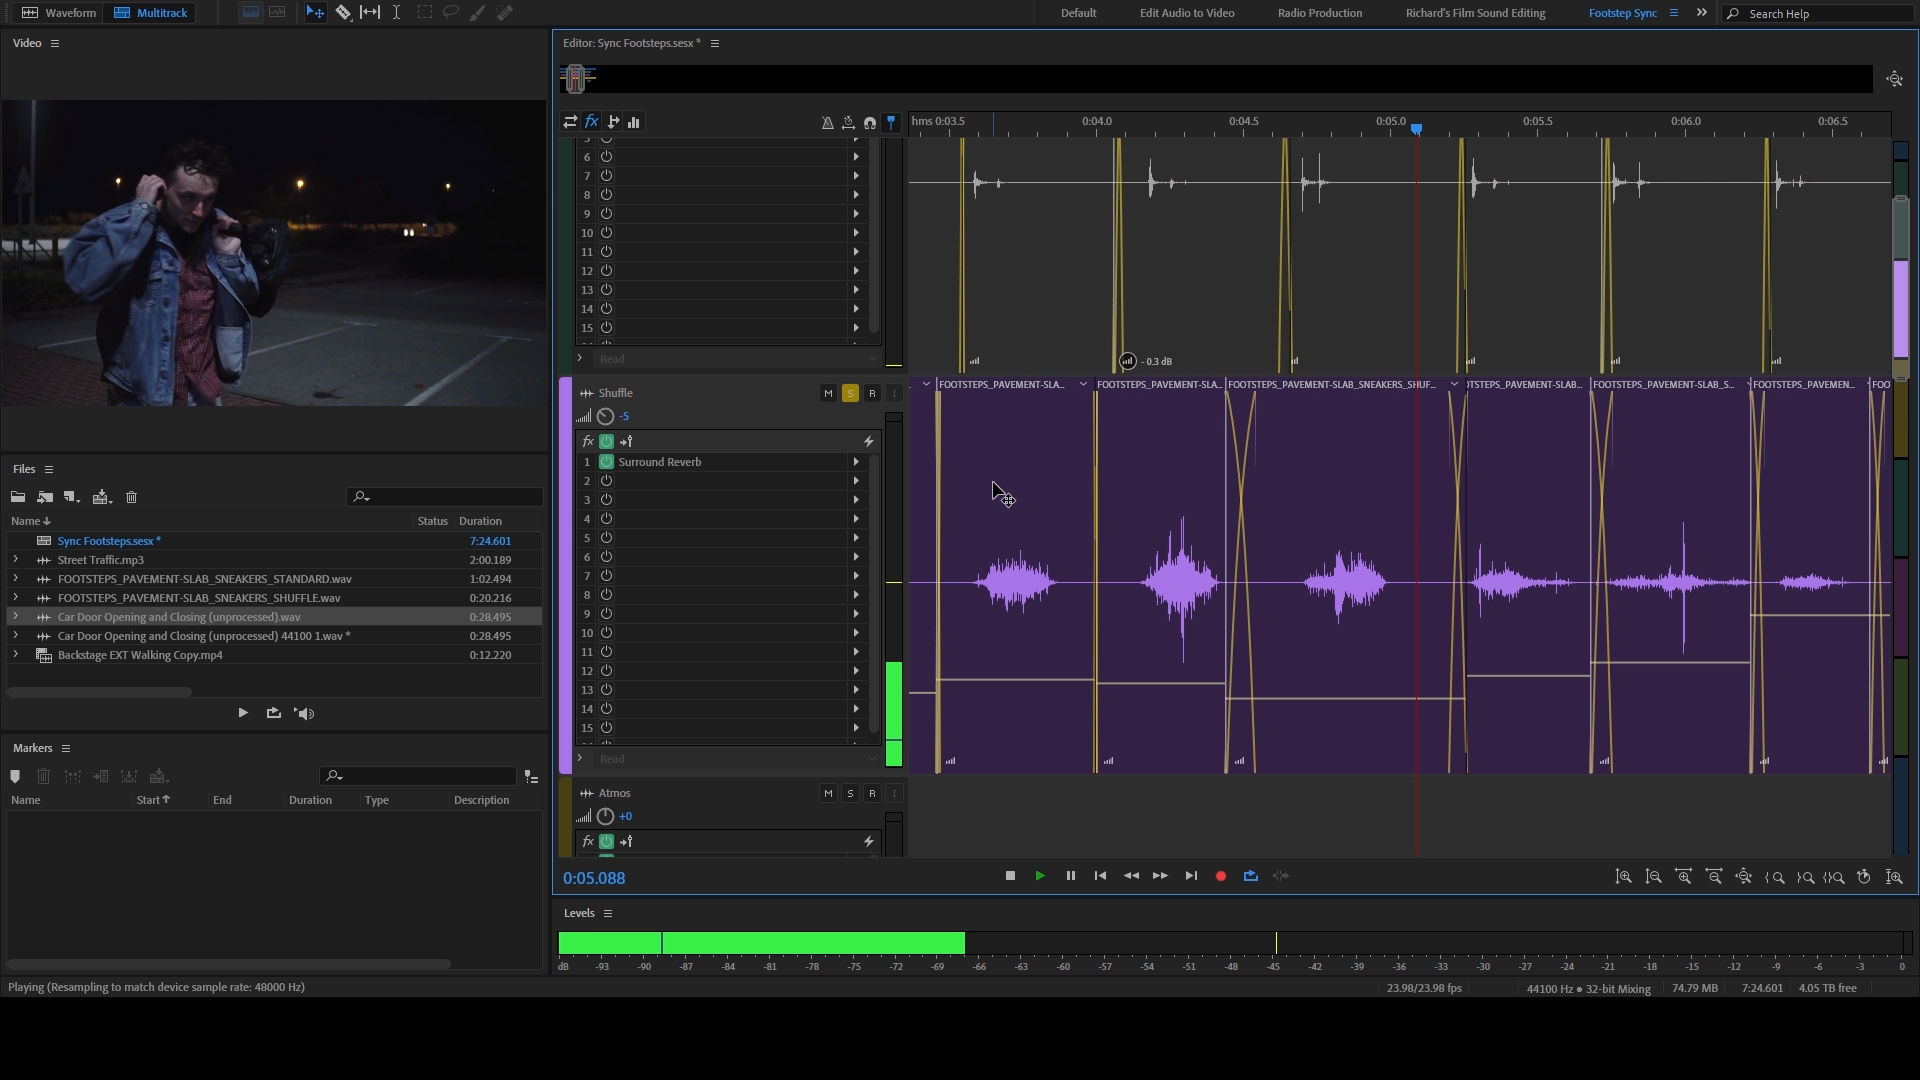
As you place in the sounds, make sure to extend the left side of the sound effect, known as the pre-attack, and cross-fade it into the decay of the previous sound. This will smooth over each sound effect and prevent any hard stops.
Next is fine tuning the sync; this is done mostly by your eyes and your ears. We have placed in our ground work using the markers, so we can delete these as they are no longer needed. Now it's just a case of watching the shot, listening to the footsteps, and looking out for any late or early steps.
This will take some tinkering, but if you do happen to have a scratch track from the video file with the original production audio, you can always listen to the take and try to match them.
If you can see the character’s feet, find the moment they make contact with the ground, and try to match each footstep sound to the image.
But, I find this doesn’t always work. Sometimes it’s better to just watch the edit and follow along. You’ll probably notice when a footstep is too early or too late.
You also might notice some footstep sounds are too strong or weak sounding for the step in the image. This is a simple fix. Just look for a step which has a stronger or weaker attack sound and replace the ill-fitting step.
Obviously right now the footsteps themselves don’t sound very realistic. They are very tappy. You can add a bit more grit to a footstep by adding a very subtle shuffle sound underneath.
Our FOOTSTEP SOUND PACK includes shuffle sounds on every surface using most footwear. Links in the description.
Here you can see I have essentially layered the shuffles under the footsteps. This will stop the footsteps from sounding so tippy tappy and will give us a sense of rubble or grit on the ground in the car park.
To quickly finish off the scene here, I have added a touch of reverb to the footsteps, added some street noise, a car door sound, and mixed it together.
Let me know if you found this video helpful in the comments below. I will be producing more episodes like this one in the future, so get subscribed if you haven’t already. And remember to achieve it one shot at a time.
🚀 https://www.thefilmlook.com/store - Step up your sound game with our FOOTSTEPS SOUND PACK. It features 200+ sounds, 9 surfaces, and 6 types of footwear, perfect for your next film project.
🎬 In case you missed it
How to Build a DIY Foley Pit: https://youtu.be/zO2hx7iToNY
$600 Mic vs $60 Mic: https://youtu.be/2VK6lYkK2AM
How to Mix Sound for a Short Film: https://youtu.be/7x5SnoftgUw
How to Record BETTER Footstep Sound Effects: https://youtu.be/vQ8bnF-OWSA
🎧 Listen to our Podcast!
iTunes: https://goo.gl/hikhGF
Android: https://goo.gl/fmsp4s
📞 The Socials
Website: http://thefilmlook.com
Twitter: https://twitter.com/TheFilmLook
Facebook: https://www.facebook.com/TheFilmLook
Instagram: https://www.instagram.com/thefilmlook
DISCLAIMERS:
Some of these links are affiliate links, if you purchase gear via these links The Film Look will receive a small commission, but there will be no additional cost to you. Thank you!


