How to MAXIMISE Your Screenplay

We are going through the 5 times you should be editing your script throughout the filmmaking process so you make the best film possible.

1. Editing Your First Draft

The most important edit to your screenplay is after you’ve written the first draft. 

You might think it’s time to start shooting, but just hold your horses! Let some people read it first!

Getting other people to read your script is only going to cost you your pride, but it’s honestly invaluable. 

Once you hear feedback from others, you’ll soon realise that a lot of your ideas aren’t actually on the page - they are still stuck in your head!

As the writer, you have the whole film playing on repeat in your head; and it’s perfect! You can visualise the characters, the locations, the action and the drama - but sometimes your ideas can get lost when translating them to the page.

Our latest short film Sixty Seconds is a 12-page action-comedy about two bombs defusal duo and was written by the two of us, so we were in constant conversation whilst writing it. 

“Does this line work here? Are we getting this point across? Is this what we want from the scene?”

When getting feedback from someone, don’t tell them too much about it. Instead, let them clue YOU up on what your film is about. They will tell you exactly what got lost between your brain and the page, because they are new to the world.

You don’t have to take every suggestion, it's still your script, but be open to feedback. At this stage, it’s probably valuable feedback.

If you are looking for feedback on your short film script, we offer feedback discussions as part of our tier 3 on patreon. We also have a community discord, and bonus videos! If you want to join these lovely people in supporting this channel, check the link in the description.

2. Editing Your Script in Rehearsals

Your first rehearsal is a magic moment; the words and characters finally come to life! But it’s also a great time for you to edit your script based on the actor's performances.

During the rehearsals, play around with the lines and the blocking with the actors. Now the words are being spoken, you might realise that a line of dialogue or action doesn’t work the same way you originally thought.

Each person in the room will bring their own experiences to the table. Some new ideas will be great, others not so much, so keep a pen handy and make notes if you think something could be edited in (or edited out!).

By the end of the rehearsals, you should have another million ideas to work with. Time to edit your script again!

3. Editing Your Script For the Location

You might have written the perfect location in your script, but unless you have the cash to build it, the next best thing is to find an adequate location to shoot in.

We wanted to shoot Sixty Seconds in a location that resembled a floor in a multi-story office building that was currently under construction. Something like an unfinished floor in Nakatomi Plaza in Die Hard. 

That wasn’t going to happen on the budget we had, so we decided to shoot it in our YouTube studio and dressed the set with boxes, caution tape, and other renovation set dressings.

Keeping your script up to date is important because each location will have a different layout, and therefore different blocking which you can not write into your script. 

You can edit the look and set dressing of the location into your script too, so when people are reading the updated version they get a further sense of the tone of the film. 

4. Editing Your Script For the Props

Just like the location, your props will likely change (at least a little bit) during pre-production as you begin to collect everything you need.

Our short film Sixty Seconds contains an elaborate bomb prop with lots of intricate modules for the characters to defuse. 

During the initial writing stage, we honestly had no real clue about what these modules would look like! So we wrote something a little more vague, knowing we could change it later.

During pre-production, we collected a bunch of stuff and built the bomb prop. After building it, we knew exactly how the characters could interact with it. This meant we could open up the script and edit the action lines to match the interaction of the props. This meant we had notes for the very particular beats in the scene. 

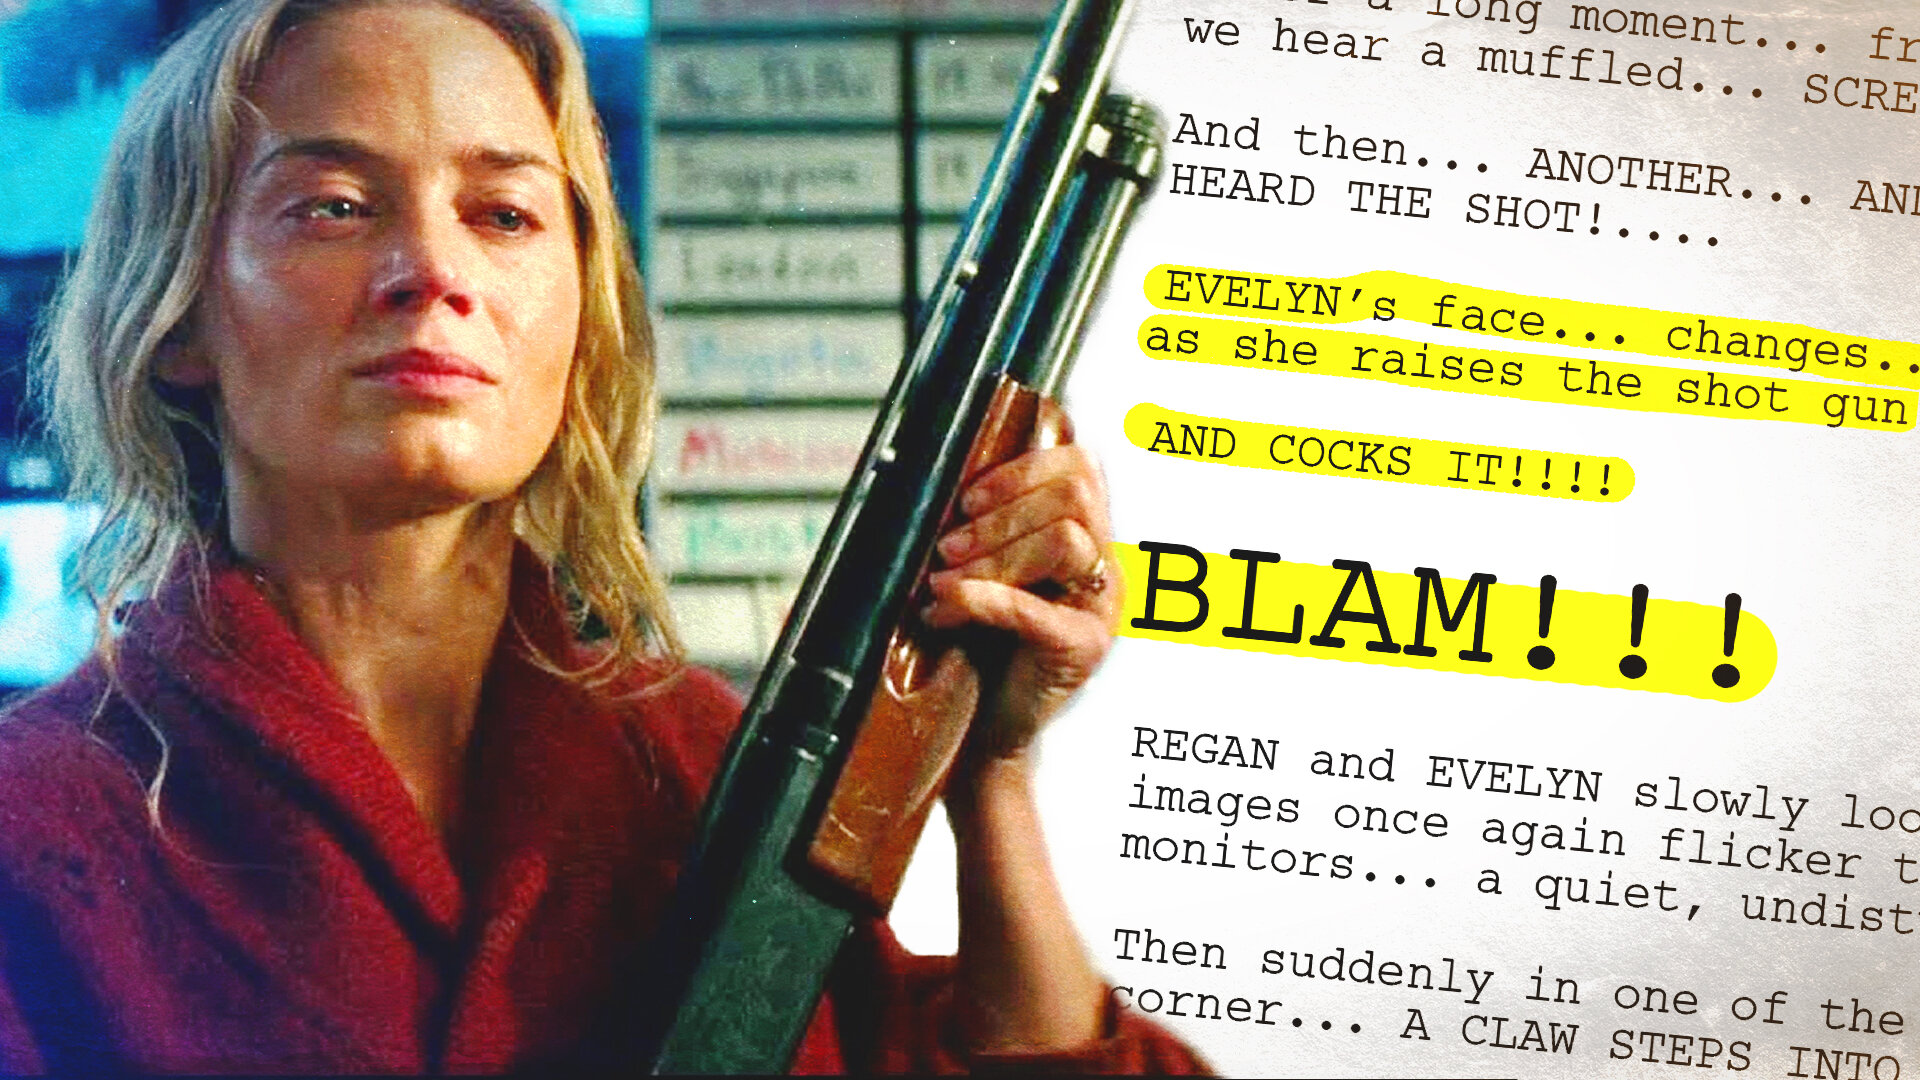
If your character pulls the trigger of a pistol, the action line doesn’t have to change after you acquire the prop. 

“RITA raises the gun and pulls the TRIGGER.”

Generally pistols all work the same way, but if you decide later on that your character should have a shotgun instead, then it’s worth editing the action line. 


“EVELYN cocks the shotgun and pulls the TRIGGER.”

Brandishing a shotgun has a different feeling to a pistol, and this small change will alter the rest of the scene ever so slightly. Put a shotgun prop in an actor’s hands and they will instinctively raise it and pump it. It’s a slight action change, but it’s worth keeping your script up to date.

Remember, the script is a blueprint for every department, not just the actors, so the props department will need to know you require a shotgun and not a pistol.

5. Editing Your Script On Set

During the final rehearsal on set, you might alter a line here or there, but once the cameras are rolling and the actors are acting, you must commit to the script. It’s now concrete.

Since you’ll be covering the scene from multiple angles and multiple takes, major changes in dialogue and actions can be a continuity nightmare. So when you begin, you gotta stick to it. 

This is why productions have a Script Supervisor. Their sole job is to keep track of continuity whilst shooting and they keep the script up to date (which is essentially another form of editing the script!).

The script is the blueprint to the entire project, so when you are on set, use it just as much as you would use the camera.

If you can think of any other times you edit your script during the production process, pop it in the comments! If you need some feedback on your script, head over to our Patreon. And here is a writing playlist we’ve made if you want to watch some more videos. And bye!


DISCLAIMERS:

Some of these links are affiliate links, if you purchase gear via these links The Film Look will receive a small commission, but there will be no additional cost to you. Thank you!

CONVERT Your Vintage Lens into a Cinema Lens

We've found a way to convert and upgrade old vintage photography lenses into cinema lenses by 3D printing new parts. The new rehousing improves the functionality of the lens by adding features like focus gear rings which the lens didn’t previously have.

The way this re-housing works is that you attach a new shell to the current one out of 3D printed parts. The lens we are upgrading is the Helios 44-2 58mm f/2 lens. 

It’s that cool vintage lens that has swirly bokeh and one we’ve used a lot, with 85% of our short film Sixty Seconds being shot using one. 

For a lens that is 40 years old, it’s worthy of the upgrade, plus there are plenty out there if YOU were thinking about doing this too.

Rehousing

The re-housing is made from 6 different parts which were printed separately and in 3 different colours. 

For those of you who don’t know how 3D printing works, you take a digital 3D design, select your printer's setting, load it into your printer, click print, and 22 hours later all 6 parts are now three dimensional solid objects. 

Assemble

Now we have all of the parts printed, we can assemble everything together, with each part sliding onto the lens with a little bit of pressure. 

The dimensions of each part are perfect and full credit goes to Thingiverse user Edward Park for creating this. I can’t imagine how many hours it took to design this.

Links to the 3D files and full assemble video can be found in the description below, and subscribe if you haven't already.

Each part is held in place using these small grub screws which you have to tighten evenly all the way around. 

The trick is to tighten each screw a little at a time making sure everything stays in line and not rubbing against each other. 

There is a bit of trial and error and it took me a few attempts to get everything working.

The black outer housing slides on next which helps hold everything together and on the front of the lens we’ve attached a few step-up rings. 

They go from 49mm which is the Helios thread size, to 82mm so you can still attach ND filters to the lens. 

To attach the lens onto our A7s we use an m42, which is the Helios 44-2 mount, to EF adapter, then an EF to Sony E Mount adapter. A bit of a long way around but it works for us.

Now everything is together, we’ve realised the 3 tone colour doesn't look very good does it. The orange might be a little too much, so before we start using it, let's reprint some of the parts.

And we think you would all agree, the colour is a lot better and it no longer looks like a fisher price toy lens.

So, does it work?

The new size is a massive improvement, especially when pulling focus by hand. The larger diameter improves accuracy, and the gear rings have been built to attach a follow focus. Overall, the housing is a lot closer to a cine lens. 

The aputure gear ring makes it easier to change your f-stop, as the original ring is super small, but the bigger improvement is the aperture number ring. Since the Helios 44-2 is a manual lens, your aputure information doesn’t get sent to the camera. Now with the larger number ring you can clearly see which f-stop you are set to.

We did print the number rings in black at first, but you can’t see the indetend numbers on the rings because everything is so dark. So if you are going to print this, make sure to print these parts in a lighter colour so you can see them.

I’ve linked the setting of the lens, with aputure and focus distance rings to this set maker point, which comes in handy if you are setting focus marks by hand.

I did spray the number rings in a plastic sealer so it would make it easier to rub off any dry wipe focus marks. 

I did crack the aputure ring when I tightened the screw, so I might need to reprint this part.

The outer housing might be made all out of plastic, but the construction is solid. If you do drop it, the plastic might break, but our advice would be to not go around dropping lenses.

You can still screw ND Filters on to the front of the lens, with the new lens thread being 82mm. We just need a 82mm lens cap to protect the glass. Maybe we could 3D print one?

Cost

The total material cost to print all of the parts was around £2, with the screws costing another £1. Which is great value, but obviously if you don’t have access to a 3D printer it's going to cost a lot more. With our setup costing around about £300.

If you don’t want to deal with printing it yourself, there are 3D printing services out there. I found prices ranging from £50 to £100 to print this design. There's also people on Facebook marketplaces offering 3D printing so check your local area.

So obviously the re-housing doesn’t improve the optics of the lens, but they were pretty good to start off with. It’s just cool that we can upgrade the usability of a 40-year-old lens with new technology.

If you don’t have a Helios 44-2, the designer has plenty of other vintage re-housing designs too. 

We are hoping he comes out with one for the Jupiter 9 85mm lens. It’s one of our favourite lenses, but it's a pain to use and could definitely do with an upgrade.


DISCLAIMERS:

Some of these links are affiliate links, if you purchase gear via these links The Film Look will receive a small commission, but there will be no additional cost to you. Thank you!

The Secret to Writing & Directing a GREAT Scene!

Here is a technique that (almost) guarantees you will have an interesting, powerful scene in your next film! Character objectives and turning points are fundamental in screenwriting and they can be utilized perfectly when directing a scene!

Transcript from the episode:

Hello crew. Welcome to the film look. Rob & Rich here with another filmmaking knowledge bomb!

Today we want to share with you a technique that will pretty much guarantee you have a really entertaining scene during the writing and directing process of your next film.

So what makes a compelling scene? Is it action, drama, violence, sex? Not quite. Every great scene in a film has something called a turning point AKA a power shift AKA conflict resolution. So what does this all mean?

Well, just like a film has a beginning, middle, and end, every scene should have a beginning, middle, and end.

We’ve got 3 films to break down with you today, and we are gonna go through all of the elements which make these scenes compelling and entertaining.

Firstly we are going to look at a film called Logan Lucky.

But before we get into it, subscribe for more filmmaking knowledge bombs just like this one!

So in this scene, we have 2 characters. Mellie and Moody. Their relationship to each other is a bit complicated but basically, Mellie is Sadie’s Auntie, and Moody is Sadie’s stepfather. So they are tenuously related.
Let’s build up this scene, starting with something called character objectives.

Mellie’s objective in this scene is to simply escape this situation. She wants to ignore Moody, and leave. She wants nothing to do with him. She wants to get her bags and go.

Moody, on the other hand, wants to assert dominance. He wants to impress Mellie. You get the impression he has low self-esteem, and if he charms this good-looking woman, he can give himself a pat on the back that he’s a confident, good-looking chap.

You’ll notice that their objectives in the scene are designed to stop the other’s objective from being successful. This creates conflict. Both characters want something, but both characters are also getting in the way of the other person achieving their goal.

This gives us a scene to work with. The actors can play on these objectives and get in each other’s way. We’ve wound up the toys, and now we are making them battle.

The next thing we can build on is the turning point, and in order to have a turning point, we need to decide who has the power at the beginning of the scene. In screenwriting, this is usually symbolized by a plus and a minus, and this will swap in the midst of the scene.

In this scene, Moody has the power. He enters the scene with confidence. He’s overbearing. He stands tall. Mellie avoids eye contact. She wants to leave. She has no power. 

Let’s play out the scene until we hit the turning point…

Bang! There. They are crashing into each other. Mellie can’t leave because he won’t shut up. Moody won’t shut up because he needs to impress her. Conflict.

Mellie finds another way to leave. This time, by taking the power away from Moody. She finds her moment to snipe him. Let’s play out the rest of the scene…

Moody is left with his tail between his legs. Mellie’s comment about how he can’t drive a manual car, aka a stick, makes Moody backtrack. He’s thinking, “How do I impress her now? Quickly! Say you love stick! Make an excuse!”.

Mellie begins the scene with a negative charge. She’s “losing”. But she leaves the scene with all the power. She wins.

Every great scene in a film uses these techniques. Character objectives should be designed to make them butt heads. A turning point should provide a change in power for each character. From losing to winning, or winning to losing. Plus to minus. Minus to plus.

We break down the entirety of Logan Lucky on an episode of our podcast!

https://open.spotify.com/episode/61oeVI7344N7jXBeITuhJV

Let’s look at another example. This time from Billy Elliot.

The quick backstory for this scene. Billy is a young lad who discovers he wants to be a ballet dancer. His Dad, a coal miner who is currently on strike, refuses to let him join the class. So Billy sneakily goes to the dance teacher’s house to persuade her to speak to his Dad about joining the ballet class.

The characters with conflicting objectives are Billy and the dance teacher’s husband, Mr. Wilkinson. Notice they are also on opposite sides of the frame. That’s a deliberate choice of direction and cinematography right there. Very well crafted.

Billy’s objective in the scene is to survive the interrogation. He doesn’t speak much. He’s just finished arguing with his Dad. He doesn’t want to argue with a stranger as well, especially an adult. He’s got the minus symbol.

Mr. Wilkinson, on the other hand, is using this scene as an opportunity to rant about the miner’s strike in a way to lift himself up. Again, it’s a matter of self-esteem. 

He’s not a miner. And he thinks the miner’s strike is pointless. He uses Billy as a way to vent these opinions. He has the power. Let’s watch…

Our turning point is when Billy asks “What do you do Mr. Wilkinson?” and his daughter reveals that he’s been made redundant. He doesn’t have a job anymore. This guy has no leg to stand on. He’s a hypocrite!

Then you get a little smile from Billy. And THAT means so much to the audience. We are rooting for Billy, and he just won. This is how you write and direct characters which we care for. 

This win from Billy seems like it didn’t take much fighting, but if you’ve seen Billy Elliot, you’ll know he isn’t the type of kid to shut up and listen, so him sitting there and taking the rant from Mr. Wilkinson is a new tactic for Billy, and it paid off.

Speaking of new tactics: we’re on Patreon! If you wanna support the channel and join this lovely bunch of people here, there’s a link down below. On there you can find; a community discord server, bonus filmmaking videos, and 1-on-1 feedback sessions.

Lastly, we are going to break down our film Sixty Seconds. We certainly tried to apply these techniques when making the film, but did they work? Let us know in the comments below.

Sixty Seconds is also a short film, not a feature like the other examples, and it happens in one location as one big scene, so the tricks aren’t like-for-like, but we applied them where we thought they worked best.

First of all, we have Stu. His goal throughout the film is to try to make Daniel his friend. His objective is to provide a fun working environment and impress Daniel as much as possible.

He tries to do this through humor and imitating Daniel’s bomb lingo. The irony of the film is that a fun working environment is impossible when trying to defuse a bomb!

Daniel’s goal is to simply defuse the bomb. He tries to do this by ignoring Stu and working alone. He’s a bit of a stuck-up workaholic.

These objectives conflict with each other, stopping the other person from being successful.

The turning point is when there is a page missing from the bomb manual and Stu finally helps Daniel by providing a good idea; find a YouTube tutorial. But because Daniel is stuck up and selfish, he rushes through the next step to defuse the bomb, he pushes the bomb over, and Stu has to catch it.

This is when the power switches to Stu. But this is also the point in the film when they both begin to realize that their objectives in the film are actually getting in the way of their goals.

Stu wants to impress Daniel and become friends. So after the turning point, he knuckles down. He gets serious. He provides Daniel with everything he needs. That’s a much better way to impress him!

Daniel realizes that he can’t defuse the bomb on his own. He needs Stu. So he invites him in. That’s a much better way to defuse a bomb and not die!

After the turning point, their new objectives line up with their overall goals, and after more humorous scenes, they are successful.

But did we pull off this technique? Let us know in the comments below.

And if you want to see more about Sixty Seconds, we have a video here that covers the entire production process from start to finish.

Thanks for watching and we’ll catch you in the next one! Bye!


DISCLAIMERS:

Some of these links are affiliate links, if you purchase gear via these links The Film Look will receive a small commission, but there will be no additional cost to you. Thank you!

Get CINEMATIC wides for $80! | Pergear 10mm Pancake Lens

We shot a bunch of cinematic wide-angle scenes with an $80 camera lens! The Pergear 10mm f/8 pancake lens is an absolute bargain and packs a punch!

Transcript from the episode:

Hello crew and welcome to The Film Look. Rob and Rich here with another filmmaking knowledge bomb!

Today we're testing out just how many unique ways we can use this tiny little 10mm Pergear pancake paragraph lens for making films and hopefully it sparks some cool ideas for you guys in your next film.

And make sure you stick around for the last setup that we used using this lens. We think it is the greatest thing we've ever shot on this channel!

So we've got the Pergear lens setup as a close-up right now and it's making this scene look a little bit crazy, a little bit strange, but that's what we want. I'm putting this bomb together, so i'm clearly playing a crazy character.

This is purely an aesthetic look that we want maybe for just this scene in the film.

We're going to shoot this exact same shot on an 85mm lens which is a bit more traditional.

You could keep everything in your film like that or you could cut to one shot in your film where you're using this lens and it's showing this crazy character in this crazy scene and it looks very, very strange.

So we're just going to give you a quick run around of the lights that we've got to set up. The key light is actually this swinging light bulb which is above me, which is a nice little effect. it's free. it's easy to do.

We've got a side-back light over here which is just an Aputure mini 20. really warm.

Our background light again is a big cob light - that is a really warm light.

Then we've got simple things like a reflector here, and a little eye light here.

So, you know, there's not a lot going on, but just something like a swinging light just adds all of the effect in there, and it's just on a pole and a stand.

The next setup is like a Matrix-style peephole shot. So we're gonna dress as police and we're gonna be knocking on this door. Obviously, there's no door here, and that's because our lens is so wide in full-frame mode that the door has to be 12 inches behind in order to make this shot make sense. You'll see in a second.

We've got a bounce board and we've got a silver board with a light here so we can get exposure on us at the door.

And then up here we've got some Aputure MC fx lights. They're a little bit green, and they've got a faulty bulb mode on so that's flashing and looks really cool.

Then, because the room is so dark, we've set up our big powerful light with a shedload of orange gels, so we got an orange background light.

And then, just to capture a little bit more of the detail in the shot, we've gelled up a side light as well to match the background light. This is an Aputure mini 20 and that's a sidelight just to make sure that we're away from the background.

Police! open up! We know you're in there Rip-off Ricky! We know you stole all those women's shoes! Knock the door down!

--hold on—

We just want to say thanks to our supporters over on Patreon actually! If you like what we do here and you want to support us, we've got things like a community discord page, we've got bonus filmmaking episodes, and we even do one-on-one feedback sessions on things like your script or your edit. So head on over to patreon.com/thefilmlook for more info, and thanks to our patrons!

Right, let's have a quick run-through of all the specs of this camera lens. Let's get it out the way.

So first of all it's 10mm, but it is an aps-c lens, so if you put it on a full-frame camera such as a Sony a7s, it is going to have some vignetting.

If you put it into aps-c mode, like on a sony a7s, it's the equivalent of 15mm.

If you compare it to something like our 35mm lens, it is absolutely tiny. It's actually smaller than the back cap which is crazy.

And because it's so small, it doesn't even have a focus ring. It's got this little handle here.

But honestly, because it's so wide and the fact that it's in f/8, you're probably not going to be using it for those really nice smooth racking focus shots.

The good thing is, it does have a metal body, so it's going to survive a little bit rattling around in a camera bag if it does get loose. Although, saying that, if it gets loose, you're going to lose it in your camera bag. Like, look at it! It's absolutely tiny!

And for you gear nerds out there, we've shot this lens compared to all the other lenses that we use so you can see how the focal length changes a human face!

Pairing this lens with a camera such as a Sony a7s (which is already really small), you can fit it in tight spaces like this one. This is the bomb prop from our short film Sixty Seconds and we've mounted the camera and the lens inside so we can capture the poster shot.

it looks like a poster now, doesn't it?--yeah--that's cool the timer underneath--

If you want to watch our short film Sixty Seconds, and how we made it, watch below.

The very first thing we thought of when we saw just how wide this was, was a 90s cheesy hip-hop music video. So we've costumed up, we've got every single light out and we're going to shoot the MADDEST MUSIC VIDEO OF ALL TIME!!!!!!!

So what do you think of this lens then? Do you reckon it's unique enough that you're going to stick it in your camera bag?

Put your thoughts in the comments below. And we've got another review of a 35mm lens for you dirty little gear-people!

And that's been another filmmaking knowledge bomb!


DISCLAIMERS:

Some of these links are affiliate links, if you purchase gear via these links The Film Look will receive a small commission, but there will be no additional cost to you. Thank you!

Building the ULTIMATE Filmmaker's Charging Station

We built the ULTIMATE charging station for filmmakers using an IKEA Billy Bookcase! It's perfect for filmmakers who work out of their bedroom or a small studio. Everything was built using IKEA products and DIY store parts, so really accessible!

We talk about all of the different camera batteries we use like Sony NPF, Sony A7s batteries, V-lock Batteries, and Insta 360. We also built a LED light charging bay holder to help store and charge our Aputure MCs and other LED effects light.

📼 The Frugal Filmmaker

https://www.youtube.com/user/thefrugalfilmmaker

📼 Rechargeable Battery Level Markers! Charged or Not?

https://www.youtube.com/watch?v=4ut6ur5u1RU

🔨 IKEA Billy Bookcase

https://www.ikea.com/gb/en/p/billy-bookcase-white-00263850/

🔨 IKEA BOTTNA Magazine Rack

https://www.ikea.com/nl/en/p/bottna-display-shelf-light-beige-70394471/

----DISCLAIMER---- We bought the IKEA BOTTNA six months before this video was uploaded. IKEA has now discontinued the product. If we find a similar solution we will post the link here. In the meantime search your local marketplace groups, you might get lucky.

🔋 CHARGING STATION LINKS

Plastic Storage Bins - https://geni.us/pvvTHCh 8-Prot

USB Charging Hub - https://geni.us/lZ6zAoz

Right Angle Brackets - https://geni.us/NEoBn

Battery Indicators - https://geni.us/Nwy85y

Neoprene Foam was 1mm thick. The best place to buy it is from eBay as you can buy different lengths, but if anyone needs some we have plenty, just pay for the delivery.

🖨️ 3D PRINTS

Tape Holder - https://www.thingiverse.com/thing:2962025

V-Lock Brackets - https://www.thingiverse.com/thing:4563429


DISCLAIMERS:

Some of these links are affiliate links, if you purchase gear via these links The Film Look will receive a small commission, but there will be no additional cost to you. Thank you!

Embed Block
Add an embed URL or code. Learn more

10 Reasons Filmmakers NEED The Aputure MC

 Hello Crew, it’s Rob and Rich from The Film Look where we drop filmmaking knowledge bombs. 

AND in this video, we are going to share 10 reasons why we think the Aputure MC is perfect for indie filmmakers.

Campfire Setup

Welcome to The Film Look campfire setup. This is quite a basic and simple setup, anyone can do this. We are using two Aputure MCs that are going into a white reflector. Then we have another MC acting as moonlight, to combat the warm glow of the fire. I am controlling everything from the app, so I can turn the light on and off and I can change all of the settings and frequencies of the firelight.

Out of the box, the MC comes with a bunch of pre-programmed lighting effects, but what takes the MC to the next level over other RGB fx lights is the Sidus Link app, which is free.

In the Sidus Link app, you can set up your scene, add each light, and you can keep everything organised by renaming everything.

For the firelight, we grouped two MCs together as they had the same settings and using the app it allowed us to quickly flick through different firelight settings to see which one looked best in the scene. 

We use the same moonlight colour for a bunch of scenes we shoot, so we’ve saved it as a preset in the app for future use. And if you haven’t already subscribed for future videos like this one.

The app does have a learning curve, but if you spend time messing around, setting up some scenes as we did, you’ll be ready to use it on set. Just make sure your phone is fully charged throughout the shoot.

TV/Cinema Screen Setup

This is our TV Screen reflection setup, we’ve got 3 Aputure MCs, we’ve got these two our keys on both sides of the camera, one in party mode, and one doing a TV flicker mode

After looking over the footage for the TV screenshot shot, we think we chose the wrong effect settings on the MCs. The TV Flicker and Disco effects aren’t random enough, so we are going to get back and try some other lighting effects.

NEW TV/CINEMA SCREENSHOT

This is the new and improved TV screen setup. 

The lights are in the same position, but this light is set to fireworks mode, and this one is set to faulty bulb mode, both of which are a lot more random and give a more convincing TV screen look.

As you can see there is some black wrap on the faulty bulb light, that’s because these don’t come with barn doors so they are going to be open and spread the light everywhere.

So to help cut and shape your light we would definitely recommend getting some black wrap. It’s a great alternative to using barn doors and is a cheap piece of lighting equipment that you’ll be using for years.

The Aputure MC does come with this rubber diffusion, which we use most of the time to soften the light which is a great little addition.

Now, let’s use the Aputure MCs with a bunch of other light.

SIXTY SECONDS

Our short film Sixty Seconds is about a bomb defusal duo and we used a bunch of lights to film the scene. 

We used a flex panel as our key light, Aputure mini 20Ds for background and edge lights, and to help establish there was a police presence we used the MCs in different parts of the location.

We did some screen tests and the built-in cop car present flashes Red, blue, and white 3 times, and we didn’t like, so we jumped into the app, cycled through the settings and customize a police light that flashed red then blue. 

It’s a simple change, which looks better on screen, and thats why the MC beats every other small RGB FX light out there. You don’t have to make compromises, you can customise it to suit your film.

POWER

We shot Sixty Seconds over 3 days, with each MC running for about 10 hours. The internal battery life runs for about 2 hours, which is decent for a light this small, but to use it for the entire shoot we powered it via USB plug.

A common USB plug won’t give you enough output so you’ve got to use something like this 9V/2A PD USB Type C plug. This was a little bit of trial and error for us, so we’ve added links in the description to the ones we use.

Also, if you use a 3 meter long USB cable the light will only output 80% brightness. We’ve got a couple of 1 meter and 3 meter long cables depending on how we are using and rigging the light.

Affiliate Links

USB PD 9V/2A Plug - https://geni.us/Si6yT6

Meter USB Type C to USB Type C cable - https://geni.us/C1TP1Ng

3 Meter USB Type C to USB Type C cable - https://geni.us/aVAK

Black Warp - https://geni.us/8JvTw3

If you are rigging the light up high, a 3 meter long cable makes it a lot easier to power the light and because these lights are so small and also have magnets on the back, you can mount it to drop ceilings like the ones we have in the studio. They work great as a flashing emergency light.

We’ve even modded one of our clamps and attached a ball head. Now we can mount the MCs anywhere you can clamp on to.

The MCs have all these fancy RGB effects tricks, but they are really great to help motivate practical lights.

Links to all of the extra pieces of equipment we have mentioned, like the black wrap can be found in the description. 

And lastly, before you click away, I want to thank our supporters on Patreon for helping us continue to make videos just like this one.

https://www.patreon.com/TheFilmLook

If you like what we do here and want to support us, head on over to Patreon.com/thefilmlook where we have a bunch of rewards including a community discord page, bonus filmmaking videos, and 1-on-1 chat sessions with us. 

Thanks for watching, and...bye!


DISCLAIMERS:

Some of these links are affiliate links, if you purchase gear via these links The Film Look will receive a small commission, but there will be no additional cost to you. Thank you!

Embed Block
Add an embed URL or code. Learn more

5 Essential Editing Tips for Short Films!

These editing tips will get your next project shaped up and ready to kill it at film festivals!

Transcript from the episode:

Hello crew. Welcome to The Film Look. Rob & Rich here with another filmmaking knowledge bomb. Today we want to share with you 5 essential editing techniques YOU should be using on your next film project!

Cut on Action

The first editing tip we want to share is the cut on action. To demonstrate, we have set up a basic scene. I’m going to enter the scene, grab my laptop, drink some coffee, and start typing on my laptop.

So, all of these little moments in the scene are called actions. These are physical things an actor does during a scene.

Each one of these actions can be used as a cutting point in the edit - hence the term “Cut on Action”. Cutting on action can help to smooth over and hide the edit from the audience, helping to provide a seamless continuity in the scene.

If you shoot the cup being placed down in a wide shot and also shoot the same action in a close-up, it’s safe to say these shots should cut together quite well. So when you are building your shot list, you can treat these actions like checkpoints during a shoot, overlapping them between setups.

Just make sure not to cross the 180-degree line! We have a video on that fundamental filmmaking rule if you follow this right here or the link down below.

Right! Let’s get down to editing this sequence. Before we open up Premiere Pro (or your preferred editing programme), we can quickly go to youtube.com/thefilmlook and hit subscribe.

If you aren’t subscribed, this is the first thing you will want to do. Then we can open Premiere and begin.

So here I have two clips. Currently, the moment when Rob places the cup down is synchronised right on the cut point. But this isn’t necessarily the best place to cut for a smooth continual scene.

Sometimes you will want to cut a moment after he places the cup down, or maybe even halfway through placing the cup down. So how do we play around with this cut?

There is a tool in most editing programmes called a rolling edit tool, and it essentially lets you peel back footage to reveal more footage on the other side of the cut - and vice versa. 

And I think for this demonstration I will cut halfway through the action as the movement of the cup is what will draw the audience’s eye.

The rolling edit tool is my preferred way to play with the cut on action point, but everyone edits their own way so just find the tools that you prefer. It’s the technique itself that is important.

On the flip side of this demonstration, please don’t think you NEED to shoot a close-up of a cup. It might be an action beat for the character, but is it a key moment in the scene or is it just a mundane task for the character to perform so they have something to do?

Remember, a close-up tells the audience “this is important”. So in this shot, it’s not necessarily the cup that we want the audience to look at, but maybe it's the book beside the cup titled “your screenplay sucks” which tells the audience the context of the scene.

Don’t just be shooting close-ups of cups if they aren’t important information. Right! Next tip.

Repeated Frames

If you are dealing with a fast-moving action point you can actually repeat a few frames after the cut. To demonstrate, me and Rich are out here in the back alley and we are going to shoot a scene where Detective Rusty Johnson is going to whip around and aim his gun. 

So these shots have been clipped together and it all feels quite smooth when you first watch it. 

But if we go frame by frame to Rob spinning round, you can actually see that after the cut point, he goes back in time for a few frames. So why didn’t it look weird when we first watched it?

That’s because our brains need time to catch up on the action after a cut. There is a small moment after the cut when our brains need to recalculate all the new information and work out if there is any shared information to the previous shot. In this case, it’s Rob spinning.

If you give the audience some repeated frames after the cut point, it helps them process the information and lets their brain catch up on the action. It will seem completely normal to them because it’s happening so fast. It’s subtle but it really helps with a better viewing experience.

As an editor, you have the power to pause, repeat, and scrutinize the footage, which is great for editing but it also means you are anticipating the cuts. This is why editors should take lots of breaks. Once you start anticipating the cuts, you are no longer watching it as an audience member.

One trick I use, and it is going to sound stupid but it honestly does work, is to watch the edit in your peripheral vision. So look away from the screen just a little bit and watch it again.

You get a feel for the edit without anticipating it because you aren’t staring directly at it. Speaking of staring, the next technique is called “Editing on the Eyes”.

Editing on the Eyes

This is an editing trick that uses the eyes of the actor to guide when and what we will cut to, and we are going to use a scene in our film Sixty Seconds as an example.

If you haven’t seen Sixty Seconds yet, there’s a card in the corner and a link below.

The scene begins with the bomb being defused. We move up to Stu who is staring at the bomb on the table. Then he looks up to someone. This is going to be our first cut point. Let’s edit on the eyes and provide the audience with what Stu is looking at.

We cut to Daniel. Daniel looks up to Stu. Let’s edit on the eyes again, following Daniel’s viewpoint.

Cut back to Stu. He nods.

Cut back to Daniel. He nods back then lowers his head to defuse the bomb.

Cut back to Stu one more time. He looks from Daniel to something on the table. Edit on the eyes. What’s he looking at? Cut to the bomb.

We follow the characters and provide the audience with a view of what they are looking at without having to shoot a POV-style shot and you also get a rhythm in the scene which is really smooth, hiding the editing process from the audience.

The cuts back and forth also get progressively quicker. The audience will need some time to understand the shots at first because they are brand new. But once we go back to a shot we’ve already seen, the audience is familiar, which means we can spend less time on it and it won’t feel overly choppy.

If you are interested in seeing more behind the scenes from Sixty Seconds, we have a special features pack that includes over an hour of on-set footage, a director’s commentary, and a bunch more. Links below.

https://www.thefilmlook.com/store/sixty-seconds-special-features

Cutting the blinks!

The next technique is called “cutting the blinks!”. To demonstrate, me and Rich are gonna sit down and have a really basic back-and-forth conversation. Then we are going to deliberately leave in every single blink just to make you guys feel really uncomfortable.

As you can see, a cut during the middle of a blink is really jarring. Even a single frame into a blink can create a scene of “What the bloody hell was that?” to the audience. It’s subliminal, and an audience member might not notice it consciously, but it definitely prevents a smooth experience.

In addition to this, a blink doesn’t just occur from an actor’s eyes. 

You can get a ‘blink’ in an edit if, for example, a bird flies in the background for a single frame, the camera changes direction before it cuts, or the sun just escapes the clouds before a cut.

In Sixty Seconds, we had blinking issues with the police car lights. The lights would flash red and blue, but every now and then in the edit, we noticed we were cutting when the lights were off completely, which made the cut feel really jarring. So just be aware of blinks during an edit. You will likely pick up on these, but if a cut feels off, look for blinks.

Before we get to our last technique, we just want to say thank you to our supporters on Patreon for helping us to provide videos just like this one.

If you like what we do here and want to support us, head on over to our Patreon where we have a bunch of rewards including a community discord page, bonus filmmaking videos, and we even provide 1-on-1 chat sessions! Right! Tip number 5!

https://www.patreon.com/TheFilmLook

Match Cuts

The last thing we want to share is a more advanced technique called a MATCH CUT. These are cuts in the film which use similar shapes between the cuts to bring those shots together in a really interesting way.

If you are interested in learning how to prep, shoot, and edit a great cinematic match cut, that video is already on the channel!

 It’s somewhere on screen now! This is where you should go next. Thanks for watching, and...bye!


DISCLAIMERS:

Some of these links are affiliate links, if you purchase gear via these links The Film Look will receive a small commission, but there will be no additional cost to you. Thank you!

How to Shoot a Perfect Cinematic Match Cut

These tricks will help you prep, shoot, and edit a great-looking match cut for your next film!

Transcript from the episode:

Introduction

Hello crew. Welcome to The Film Look. Rich here with another filmmaking knowledge bomb. Today I want to show you how to prep, shoot, and edit a great-looking match cut.

Me and Rob recently shot one for our film Sixty Seconds and found a few tricks which we want to share, so we are going to recreate our process step-by-step so you can see how we did it and use that technique for your own films.

What is a Match Cut?

So what even IS a match cut? Basically, if you stitch together two shots that both feature matching shapes in the frame, you get a match cut. Sometimes they also include synchronized motion if you want to get really fancy.

They tend to be used as scene transitions and work great to bring together two contrasting elements.

Preparation

We all know preparation is key, so you can start by subscribing to this channel for more filmmaking knowledge bombs, then we can draw the match cut into our storyboards before we shoot. So...

They don’t need to be works of art. Just as long as you can understand this shot is cutting to this shot, using the shape as the transition.

Doing it this way just means you are actively thinking about the match cut BEFORE you get into the editing room, making for an overall better transition.

Once we have it planned out, we can start shooting - and we’re actually going to start with SHOT B.

Shot B, The Frame Guide

Shot B starts with our character slowly removing a silver module covered in colored buttons and placing it on the table. So we can shoot that now. 

Once we have SHOT B in the bag, we can find the frame which will be used as the cutting point, and make a frame guide on the monitor using a plastic wallet, scissors, a sharpie, and some tape.

Draw around the shape you will be match cutting and save the guide for when you are ready to shoot SHOT A.

This might be in a week’s time, or it might be months between shots, so just hold onto it. You will also want to make a note of the lens’s focal length so you can match that too and get it PERFECT.

Examples from Films

You can technically match cut any two shots which have a similar composition, but it is worth finding elements which; work as visual metaphors, meet your film thematically, and all that pretentious crap that, face it, we filmmakers love to inject into our movies.

One example of a great match cut metaphor is from 2001: A Space Odyssey. SHOT A shows early man throwing a bone into the sky (AKA early man’s first use of a weapon), match cutting to SHOT B, a spaceship, a highly advanced tool created by man. The match cut shows the vast evolution of human technology in a cut.

We breakdown the filmmaking elements of 2001 on our podcast.

🎧 Listen to our Podcast! (2001: A Space Odyssey) https://open.spotify.com/episode/4EZW1K5N1844P2wPRIr3Ja

Shot A, The Camera Move

Since we now have the frame guide, we can film SHOT A. We are going to slowly zoom into the pages as they are being turned, and when the page lands, we will land into the frame guide for the match cut. 

You can do this with a pan, a tilt, or a camera move as well, just make sure to land the shot into the frame guide so you can get a perfect match cut.

To prevent the match cut from feeling orchestrated, you can blend it into the visual language of your film. For Sixty Seconds, we placed it alongside the various top-down shots, smash zooms, and smash cuts.

Editing The Match Cut

Editing a match cut can be as simple as cutting these shots back-to-back and away you go. If you wanted it to be pixel perfect, you could always adjust them slightly in post.

But, honestly, it doesn’t need to be pixel perfect. What actually makes a great match cut is the use of complementary sound design. For Sixty Seconds, I layered up a few things.

Sound Design

Basics.

  • Atmos: int./ext. Room tone throughout the whole film. Quiet, so you’ll want to hear headphones for this part.

  • Foley: clothing foley, bomb handling foley, and manual handling foley

Added Sound Design Elements. 

  • Impact. Crescendos up, hits, and fades out. So it builds up to the match cut, re-enforces the edit point. 

  • Whoosh: this layers up on top of the impact, smoothing it out, adding some low end bass.

  • Police Sirens, panned from right to left, and faded out. This gives us an audible clue that the scene has moved on. In the script this would be “moments later”.

But what I think really helps is the way we used the music in the scene.

This is the track we used, called Rapid Motion from Artlist.io. Links down below. You can hear the ticking in the music, very on theme with the film.

So when we actually shot this shot, we played the track on set as a sort of a metronome, so every page turn is in time with the music.

With every put together, it sounds like this...

Honestly, I’m really proud of that shot. I think it looks & sounds mint, it’s got a good pace, and it has that little extra spice in the edit to give it The Film Look.

If you want to see more about Sixty Seconds, we have a Special Features pack with over 3 hours of behind the scenes content, including an on-set experience, a director’s commentary, and even some tutorials to follow. Links down below.

And finally, we want to thank our supporters over on Patreon. Your support means we don’t have to sell our souls to sponsors! If you are interested, we have a community discord channel, bonus videos, and 1-on-1 feedback sessions. Links below.

Thanks for watching. Bye!

📼 Watch Sixty Seconds!

🎬 Check out our Special Features! https://www.thefilmlook.com/store/sixty-seconds-special-features

📺 Check out our Patreon! https://www.patreon.com/TheFilmLook

📺 Match Cut by Celia Gomez

🎵 Need music for your films? Try Artlist. Get 2 months free! https://bit.ly/artlistfilmlook


DISCLAIMERS:

Some of these links are affiliate links, if you purchase gear via these links The Film Look will receive a small commission, but there will be no additional cost to you. Thank you!

Have we MAXED OUT the Sony a7s? | Patreon Bonus Video

In this Patreon Bonus Video, we discuss the limitations of the Sony a7s among other things!

📺 Check out our Patreon!

https://www.patreon.com/TheFilmLook


DISCLAIMERS:

Some of these links are affiliate links, if you purchase gear via these links The Film Look will receive a small commission, but there will be no additional cost to you. Thank you!

How to shoot a Short Film: from START to FINISH!

In this video, we guide you through the process of making a film from start to finish!

Transcript from the episode:

“Hello crew, it’s Rob and Rich from The Film Look where we drop filmmaking knowledge bombs.

Today we are going to run you through the entire timeline of how we made our short film Sixty Seconds so you can see exactly what went into making it and take some tips with you on your next project.

THE FILM LOOK.

We are going to be referencing our short film Sixty Seconds a lot in this video. If you haven’t seen it, there are links below, and cards at the end.

To sum it up, it’s a cheesy action-comedy about a ragtag bomb defusal duo. Think: “Hot Fuzz meets Die Hard meets Men in Black”.

Let’s go back to the very beginning of this project. 2 years ago.

Pre-Production

The Idea

The idea for this film actually erupted from a video review we had planned for an LED studio light. The light had a bunch of pre-programmed lighting effects, including a cop car mode, so we had planned on shooting a short scene for the review.

First thing’s first: we needed an idea! Speaking of ideas, it might be a good idea to subscribe now before we get into the meat of the episode. Go on then!

Dramatic Recreation. Rob and Rich brainstorm the idea in front of a pinboard, with moody detective lighting.

Rob

So. Cop car lights. A film about police?

Rich

Detective Rusty Johnson?

Rob

Let’s bring him back. He could be arresting Rip Off Ricky.

Rich

Nice. What's he been stealing?

Rob

Bombs. 

Rich

The COPS are defusing a bomb!

Rob

Nice. So what does this bomb look like?

Rich gets an idea. Whip pan to the editing room. 

Rich

Keep talking and nobody explodes. One person defuses, everyone else has a big-ass manual which they have to rifle through to find the right page to defuse it.

Rob (points at the screen)

I like all the different modules.

Rich

Simon Says. Wire-cutting.

Rob

And a timer…(epiphany) They’ve only got Sixty Seconds to defuse it!

Are you thinking what I’m thinking!?

Rich

The countdown lasts comically longer than it would in real-time just like every bomb defusal scene in every film ever made?

Rob

You son of a bitch!

The Script

We spoke for a bit longer, and it wasn’t as dramatic, but once we had a solid idea, Rob went away and wrote the first draft of the film.

One of the main inspirations for this film was The Last Action Hero. Both me and Rob loved this film as kids, and we wanted to make Sixty Seconds lie on that border between action and satire. 

We actually broke down the filmmaking elements of The Last Action Hero on our podcast if you wanna have a listen some time.

https://open.spotify.com/episode/04T7PE0WF2v206TCxT9iUk

Honestly, that film doesn’t get the credit it deserves. You can find the podcast on all podcasting apps including iTunes and Spotify, or just ask Google or Alexa to listen to “the film look podcast”.

Once we had a draft, we could throw ideas around and edit the script. It’s a lot easier to work on something which already has words. As they say, you can’t edit a blank page. So even if your first draft is a bit naff, don’t worry, it’s there to be molded. 

Just please promise us you don’t go off and shoot your first draft! Send your script to some other writers or filmmakers, and ask for feedback on it. Think about your story arc, the characters and their motivations, and whether this is something you can afford to shoot. 

We have a playlist of writing videos if you want to know more:

https://www.youtube.com/playlist?list=PL4_xFfQs1s6B2cuYNVI5TwkDjGhqhAvIC

…and if you are really struggling to find decent honest feedback, we offer feedback sessions as part of our Tier 3 on Patreon.

https://www.patreon.com/TheFilmLook

So basically, nine drafts later, we had something which we were happy to make.

Casting

The casting process for Sixty Seconds was actually quite simple. We had two roles, and we had pretty much written the roles for two actors in particular who we had worked with within the past. 

The hardest part was convincing them to accept the role! They...they just said yes. It was actually really easy. 

If you’ve never cast actors before, we have a video all about that:

The Location

If you’ve been following this channel for a while, you will probably know that we somehow always lose access to a location just as we are ready to shoot. So for Sixty Seconds, we wanted to find a location that we KNEW we could hold down.

We considered a few different locations and even shot some test footage but the problem with these locations was the lack of facilities.

No parking, no toilets, no space for equipment, no electricity, not even a space for the cast & crew to eat their lunch! These things are just as important as the look of the set. You have to make everyone as comfortable as possible - especially if this is a film shot by unpaid volunteers! 

So, we went back to the drawing board and thought about where else we could shoot the film.  

We had recently taken over the studio space by the previous landlord and had knocked down some walls to make our studio bigger! 

Then we realised it was right under our noses! 

“Let’s shoot the film in the studio!”

The Set

We wanted the set to resemble a floor in a multi-story office building that was currently under construction. 

Something like an unfinished floor in Nakatomi Plaza in Die Hard.

So we filled the room with cardboard boxes, paint cans, and various other construction site/renovation stuff. The only money we actually spent on the set (if you don’t include our own studio renovation) was on the caution tape which held most of the set together.

Test Shoot

We set up a bunch of lights and shot a range of test footage to see which look we liked best. We made adjustments to the set once we had a camera pointed at it. 

Having all this free time to play around was good fun, but a luxury you don’t always get, so we took full advantage of it.

Props

Sixty Seconds definitely has the most amount of props we have ever needed for a film and all of them are crucial to the plot. 

In our draft script, we had vague descriptions of the bomb modules. 

They said things like:

“In front of Dan sits a bomb. Glowing green, mashed together with parts from every type of electronic device. Different coloured wires connect each part together.”

So we made all the props, with attention to detail on their interactivity, making sure they could be “defused”. Then we re-wrote the script to match the interactivity of those exact modules.

Script Changes

At this point in time, the script was actually a year old and we had learned a lot more about scriptwriting. So here comes the script changes!

Firstly, the ending needed changing. It was vague, and not very cathartic. So we decided to re-write the finale to give it more BANG.

We also added some slower scenes into the script, to create a better sense of pace for the film. We wrote two more characters, a Police Chief Rusty Johnson, and a YouTuber called Cody Shwartz who makes YouTube tutorials on how to defuse bombs. These two roles were easy to cast.

Rehearsals

Once we had a script, a location, and props, it was time to start rehearsing with the actors. 

Get the actors together and simply perform the script. We like to go one step further and bring them on location (if it’s available, of course) and act it out, working on blocking throughout. We even grab a camera and try out some camera angles, but nothing concrete.

We workshopped the script with the actors; they tried different lines, added their own, and we basically played around with the script. Then we went and edited the script to include a bunch of these ideas.

Even though you have a ‘final draft’, the script still isn’t complete. Get your actors involved, they might have some great ideas to toy with that will make the script even better. 

If you don’t like their ideas, just tell them why you think the original way works better. They won’t be offended. Just be open to ideas at this stage. You never know what might come from someone else’s brain - and then when the film goes on to win loads of awards you can take the credit.

Storyboards

Before you shoot, it’s worth creating some storyboards. If you aren’t confident with a pencil, the next best thing is storyboarding with photos. If you can get your actors on set, that’s ideal.

But if they are busy, find a few friends to help out as stand-ins. Me and Rich took turns playing each character in the script.

Storyboarding this way helps you create a pre-vis. A super rough version of the film which includes most of the film’s elements. You can play with your composition and the camera movement, trying out different things and seeing what works best.

This is the best time to spend some time making mistakes and figuring out what you really want. 

When it’s time to shoot, you already have a “version” of the film shot.

Production Documents

Before we shoot a film we like to have a blueprint of how the film will be made. So much so, that if you picked up our production documents, you could make Sixty Seconds. 

In our docs folder, we had a completed shooting script, storyboards, a shot list, and a shooting schedule.

If you have storyboards, you can turn them into a shot list. And turn the shot list into a schedule. Bring a bunch of copies with you and give them to everyone on set so every person is on the same page.

In the Special Features pack on our store, you can also find copies of the production documents we created for Sixty Seconds with a walkthrough of how we used them. Link in the description.

Production

After all of the planning, it all comes down to this. THE SHOOT. With the help from our 1st Assistant Director, Sel, we sat down with all of our production documents and scheduled the shoot.

With a total of 12 pages and 75 shots, we scheduled 3 days to make the film. 

The Shoot

The 3 days it took us to shoot the film all blended into one, so luckily we had someone shooting behind the scene footage to remind us what happened.

We filmed for 2 days in a row over a weekend, then filmed the 3rd day the following Saturday. We tend to film on weekends so most people don’t have to take the time off work since this is a no-budget shoot.

The call time for each day was 9:30 in the morning, so not super early. Then we filmed for about 10 hours, with a couple of breaks and lunch, which is the most important part of any shoot to be perfectly honest.

Day One

On day one, it’s always great getting the crew and the cast together, sometimes for the first time. For Sixty Seconds we had a crew of 15 people. Read the credits to see what everyone did, we couldn’t have made the film without them.

When it comes to the shoot me and Rich split off and take dedicated roles. Rich takes the lead with the direction and I do the same with the cinematography.

Most of the time on set we rarely speak to each other. We’ve planned the film so extensively at this point that we are full steam ahead and don’t need to converse about every shot. 

Every now and then we will have a quick discussion about a shot if we need to solve a problem, but that’s about it. 

During the three days Sel, the 1st AD, ran the shoot. He kept us on schedule and told us when we needed to move on to the next shot.

By the end of day one, we’d shot 28 shots, 77 takes, which was four pages of our 12-page script. This meant we were on track for day two which started with the most technically challenging shot of the whole film.

Day Two

For this shot, which was shot 7R, we had three people operating five lights, one person spraying canned smoke and using a hairdryer to create wind, Rich spraying water into the actor’s faces for sweat and our 1st AD, Sel, shouting out the action to keep everyone in sync.

The shot runs for about 40 seconds, we did 8 takes, and we had 3 takes which all could have been in the film. We have a video coming soon which breaks down the lighting of this shot, so again subscribe if you haven't already.

Once we got this shot, we went to the beginning of scene 7 and started to shoot that. Shooting the last shot of scene 7 first meant our actors knew how far their performance would need to get to, and it also meant we were shooting the most energetic scene at the start of the day rather than the end. 

Between day 2 and day 3 we had a week to edit a rough cut of the scenes we’d shot. This meant we could show the cast and crew the direction we were going in, which gave us momentum for the 3rd shoot day.

Day Three

Day three went smoothly and we all got back up to speed straight away. We wrapped on both of our actors on slate sixty which was a nice coincidence considering this film is called Sixty Seconds if you didn’t already know. Links in the description.

When you hear the words “that's a wrap” it's a mixture of relief but it's also a little bit sad. Being on set shooting your film is the most stressful yet exhilarating part of making films, but you can’t be on set shooting forever. At some point, you have to sit down and chop it together. 

Post Production

Rough Cut

With the 3 shooting days complete Rich organised the footage and did a rough cut. To help find the tone and pace of the film, temporary music was added, some of which made it into the final film. 

This rough cut helped us see what we had, and we were happy with the way it had turned out so far. It was reassuring, which is kind of a weird feeling to have at this stage of the edit.

For the cast and crew, the shoot was over, but at this stage, we’d actually only shot about 80% of the film. The other 20% of the film are the many insert shots which we’d always decided to shoot without the cast. You don’t see the actor’s face in any of these shots, so as to not waste their time, me and Rich performed the actions and shot the inserts ourselves. 

Since we owned the location, we kept the set intact. And since it was literally a step away from the editing room, we could pop in and shoot what we needed.

The Edit

Now we had everything, we both took turns to edit the film. I did the first rough cut and when I couldn't look at the edit anymore, Rob took over and did a cut based on my edit. 

He called it the short back and sides edit since he’d chopped about 30 seconds off the duration.

Then our friend Ed, who was the Best Boy onset and has worked on all of our films, did his own cut which was shorter by another 30 seconds.

Then we watched all of the cuts and worked out what was good and bad, then made a pick n’ mix cut which combined the best of the different versions. 

Additional Photography

We are in post production at this point, but we still had a couple of more scenes to shoot. We’d planned to shoot a different opening sequence where we started outside with the briefcase, following it into the building.

These shots would have required a crew of at least 6 people and a group of extras, then Covid-19 happened. 

We don’t want to make a big deal about this, it is part of the timeline for this film but in the grand scheme of things, it only pushed the release date back. We hope everyone’s keeping well.

At this point, the picture was 96% complete. 2% of that was going to be the new opening sequence and we had no idea if we would be able to film that. So we decided to cut it from the film and concentrated on getting the other 2% which was the police chief scene.

We managed to shoot this in a couple of hours with a crew of 2 and the help from a C-Stand arm to boom in the microphone. 

A couple of days after this, the UK went into full lockdown. So we closed up the studio, Rich took Suzie home and we locked the picture over Discord. 

Rich also took his sound equipment and all of the props and costumes home, and turned his bedroom into a foley den.

Foley & SFX

The first thing was deadening the room. So I set up a C-stand with an arm and draped my bed cover over it to use as a sound blanket. 

Then it was a case of recording multiple versions of every single prop in the film, in sync with the actions of the characters on screen.

This took around 3 days to complete, and then it was onto sound editing and mixing, which took at least 3 weeks of solid work. 

(it actually took a lot longer because I was stuck at home in lockdown, pulling my hair out with cabin fever, but anyway!...)

Picture and Sound Lock

After 122 saved versions of the film, 116 audio layers all mixed in stereo, and when it was safe to do so, Rob watched the film for the first time in about 4 months. 

Dramatic Recreation - Setting up the projector watching the movie

I hadn’t heard any of the sounds Rich had edited in by this point, and it was like watching the film for the first time. 

Rob

It feels like I’m watching the film for the first time.

Everything was embedded into the film. Each prop felt real with the different foley and sound effects. It was like watching a proper movie.


Rob

It’s like watching a proper movie.


We made a few tweaks after watching it a bunch, but the picture and sound were locked.

There were a few minor visual effects shots in the film, mostly consisting of bomb timers being painted out or painted back in, to match continuity. 

We knew all along that the timer was excessively long, that's the joke! 

But we knew someone would be looking to see if it counts down correctly, which we made sure it did. 

Then we colour graded the film, but to be honest, we only added contrast and a few other little tweaks to the image because we got the look we wanted in-camera. So we just needed to make the image pop.

My Rode Reel

At this stage the film was done, but it still took us another six months to release it to the world. 

The UK went into many different lockdowns, we decided to do another studio renovation, and we also entered Sixty Seconds into the My Rode Reel competition. 

To enter myrodereel, we had to cut 5 minutes out of the 8 minute cut to meet the 3 minute maximum length the competition required. It took us a few weeks, but we managed to do it and we thought it worked. A lot of the character development was lost, but all of the action and overall plot of the film was retained.

We didn’t end up winning anything, but it was great to enter into the competition.

If you would like to see the 3 minute cut of the film, let us know in the comments below and we might upload it onto the channel.


Special Features

Another reason it took a little longer for the film to come out is that we’ve made a special features pack which we’ve been mentioning throughout this video.

It’s got over an hour of behind the scenes from the three-day shoot, a director's commentary, a deep dive into the screenplay, and all of the production documents from the film. 

The special features pack is in our store right now:

https://www.thefilmlook.com/store/sixty-seconds-special-features

Sixty Seconds

If you’ve made it this far, that’s it. Thanks for sticking with us and living through the entire timeline of our short film Sixty Seconds. 

We will be making videos delving deeper into how we made each element of the film so if you haven't already, consider subscribing, and let us know in the comments if there is anything, in particular, you would like us to talk about.

And for the final time, links to the special features pack are in the description. If you can and want to purchase the pack, we will be truly grateful for your support and helping us make films and videos like this.

Aaaaaaaaaaaaaaaand bye!

DISCLAIMERS:

Some of these links are affiliate links, if you purchase gear via these links The Film Look will receive a small commission, but there will be no additional cost to you. Thank you!

Building a Perfect Short Film Shoulder Rig

Hello Crew, it’s Rob from The Film Look where we drop filmmaking knowledge bombs...AND…We’re going to build the shoulder rig used to shoot our short film Sixty Seconds so you can take some inspiration for your camera rig as everyone's setup is a little different.

Heres all of the parts that make up the rig which we collected over the last few years.  A lot of parts are from Small Rig and you can find links to everything in the description. 

To help build the rig, I’m going to be using this filmmaking multi-tool. It’s replaced the box of random Allen keys because it has the 4 main Allen Keys most rig part-use. It also has a flat head for the tripod screws, T25 and a Philips head bit. You can even store a couple of spare screws on it.

Here are all of the parts we used to build the shoulder rig -

Small Rig Multi-Tool - https://geni.us/VOmG

Camera Sony A7s Mark 1 - https://geni.us/L4mL5xi

A7s Cage - https://geni.us/6792f

Universal 15mm Rail Support System Baseplate - 2272 - https://geni.us/mhkFKW

SmallRig Shoulder Mount - 1954 - https://geni.us/Okj4QO

Rig Screws - https://geni.us/dwUvf7h

SMALLRIG Rosette Extension Arm - 1870 - https://geni.us/DHHGHOa

Rosette Handle - https://geni.us/ybBJagr

Rosette Wooden Grip - https://geni.us/A8JA

Wooden Grip + Record Button - https://bit.ly/35CPirV

Top Handle Record Button - https://geni.us/x91Eex

Monitor - AndyCine 4K - https://geni.us/MAKo5Gp

SMALLRIG EVF Mount Monitor - https://geni.us/Fz6E

15mm Rods - https://geni.us/9j9fyG

SmallRig 15mm Rod Clamp with Rosette Mount - https://geni.us/l8Q5Bbc

Wireless Follow Focus

Tilta Nucleus-M - https://geni.us/gIWEqTu

Dummy Battery - Sony A7s - https://geni.us/MmlH

DC Extension Cable - https://geni.us/qb83AB

NPF Battery - https://geni.us/jecVAk

NPF to T-Tap - https://geni.us/mYs6G

V-Lock Plate - https://geni.us/uZi1

V-Lock Battery - https://geni.us/8D3S07e

HDMI to HDMI Micro - https://geni.us/kfPcBxT

SMALLRIG HDMI Cable Clamp - 1822 - https://geni.us/K7ecK

Cable Ties - https://geni.us/yD13


DISCLAIMERS:

Some of these links are affiliate links, if you purchase gear via these links The Film Look will receive a small commission, but there will be no additional cost to you. Thank you!

Sixty Seconds Special Features!

Need more Sixty Seconds goodness? We made a Special Features package with over 3 hours of bonus content!

https://www.thefilmlook.com/store/sixty-seconds-special-features

While shooting the film, we had a team of Behind The Scenes shooters capturing every moment.

This was the first time we created a marketing campaign prior to the release of the film. Using the timer prop which features heavily in Sixty Seconds, we created a countdown of videos to tease the film upon its release.


DISCLAIMERS:

Some of these links are affiliate links, if you purchase gear via these links The Film Look will receive a small commission, but there will be no additional cost to you. Thank you!

The Making of Sixty Seconds | On-Set Experience

Witness the ins & outs of a 3-day indie film shoot! Join us as we shoot our film Sixty Seconds!

While shooting the film, we had a team of Behind The Scenes shooters capturing every moment.

This was the first time we created a marketing campaign prior to the release of the film. Using the timer prop which features heavily in Sixty Seconds, we created a countdown of videos to tease the film upon its release.


DISCLAIMERS:

Some of these links are affiliate links, if you purchase gear via these links The Film Look will receive a small commission, but there will be no additional cost to you. Thank you!

Sixty Seconds | Short Film

Sixty Seconds is a cheesy action-comedy about a ragtag bomb defusal duo. Daniel, a stuck-up straight shooter, gets paired up with Stu, a loosey-goosey renegade. Think: “Hot Fuzz meets Die Hard meets Men in Black”.

While shooting the film, we had a team of Behind The Scenes shooters capturing every moment.

This was the first time we created a marketing campaign prior to the release of the film. Using the timer prop which features heavily in Sixty Seconds, we created a countdown of videos to tease the film upon its release.


DISCLAIMERS:

Some of these links are affiliate links, if you purchase gear via these links The Film Look will receive a small commission, but there will be no additional cost to you. Thank you!

Flex Lights: A Filmmaker’s Secret Weapon | Falcon Eyes RX-18TD Review

Imagine if you had a light which could serve as a large soft source…

Was thin enough to fit into small spaces like the briefcase scene in Pulp Fiction…

AND was light enough you could tape to the ceiling...

This versatile flex light from Falcon Eyes gives you loads of creative possibilities. Today we’re going to show all the ways YOU can use this light, getting you one step closer to achieving the film look. 

If you are new here, my name’s Robert, and this is Richard. We make films on this channel and then share everything we learned so you can make YOUR films bigger, better, and create something which you are proud to share with the world. Today I want to talk about the Falcon Eyes RX-18TD.

Flex-LED-Review-1.gif

The Falcon’s eyes 18TD can give you 4 different types of light source. First, we have a barebones setup with no modifiers which will give you a harder light source. Next, we are going to use the dome modifier.

This helps to spread and soften the light. Next, we are going to attach the frame and diffuser.

This is modifier is creating a large soft source, but it is giving you a lot more control as the frame is stopping the light from spilling out of the side. Next, let’s attach the honeycomb grid. 

This is the setup we have been using the most. We are still getting a large soft source, but with further control over the light as the grid is cutting the light from spreading further.

Since the main selling point of this light is that it is thin and you can roll it up with it still working, let’s try and fit it into some small places.

To power the light in the suitcase we used a vlock battery which attaches to the back of the power unit. The light can also be powered via a plug if you have a more permanent light setup. For the scene we also wanted a warmer light glowing from the suitcase so we change the colour temperature from 5600 kelvin to 300 kelvin, and set our cameras white balance to daylight.

Flex-LED-Review-v2.gif

With the light being so thin and flexible it can fit into these small places, but this is only made possible because the power control unit is separate from the light source, which is where you control the colour temperature and brightness. 

Companies like Aputure and LEDGO have a similar system of having the control unit separate, but they all make the power cables to short so you still need to find a place to mount control unit right next to the light. Which kind of defeats the purpose of having them separate. 

Luckily Falcon Eyes does sell extension cables and we have been using the 6-meter one so we could feed the cable along with the ceiling, into the back seat where we can get access to the controls.

Flex-LED-Review-v3.gif

----

We like to give nicknames to our equipment, for example, we’ve got “Stevie”, then [Insert Name], and the newest addition “Leela” for our Insta 360 camera which was suggested by one of your subscribers Kristian Foreman. 

Let us know in the comments below about what you would call this, we’ve come up with Flex Arm Stong and Mr Fantastic, the one with the most thumb up will be the winner. 

-----

Flex-LED-Review-v4.gif

The location for our next short film is an INT. WAREHOUSE - NIGHT which is actually just our studio dressed up to look like a warehouse.

Throughout the film, we have loads of RGB lights that flash different colours, have police car effects, lightning mode, basically, we are going to use every RGB effects light we own to make it look as crazy as we can.

These light will change throughout the film depending on what our characters are doing, but the one light which will stay consistent is the RX-18TD we have rigged up to the ceiling. 

Since the flex light is so thin and lightweight, we used one of these scissor clamps to attach it to our drop ceiling in the studio. Even with attaching the included softbox and honeycomb grid, the light still weighs nothing.

If you don’t have a ceiling like this you can take off the bracket and tape it to the ceiling.

Flex-LED-Review-v5.gif

We have this Astora panel which has a similar output but is much heavier than the falcon eyes,  which you can tell that by just looking at them. 

To get an average panel up there, a couple of crab clamps and a magic arm is going to cut it. To boom the light overhead you are going to need a c-stand, arm, and a couple of sandbags to take the weight, all which costs more money.

----

Having the ability to flex the light isn’t a gimmick it really does work, but it’s not how we have been using it the most. Because the light is so big, and the inclusion of the softboxes and grid you get a really nice soft light, with the added benefit of being able to rig it with ease.

As an indie filmmaker having equipment that can adapt to shoot in many different situations is key, so if you are looking for a light panel we would highly recommend Falcon Eyes RX-18TD, it’s got The Film Look approval.


📼 Check out these handy videos too!

🎬 All the Gear we used for this episode!

Falcon Eyes RX-18TD: https://geni.us/aBvfwS

Falcon Eyes 6 metre Extension Cable: https://geni.us/60hXD9

Sony A7s: https://geni.us/TlulUbD

Our Favourite Lights: https://geni.us/OurFavoriteLights

Gaff Tape (black): https://geni.us/dj3JhK

Gaff Tape (coloured): https://geni.us/ysIntJw

Scissor Clamp: https://geni.us/6q2TBzE

Black Wrap/Cine Foil: https://geni.us/GPFzOK

Light Stands: https://geni.us/SsG0n

Aputure Mini 20s: https://geni.us/bA6Fz

Zyhuin Crane 2 [handheld gimbal]: https://geni.us/ZNRV

AndyCine a6 Plus [monitor]: https://geni.us/GGNO

Shower Curtain (diffusion): https://geni.us/davES

Spring Clamps: https://geni.us/BpTIw6f Magic

Arm: https://geni.us/iWuyoyD

Crab Clamps: https://geni.us/iGwXcsx

Astora LED Panel: https://geni.us/TScVT

C-Stands: https://geni.us/9Nel17h


DISCLAIMERS:

Some of these links are affiliate links, if you purchase gear via these links The Film Look will receive a small commission, but there will be no additional cost to you. Thank you!

Getting THE FILM LOOK with a 360° Action Camera | Insta360 ONE X Review

As narrative short filmmakers, we’ve always been in two minds whether to get a 360 action camera. We were never sure if they could be used well for narrative filmmaking.

Most of the footage you see online is all travel videos, vlogs, and tech demos. They all look great, but what about traditional filmmaking with actors, crew, and sets?

When Insta360 asked if we wanted to try out the ONE X, we thought this would be a perfect time to answer the question:

Does a 360 action camera have what it takes to give you the film look? Let’s find out!


📼 Check out these handy videos too!

📺 How to support the channel

🚀 bit.ly/artlistfilmlook - The music you heard in this episode is from Artlist. Click the link to receive 2 extra free months on when you purchase an Artlist subscription!

🎧 Listen to our Podcast!

iTunes: https://goo.gl/hikhGF

Android: https://goo.gl/fmsp4s

📞 The Socials

Website: http://thefilmlook.com

Twitter: https://twitter.com/TheFilmLook

Facebook: https://www.facebook.com/TheFilmLook

Instagram: https://www.instagram.com/thefilmlook


DISCLAIMERS:

Some of these links are affiliate links, if you purchase gear via these links The Film Look will receive a small commission, but there will be no additional cost to you. Thank you!

Realistic Reverb: How to Mix GREAT Foley & ADR for Films

Learn how to re-create the genuine reverb of your film location with special guest Mark Edward Lewis of CinemaSound.com so YOU can become a post-production audio God!

For more in-depth knowledge, check out: https://www.cinemasound.com/

Need Footstep Sounds? https://www.thefilmlook.com/store/footsteps-sound-pack-mega-bundle


📼 Check out these handy videos too!

📺 How to support the channel

🚀 bit.ly/artlistfilmlook - The music you heard in this episode is from Artlist. Click the link to receive 2 extra free months on when you purchase an Artlist subscription!

🎧 Listen to our Podcast!

iTunes: https://goo.gl/hikhGF

Android: https://goo.gl/fmsp4s

📞 The Socials

Website: http://thefilmlook.com

Twitter: https://twitter.com/TheFilmLook

Facebook: https://www.facebook.com/TheFilmLook

Instagram: https://www.instagram.com/thefilmlook


DISCLAIMERS:

Some of these links are affiliate links, if you purchase gear via these links The Film Look will receive a small commission, but there will be no additional cost to you. Thank you!

Every Filmmaker Struggles to Make Films

Making films takes time; hardships, struggles, and setbacks are a rite of passage for every indie filmmaker. We wanted to share everything that has happened in the last year with our channel and our upcoming film projects.


📺 How to support the channel

🚀 bit.ly/artlistfilmlook - The music you heard in this episode is from Artlist. Click the link to receive 2 extra free months on when you purchase an Artlist subscription!

🎬 In case you missed it

Pocket 4K Review: https://youtu.be/q5bH1runF-U

SmallRig Cage: https://youtu.be/qI34s4mEklk

LEDGO RGB FX Light: https://youtu.be/_ML9dFIoKEU

🎧 Listen to our Podcast!

iTunes: https://goo.gl/hikhGF

Android: https://goo.gl/fmsp4s

📞 The Socials

Website: http://thefilmlook.com

Twitter: https://twitter.com/TheFilmLook

Facebook: https://www.facebook.com/TheFilmLook

Instagram: https://www.instagram.com/thefilmlook


DISCLAIMERS:

Some of these links are affiliate links, if you purchase gear via these links The Film Look will receive a small commission, but there will be no additional cost to you. Thank you!

🎤 FOOTSTEP SOUND PACK | 🎬 NOW ON SALE! 75% OFF!

Our FOOTSTEP SOUND PACK is now on sale!

The Film Look FOOTSTEP SOUND PACK features over 200 sounds, on 9 surfaces, in 6 types of footwear, giving you a plethora of available sound types to choose from when mixing the sound for your film.

All sound effects have been recorded in a low noise environment giving you a clean, loud sound for every single footstep. They have also been recorded as dry as possible, meaning there is no reverb baked into the sound so you can add reverb in the mix to replicate the scene on screen perfectly.

These sounds have been exclusively recorded as “singles”, meaning each step is completely individual so you can cut in and match up the steps without having to worry about creating more space between the sounds.

Every single set of footwear of every single surface has multiple performance types: light, standard, heavy, heel-to-toe, shuffles, and jumps. These have been created so you can match the performance of the actors on screen.

Is your character walking? Standard is all you will need. Are they running? Maybe go for heavy to match the high impact!

As well as creating this pack, we have also create a short series of videos showing you how we setup and recorded the footsteps, so if you want to create your own library of footsteps, go ahead!

The first video in the series shows you how to setup a DIY Foley Pit: a small pit for dumping your surface materials so you can record in messy stuff in a clean way!


Get Cinematic: Add MORE to Your Set

Today we are talking about how you can actually make things look more cinematic by adding some mess to your set.

We’ve been watching the latest season of Stranger Things and we’ve been inspired to create something that gives off a messy, lived-in, retro vibe. Let’s break it down.

We began with the bare essentials of the scene. In the script, it reads:

“Rob is sitting playing video games”.

So we grabbed Rob’s NES, we hooked it up to an old TV, and sat him down on a beanbag.

Episode.00_01_42_11.Still002.jpg

But clearly, there is something missing from this scene. The shooting space is just too bare. It doesn’t look real. There’s not enough stuff!

So we grabbed everything we had which looks old, retro, and domestic, and started layering things into the frame, starting with the background.

The bookshelf is a good start already, but we re-arranged the visible shelves, placing a foam finger, a super 8mm camera, and a picture frame from The Breakfast Club, making the shelves look a bit more informal and hitting that 80s vibe.

Episode.00_02_02_12.Still003.jpg

Then we needed to put something on the bare wall. We grabbed a poster from one of our films, Backstage, and stuck it up. Thankfully, the poster is already designed to look like it’s from the 1980s, so this was an easy one.

We popped a floor lamp in the background to light up the poster and bookshelf, and it also comes in handy for the lighting setup. 

Episode.00_02_26_01.Still004.jpg

More on the lighting setup down below!

Lastly, we needed to hide the door to our editing room. So we wheeled over our costume rail and literally just placed it in front of the door. 

We decided to bring the costume rail into the mid-ground on an angle. This closes the space a bit more, making it feel cosier. 

Episode.00_02_56_09.Still005.jpg

We also piled up some plastic crates on the other side of the subject. This fills the space, but it also hides the extension cable and the light stand in the shot.

If you are struggling to keep your equipment out of shot, the next best thing is to hide it with props and set dressings!

We had a pile of magazines laying around so we threw them into the frame (from a distance they look a bit like comic books), and we even topped the stack of magazines with a few old cigarette boxes to make it feel even more lived in.

We placed in the phone, a necessary prop in the script.

The last mid-ground set dressing was a Persian rug. We wanted to give the floor some colour and texture, so this worked really well.

Episode.00_03_29_03.Still006.jpg

In the foreground, we had the TV on one side, so we placed in a stack of old suitcases, and an NES box on the other side to give us a natural vignette and a nice frame to shoot through.

We included a pizza box, and we stacked up the NES game boxes and another controller for even more mess.

Obviously, when you dress a set for a film, everything you pick should relate to the character, story, or scene. We have an episode on that:

Next up, we have the lighting.

Episode.00_04_11_07.Still008.jpg

Our key light in the scene is from the old TV. In order to manage the exposure levels, we motivated that light with a small LED FX light, set to a slow pulse. We set the exposure levels to the 70 range on the subject’s skin when the light is at its brightest.

That practical floor lamp we placed in the background earlier meant we could add a few extra sneaky productions lights into the scene using the floor lamp as the motivating source. 

Episode.00_04_32_00.Still009.jpg

We used an Aputure Mini 20 to give the subject a hair light, and we pointed our Astora LED panel towards the ceiling to bring up the ambient light in the scene.

Episode.00_04_37_07.Still010.jpg
Episode.00_04_51_20.Still011.jpg

Floor lamps are great to place in a scene if you do intend to bounce light off the ceiling because the direction of the light between both sources looks very natural. If you do add light into a scene, it’s always better to accompany it with a practical source to ground it in reality. Think to yourself “Where is this light coming from?”.


This video will show you how adding more mess and clutter into a frame can actually make it look more cinematic. By the end of this video, you will have an understanding of what you will need to dress your sets to gives your movies the film look.

📺 How to support the channel

🚀 bit.ly/artlistfilmlook - The music you heard in this episode is from Artlist. Click the link to receive 2 extra free months on when you purchase an Artlist subscription!

🎵 https://www.joelfamularo.com/colour - Use discount code "TFL" at checkout to get 20% off your LUTs purchase!

🎬 In case you missed it

How to use the 30 Degree Rule: https://youtu.be/Sud_wMH7L18

Backstage BTS: https://youtu.be/tSBta8DFwww

Action Hero Entrance: https://youtu.be/5C05jf4VQTU

Get the Film Look with Art Direction: https://youtu.be/6AUmcvAyTKU

How to Use False Colour: https://youtu.be/nncazai0Ei4

🎧 Listen to our Podcast!

iTunes: https://goo.gl/hikhGF

Android: https://goo.gl/fmsp4s

📞 The Socials

Website: http://thefilmlook.com

Twitter: https://twitter.com/TheFilmLook

Facebook: https://www.facebook.com/TheFilmLook

Instagram: https://www.instagram.com/thefilmlook


DISCLAIMERS:

Some of these links are affiliate links, if you purchase gear via these links The Film Look will receive a small commission, but there will be no additional cost to you. Thank you!