Pre-Production

How to Develop your Character's Backstory

Sam Mendez says “When you have a cast of 20, this means you have 20 other imaginations in the room with you. Use them.” And that’s exactly what we did on our latest short film Backstage.

Today we are going to talk about further developing a character’s backstory by hot seating our actors.

So this is how hot seating works: an actor will sit down and assume the role of their character. It’s up to you as the interviewer to ask them questions about themselves; their family, their work, their habits, pretty much anything which will build up a backstory.

Aja Improvising her Character Jenny.jpg

It’s a way to expand a character’s biography on the spot by having them improvise answers based on their current knowledge of the character.

You can ask the actors to play the role during the interview, or if improvising isn’t their thing, you can simply discuss the questions and answers together.

The first person we hotseated was Aja who plays the Stage Manager, Jenny. We gave Aja some basic information on the character such as her age, brief personality traits, and the purpose of her role in the film.

Aja as Jenny in Backstage.jpg

After that, it was up to her to fill in the blanks based on the range of questions we asked. Here are some examples:

  • How do you feel about the North East Wrestling Federation?

  • Tell us about your relationship with your parents.

  • Tell us about your relationship with the wrestlers.

  • Are you thinking of quitting? Do you have any other jobs lined up?

Straight away, Aja started to expand the character. She invented the relationship with Erik AKA The Medium and how she has known him since she was a child. Her father used to run the NWF and she would be involved in the activities from a young age, so she’s been around community centre wrestlers her whole life.

We didn't write that. Aja did! On the spot!

Aja Dodd as Jenny in Backstage.jpg

With added backstory information like this, Aja is able to more comfortably place herself in the shoes of the character, and give the character meaningful emotional beats in the film. And because we hotseated the character together, we both had an understanding of the character as a whole, which made directing her performance even easier.

We also hotseated Liam who plays Erik AKA The Medium. With Liam, his character was playing a character, so we actually hot seated both The Medium and Erik as separate personas.

Liam Angus as Erik in Backstage.jpg

Again, we gave Liam some basic information on the character, but left it up to him to flesh out role and make it his own. By leaving a few empty pages in the character biography the actors are able to insert their own information and in turn it helps them play a more convincing role.

Liam Angus as The Medium in Backstage.jpg

You can also use the technique of hot seating as a writer to expand your knowledge of a character you are writing. You may not put a character’s favourite cereal into the script, but it will help create a more rounded and realistic character as you are thinking further into the life of this imaginary person.

So next time you need a bigger backstory for a character, try hot seating.


This video was Sponsored By

🎵http://bit.ly/pb-happyfunkyday - Thanks to PremiumBeat for providing the music for this week's episode. Check out Premiumbeat.com to discover a huge range of exclusive royalty free music!


How to Develop your Character's Backstory.jpg

DISCLAIMERS:

Some of these links are affiliate links, if you purchase gear via these links The Film Look will receive a small commission, but there will be no additional cost to you. Thank you!
Costume Design 101

Getting The Film Look is more than just changing camera settings. Costumes are a massive part of creating a cinematic image and there are several key decisions YOU can make in order to help achieve unique and an interesting costume choice..

One of the biggest impacts you can make to the image of your film is your choice of costumes for your characters. Every fabric, colour, length, and design is telling the audience a very particular visual story which you have control over.

We certainly aren’t massive costume designers to any degree. But with the few projects we have made, we have discovered some key decisions which help aid the reasons for the design of a costume.

Realism is an important one. This doesn’t have to mean realistic in our world, but realistic in the film’s cinematic world.

Zombie film? The clothes need to be stained, weathered, and strictly functional.

Zombie-Film-Costume-Design

A 1980s Community Centre Wrestling Event? Well all of the wrestling costumes will be cheap and nasty, and the fashion choices will steer towards the image of that decade.

Next you want to think of the colour and and texture. Choosing a few strong colours will look better than a mix-mashed pallette.  And pick clothing which will pop from your background and environments too.

Costume Design - The Medium
Costume Design - Flyswatter - Wrestler

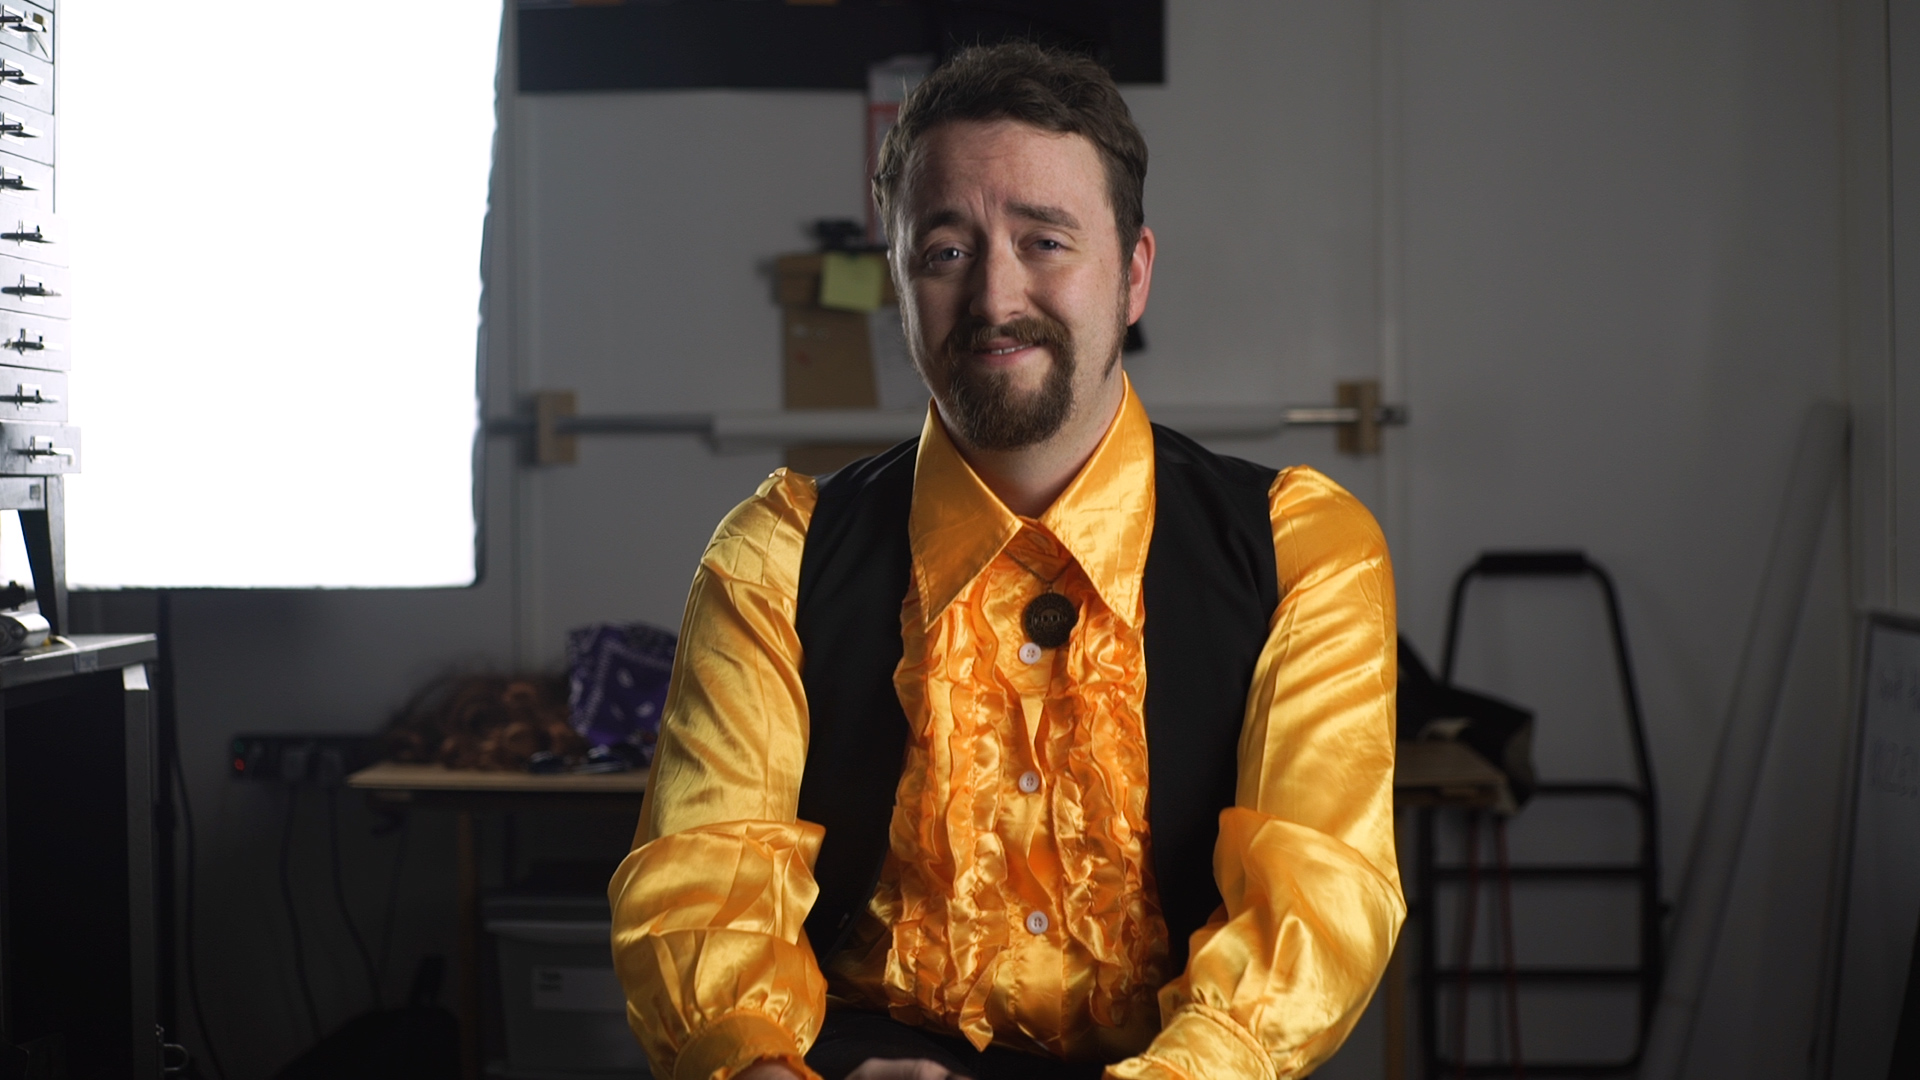
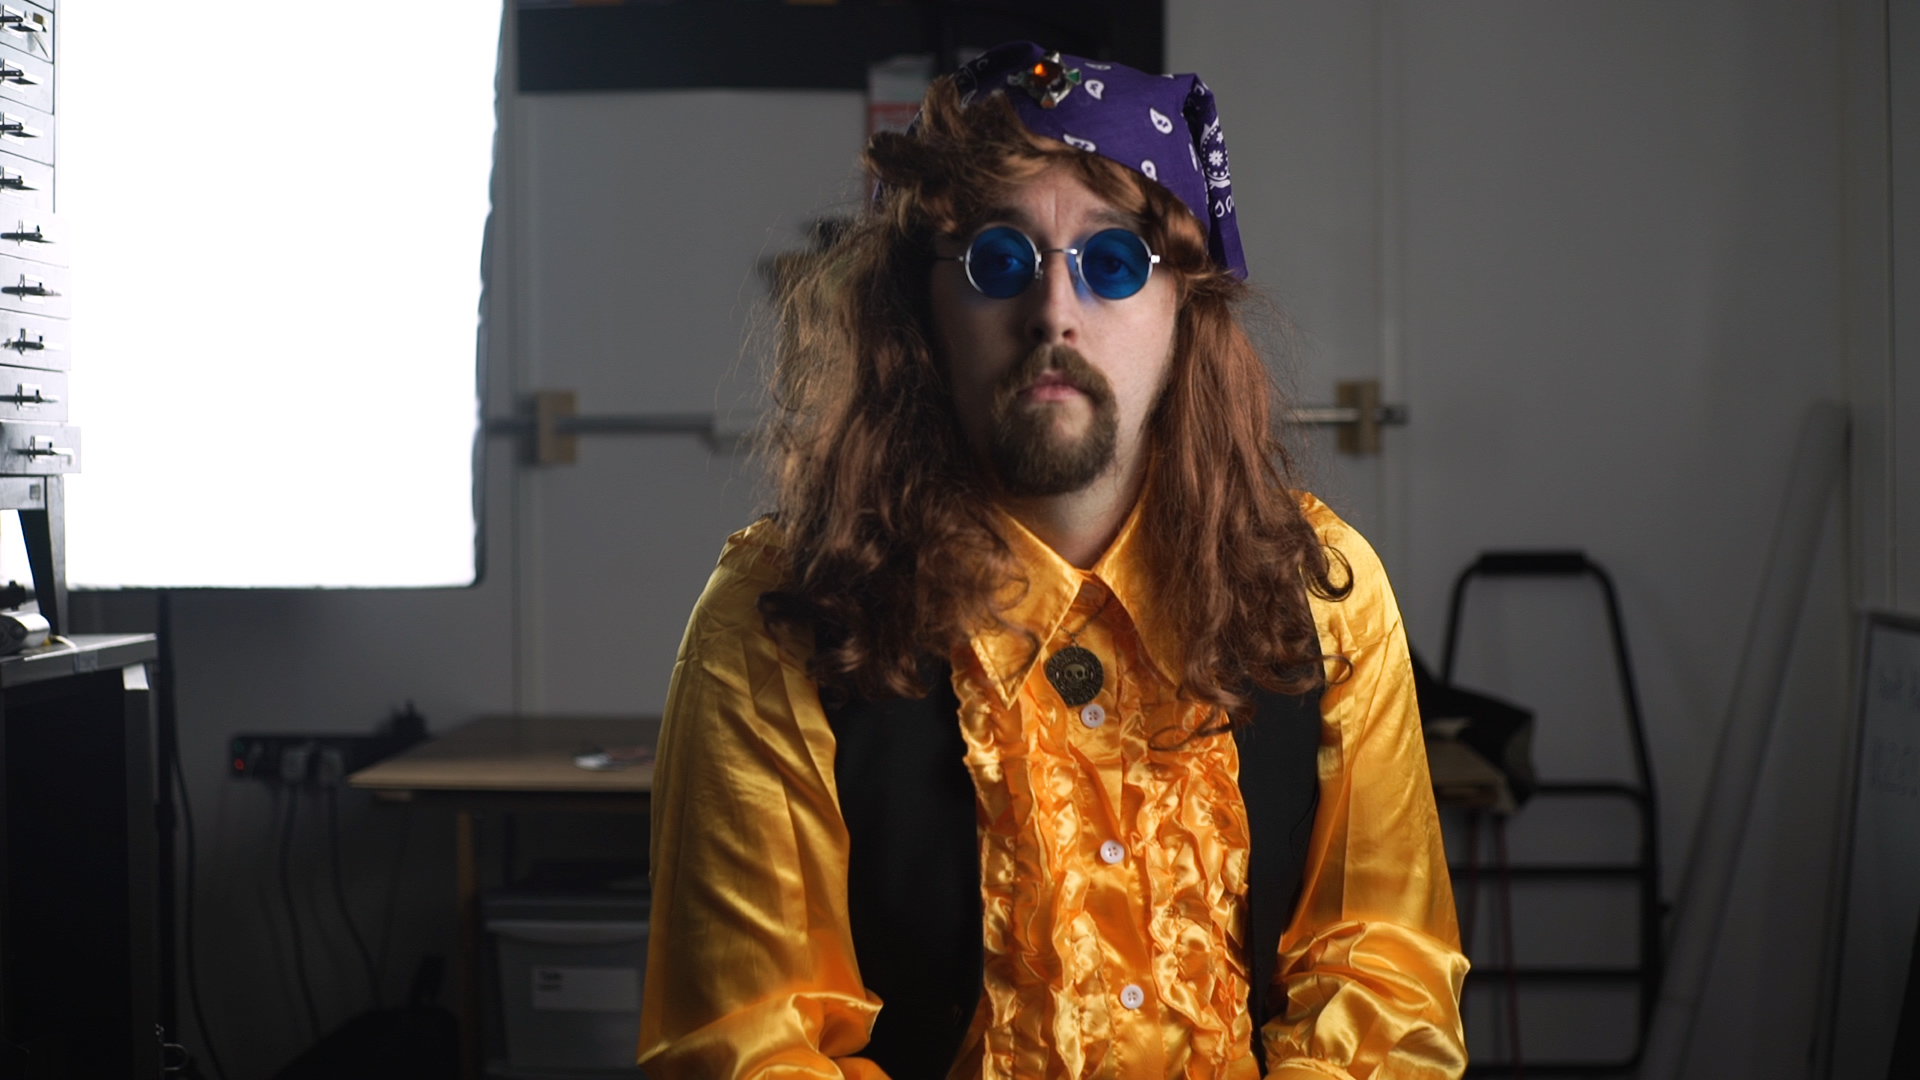
In our short film Backstage we choose a bright yellow shirt for our character The Medium, in order for him to stand out from the blue walls of the locker room. The Flyswatter another character in the film needed to contrast The Medium so we inverted his colours and went for majority black, with gold accents.

To go deeper into this, The Flyswatter’s casual clothing is typical 80s fashion, double denim. This gives a stark contrast between his comfort and discomfort in the film. His light blue denim clothing also helps him pop on screen in the dark car park.  

80s-film-costume-design

In films spanning over a large length of time you’ll need multiple costumes. So pick a style for each character and don’t vary it too much. This is evident in real life too.

I’m a sweater-guy. You will see no logos or brands on them, and they will usually be dark and wooly. The sweater is always accompanied by a pair of chinos. This is my costume design.

Rob-The-Film-Look

Richard is even more basic. He is a T shirt guy and it’s usually dark. If fact I am sure he only has 3 different T-Shirts. This is his costume which he rarely differs from.

Rich-The-Film-Look

So next time you are design costumes, put yourself in their shoes and try to figure out what purchases they would make in a clothing store, or how they have acquired their clothes. Then make the cinematic choice; pick contrast colours which help them pop on screen.

This will get you one step closer to achieving the Film Look.


This video was Sponsored By

http://bit.ly/track-the-funk - Click here to download this episode's track. Check out Premiumbeat.com to discover a huge range of exclusive royalty free music!


Costume Design 101.jpg

DISCLAIMERS:

Some of these links are affiliate links, if you purchase gear via these links The Film Look will receive a small commission, but there will be no additional cost to you. Thank you!

How to Dress a Set

So you’ve found a location to shoot our film but it doesn’t quite look or feel like how you see it in your head.

In order for it to suit the tone of your film you need to add some things, remove some things, and change some things. This week we are talking about set dressing.

Your choice of location is arguably just as important as the actors you cast. The location is an extension of what is happening in the foreground, and dressing the set to match the tone of the film, or a character's persona, will help you get closer to achieving The Film Look.

This is what the location looked like before we dressed the set for our short film Backstage which is set in a locker room at a local wrestling event in the 1980s.

Location-for-the-film-look-Backstage

The location we had access to was a boys bathroom in an disused school, and we had a lot of freedom to turn it into the set we wanted. Since the film is about a local wrestling event, the backstage locker needed to look old and dirty.

Our idea was that the event is being held at a rundown community centre ran by Mucky Mickey, who does not do a lot of cleaning. Since the school had been closed for about 6 years, it definitely looked old and we actually had to clean it a little.

If we went for a location that was new, say a gym's locker room, everything would have looked relativity new and it would have cost a lot of money to age it. We blocked out all of the windows to control all of the light.

We also did this to make it look like the windows have been broken and boarded up, further creating the idea that this is not the nicest of places.

You don't see it in the film but we added a sign on one of the cubicle doors that says - ‘Out of order - Broken Window’ to help sell the effect even more.

Since this is a community centre there would be posters, leaflets, and notices for other events that would be happening at the community centre.You can see these on the back of the door and the window boards. You can’t read what these say but it adds colour and depth into the background.

The-Film-Look-Set-Dressing

Since this is a wrestling match we added the event posters and flyers all of over the room, again to add depth. Since one of our characters is nervous about wrestling in his first match, we wanted to make sure the event posters are always looking at him.

Finally we added hair gel, deodorant, towels, wrestling costumes, and peoples clothing.

Dressing the backstage set took us about a full day to collect everything we needed, board all of the windows, and actually dress the set. By having such a flexible location we were able to dress and leave the set in a shootable condition a week before we started shooting.

This saved us time on the shooting day as we just needed to turn up and get started. Set dressing, at least from what we’ve achieved, is about telling a story at the location.

You want someone to be able to walk into the room and make a really good guess as to what this film or scene is about by dropping visual hints.

So next time you find a location, ask yourself what the location is currently tell you, and what you can do to make it tell the right story.


This video was Sponsored By

http://bit.ly/pack-emulsion - Make your video look like it was tailor-made for the silver screen with RocketStock’s film grain overlay pack, Emulsion!

http://bit.ly/track-rollthedice - Click here to download this episode's track. Check out Premiumbeat.com to discover a huge range of exclusive royalty free music!


How To Dress a Set

DISCLAIMERS:

Some of these links are affiliate links, if you purchase gear via these links The Film Look will receive a small commission, but there will be no additional cost to you. Thank you!


How to scout a location for filmmaking

The location you choose to shoot your film helps to create the world your film is set in, and it’s just as important as casting the right actor.

So how do you know if a location is the right one for your film?

Once your script is complete go through and break it down. Make a list of all the locations that you need - in fact, make a list of everything you need to make your film.

We made a video about breaking down your script which goes into more detail if you want to check out that video after this one.

Now you have written down all of the locations you need, ask yourself how you want each location to look and how much access you need to shoot the scenes in that location.

How do you need it to look?

The main location in the script for our short film Backstage is set in the locker room at a local community centre or boxing gym.

This is how we describe the location in the script -

INT. LOCKER ROOM - NIGHT

The backstage toilet has been used by many performers over the years, but from the graffiti on the walls and the flicking of the neon lights, this is not a classy venue.

When looking for this location we thought about contacting local gyms and sports centers as they would have locker rooms which are already set up.

The first problem we had with these types of locations is that they do not look run down, and it would be very difficult to make them fit the mood we needed for the film.

Access

The reason we could not change the look of these locations is the second problem we had which is access.

Access is very important when making low budget films as you are normally asking to use the location for free, and have to work around external time restrictions.

Local gyms and sport centres are normally used on a 24 hour basis, and if they are closed it’s during the night.

Our access would be very limited, before and during the shoot. If we needed to dress and undress the location after each shooting day, keeping the look of the set consistent would have been very difficult.

Don’t just use the first location that comes to mind, spend a little time searching for alternative locations.

If you need a living room, a friends or parents living room would be the quick and easy option, but if you need the location to look run down you need the time to make it look that way.

Can you set up the room, shoot everything you need, and return the location to its original state in the same day?

Backstage

The location we used for our short film Backstage was in a old school which now gets used by a church, they never use the area we wanted to use which was a boys bathroom, and we could get access to the location as many days as we needed before the shoot.

This was the 3rd location we looked at. The first was too small, the second was too new, and it might not look like it, but the 3rd was perfect.

Having these extra days before the shoot allowed us to clean, dress the set, test the lighting, and block the scene a few weeks before we shot the film.

This meant on the first day of principal photography we only needed to turn up with the camera and shooting schedule, giving us more time to work with the actors and start shooting on time.

We found the location by putting a call out on different local Facebook filmmaking groups.

Emily, the producer of the film, posted out to a bunch of pages and someone she knows, knew someone else, who knew of a place that might suit what we needed.This is why it is so important to collaborate with others as a filmmaker - you never know who knows someone that can help.

Location Scouting

The look of the location and available access are just two of the main things you need to think about when scouting locations for your film.

In the description below you will find a location checklist that has other things you should check when scouting your next filming location. Let’s film in the form.

Location Scounting Form 1.jpg

Script Location - For us it is Locker Room

It’s Scene - 1 of the film which is set at night and it is an interior. The actual Location was an old school and then we add the address which will come in handy later on.

Add the time of when you visited the location as at different times of the day the look and sound of the location may change.And finally add the contact details of the person that give you access to the location.

Next work out the dates you would like to use the location, this includes the number of preperation, shoot and how many days it will take you to reset the location. You can use this information to compare what access is available at the location.Make a note of how far away it is from our production office from the address you wrote down, for most people this is their home.

Location Scounting Form 2.jpg

When at the location draw a rough floor plan of the room and then make a note of what the room looks like.

Also, take photos of the room.

Does the room fit the tone of the film? This question maybe yes or no, but you should always be thinking about how much set dressing you need to do to make it match the tone of the film.

Location Scounting Form 3.jpg

Then work out do you have enough time to dress the set with the information you know from how much access you have.

Listen to the sounds that are in the location. Will you be able to record clean dialogue?

If not can you turn off anything that is making a noise like a clock or a fridge. If there are noises you can not get rid off can like cars going by, can you record your film at this location.

Finally make a note if there are places for people to park at the location. Is there enough room for you to store equipment, makeup artist, and are there bathrooms. This one is very important.

Location Scounting Form 4.jpg

So when you are scouting your next film location, use this checklist to evaluate whether the location is the right one for your film. Ask yourself what you need it to look like, how much access you’ll need, and be open to different places.

You never know, a disused boys bathroom might be the perfect setting for your film, it was for us.


This video was Sponsored By

🎵 http://bit.ly/interface-pack - "Interface", RocketStock's HUD element pack, offers you more than 400 futuristic elements compatible with Premiere Pro, FCPX, and AE. Discover it now!

http://bit.ly/track-rosegold - Click here to download this episode's track. Check out Premiumbeat.com to discover a huge range of exclusive royalty free music!


Location Scouting The Film Look

DISCLAIMERS:

Some of these links are affiliate links, if you purchase gear via these links The Film Look will receive a small commission, but there will be no additional cost to you. Thank you!


How to Break Down Your Script

Once you have your script complete, the next step is to figure out exactly what you need to make your film. It’s time to break it down!

A script breakdown is essentially extracting all of the necessary information from your script. To do this you need to read through your script and every time a location, prop, costume, or character is mentioned write it down.

This is the script for our short film Backstage. Let’s take a section from the script and break it down. Everything we highlight is something we need to make the film.

Breaking Down the script.jpg

Characters

For this scene we know we need to cast someone to play Jack who is The Flyswatter.

If you haven’t already, start to think about the characteristics your characters have, and then put a call out for to cast your actor. We cast an actor called Daniel Lemon to play Jack.

In this scene we also need a group of people to be wrestling fans that walk past the camera. This is a very small part for people to play, but we still need them to help tell the story. The wrestling fans in our film were just crew members.

Costume

To help identify them as wrestling fans, Ed the sound recordist is wearing the same bandana asThe Medium, a Wrestler in the film.

It shows he is going to the wrestling event to support him, and we threw in the the foam hand as this is a well known costume that people would wear when going to a sporting event.

Breaking down your script - Costumes.jpg

Since this film is set in the 80s all of the costumes need to fit that era, so we needed to dress Jack in washed out jeans and a multicolored jacket.

The final costume looked like this.

We did not go for a multicolored jacket because we managed to get this denim jacket which is actually from the 80s, and nothing says 80s like double denim. Having this list just made sure we had something for our actor to wear, which fit the tone of the film.

Props

The props we needed in this scene were wrestling leaflets, which are shown earlier in the film to help dress the backstage set, and help set the scene that this is a wrestling event. The black sports bag which he is carrying in this scene was also used earlier in the film.

Breaking down your script - Props.jpg

The 1982 Volkswagen Scirocco really helps to ground this film in the 80s. Having access to a vintage car like this upped the production value of the film and really helped put a time stamp on the film. We wrote it into the script because we knew we could get access to it for free, as it is owned by Richard’s Dad.

Breaking down your script - Props 1.jpg

Location

The location we needed was an exterior venue where a local wrestling match might take place. We chose a public car park with very few buildings and signs surrounding it.

We couldn’t point the camera towards anything that showed we were shooting in 2017, so this empty car park worked perfectly. We also chose this location because we were able to place the car under a flood light, reducing the time to set up complex lights.

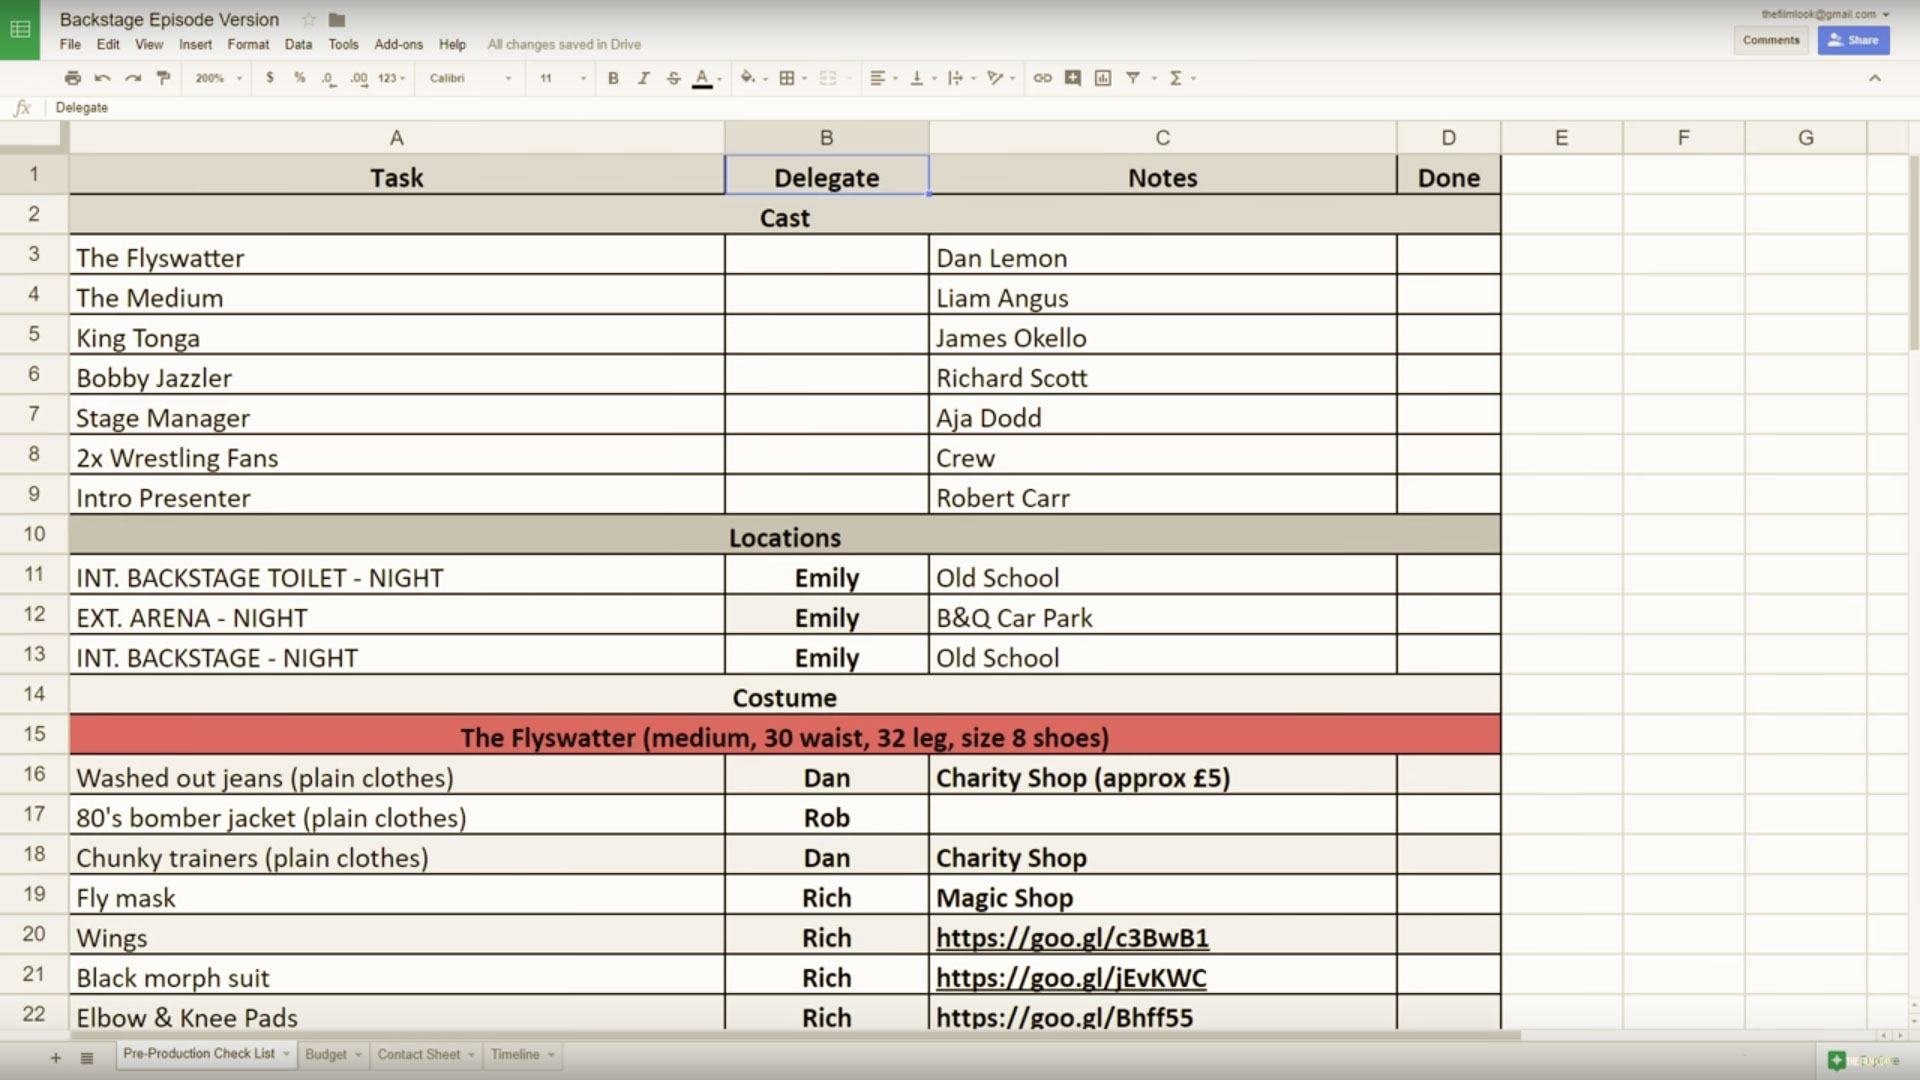
Once we’ve gone through the entire script we create an excel document to store all of this information. In the document we have 4 columns with the first being the task. This is where you put the name of all of your characters, props and costumes.

Excel - Breaking down your script

The next column is Delegate, this is where you can add the name of the person who is responsible for completing that task.  The 3rd column is for notes with information where you might obtain costumes or props. Finally the 4th column is where you can tick off a complete task.

When all of this section is green you have obtained everything to make your film.

Throughout this breakdown document we break down everything we need into different sections. We start by making a list of all of the characters we need to make the film, and when we have cast them, their name goes in the notes section.

Next are the locations we need, and when we have them complete the address and contact details of that location also go in the notes section. For the costumes, each character gets their own section so we know which character is wearing what item of clothing.

Finally we split the different props and set dressing into the different locations of the film. We do this so we know exactly what we need to take to each different location.

Breaking down your script Form.jpg

Having a document like this let's you and your production team know what you need to make your film on different days and at different locations. We use Google Docs to do this as it is free and everyone can see what they are responsible for.

Breaking down the script gives you a list of all of the pieces you need to make your film, it’s just up to you to put them together.


This video was Sponsored By

🎵 http://bit.ly/illuminate-pack - RocketStock’s light leak pack, "Illuminate", is sure to impress your viewers. Shot using digital cinema cameras in 4K, it’s an unbeatable way to lift your video to new, cinematic heights.

http://bit.ly/track-boundforglory - Click here to download this episode's track. Check out Premiumbeat.com to discover a huge range of exclusive royalty free music!


DISCLAIMERS:

Some of these links are affiliate links, if you purchase gear via these links The Film Look will receive a small commission, but there will be no additional cost to you. Thank you!


The Basics of Writing a Screenplay

YOU just came up with an awesome story that you want to turn into a film. What do you do now? It’s time to get that story written on paper - let's write a script!

A script (or screenplay) is the backbone of your film. It is the blueprint you’ll follow when you plan, shoot, and edit your movie.

In the last episode we spoke about storytelling, structure, and using “character, conflict, goal” to craft a compelling plot. Now it’s time to put that into practice and draft a formatted screenplay.

Firstly let's breakdown the elements of a screenplay using a page from our latest film BACKSTAGE.

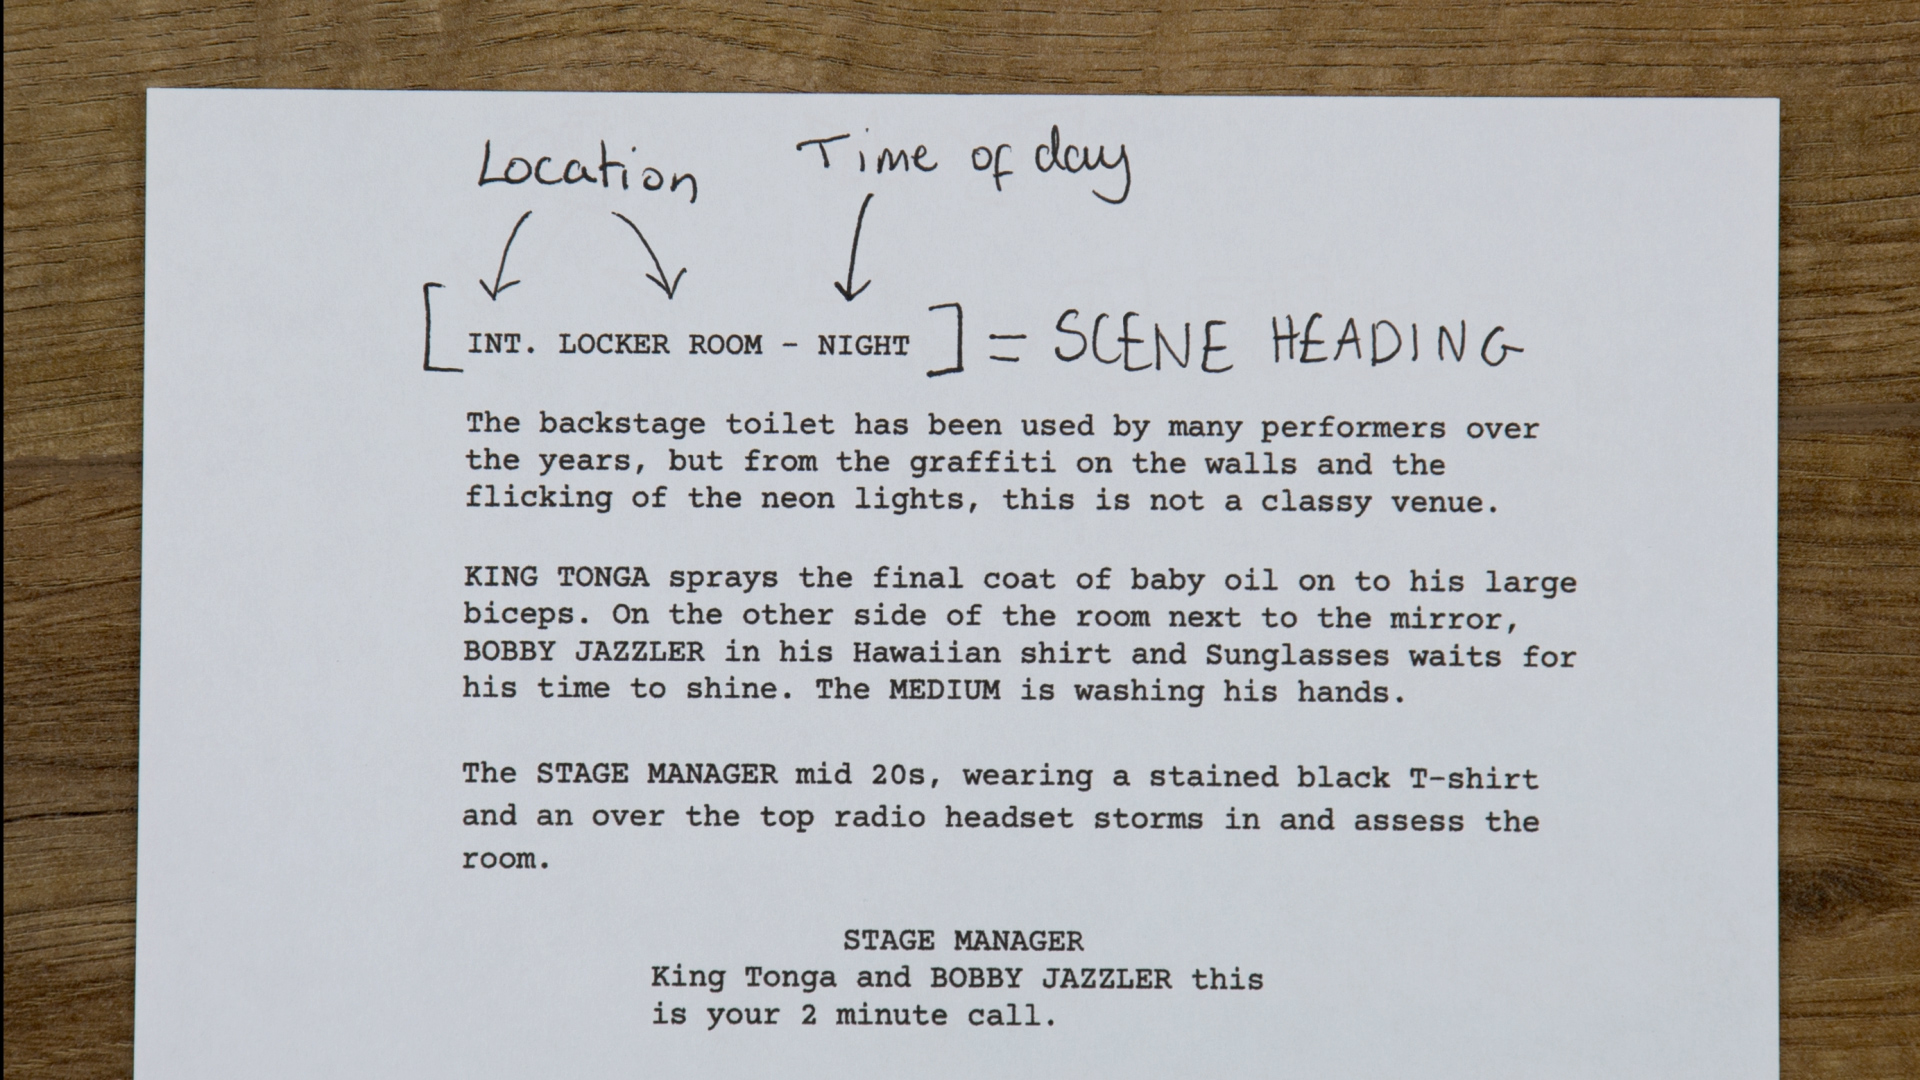
A scene always starts with a scene heading. The scene heading is there to tell you the location and time of day of the scene you’re about to read.

Screenplay - Scene Heading.jpg

It always begins with INT or EXT, signifying if the scene is inside or outside.

Then a brief description of the location, for example, LOCKER ROOM. This is followed by the time of day: DAY or NIGHT are standard descriptions, but if you plan on shooting in a certain light, you can be more specific like GOLDEN HOUR or DAWN.

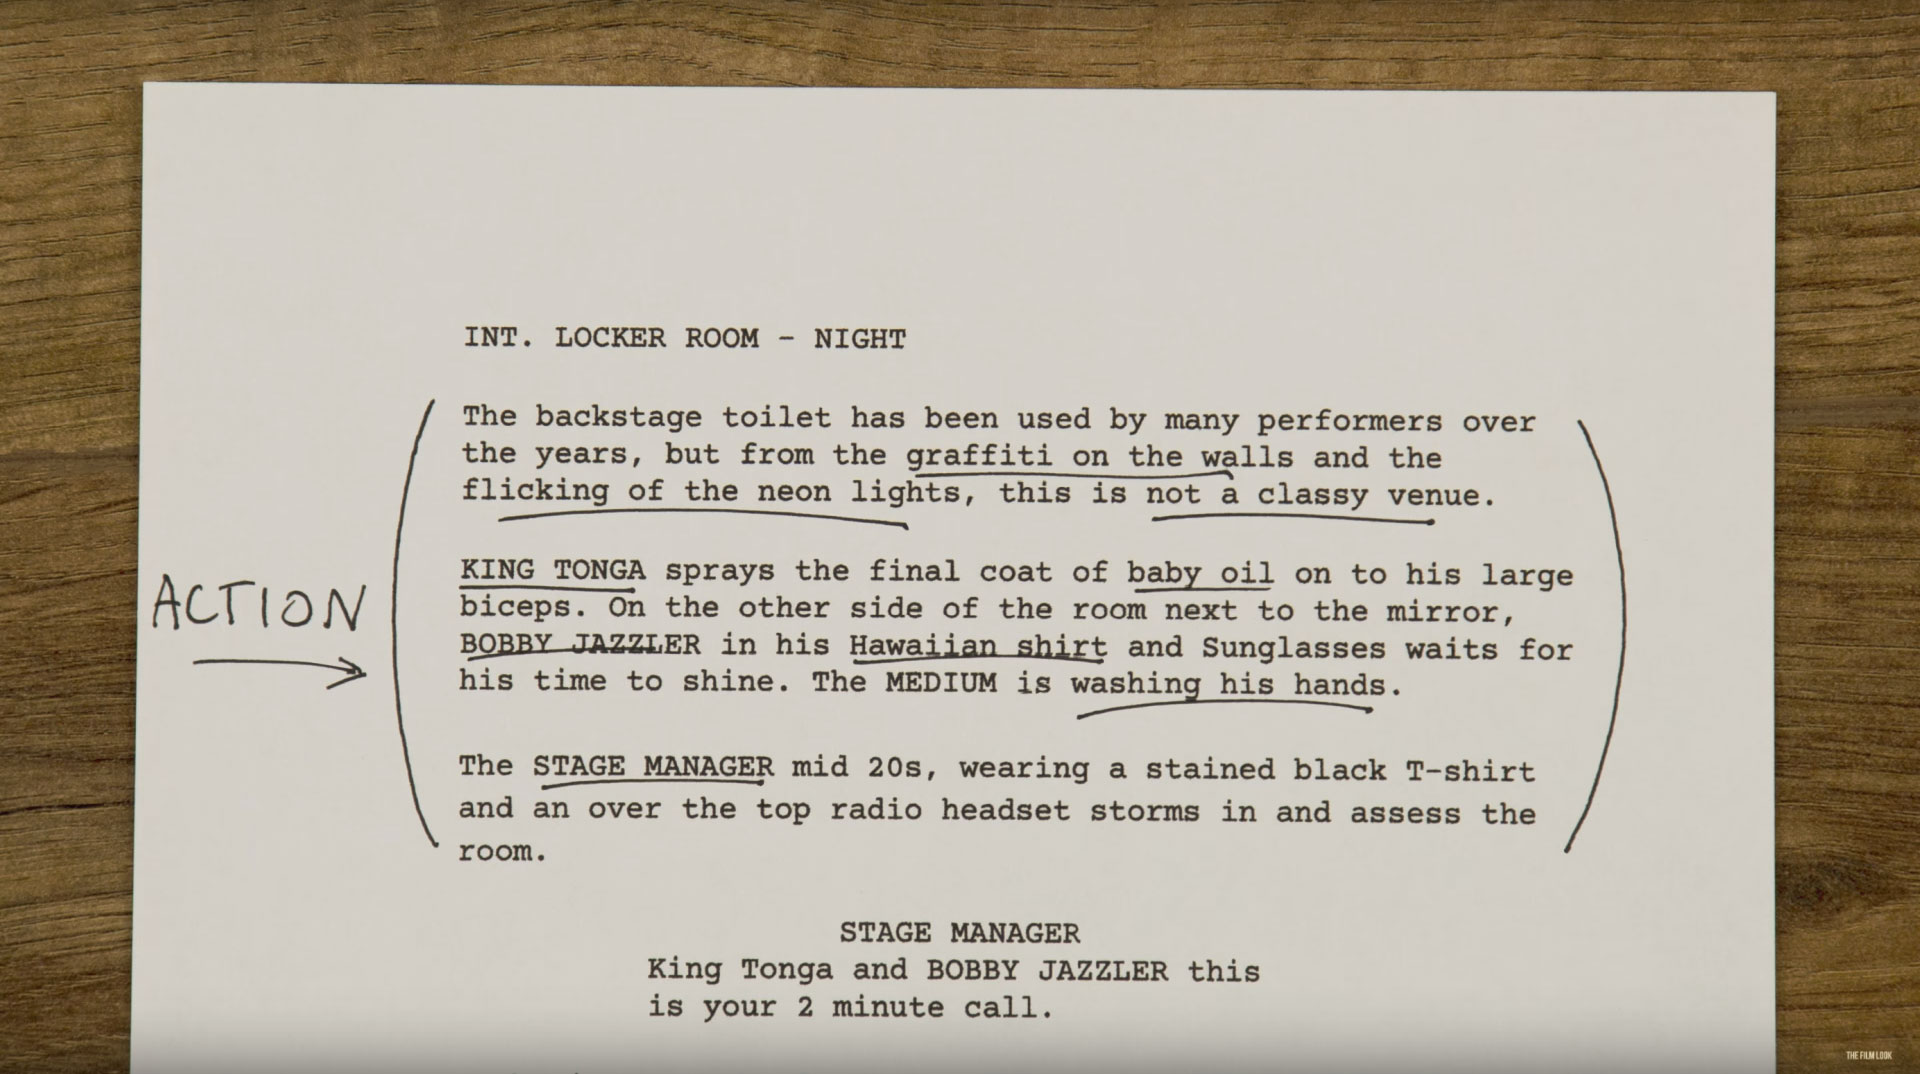
Next you have action; this is where you place the narrative description of events in the scene. This is the meat of the script, so in here you can describe characters, the events, the location and character interaction.

Screenplay Action

When a character is introduced for the first time, their name should be in ALL CAPS. This is to clearly identify that this is a new character who we haven’t seen yet.

After that, you should use sentence case with a capital letter at the beginning of their name.

Next up we have dialogue. It always starts with the character’s name in ALL CAPS in the centre of the page. Underneath you have the written lines in sentence case.

Screenplay - Dialouge.jpg

We won’t be getting into the nitty gritty of margins, spacing, and indents. With screenwriting programs such as Celtx and Final Draft doing all of this for you, I won’t bore you with it.

Next up we have parentheticals. These are seen as small descriptions placed between a character’s name and their dialogue inside parentheses. They have multiple uses, and all link to the dialogue being performed.

Screenplay - Parentheticals.jpg

They can be used to indicate where a line is being outputted, such as FROM PHONE.

They can be used if a line of dialogue needs to be performed a specific way, such as SARCASTICALLY.

They can also be used when a character is addressing a specific character in the scene, such as TO BOBBY JAZZLER.

You can SOMETIMES use parentheticals in replace of action, such as TAKES OFF GLOVES. This should only be used if the action can be written with very few words and is delivered during the line. Otherwise, break from the dialogue and write it out as an action line.  

Parentheticals should be used sparingly, and it’s common to see parentheticals unused in a script altogether. If you don’t know whether to use them, just leave them out.

There are a few more intricate details you can add to your script, but this is a good starting point to formatting. So now you know the basics, what's next?

It’s time to start filling out the action. If you have some brief notes from your beat sheet such as “a bunch of wrestlers are getting ready for the fight” you can now turn it into something more descriptive.

Just remember to avoid writing anything which is unfilmable; by this I mean anything which you can’t capture on screen.

Instead of writing “the locker room smells like a boys bedroom” describe the pile of dirty laundry in the corner. Try to limit describing anything you can’t point a camera or microphone towards.

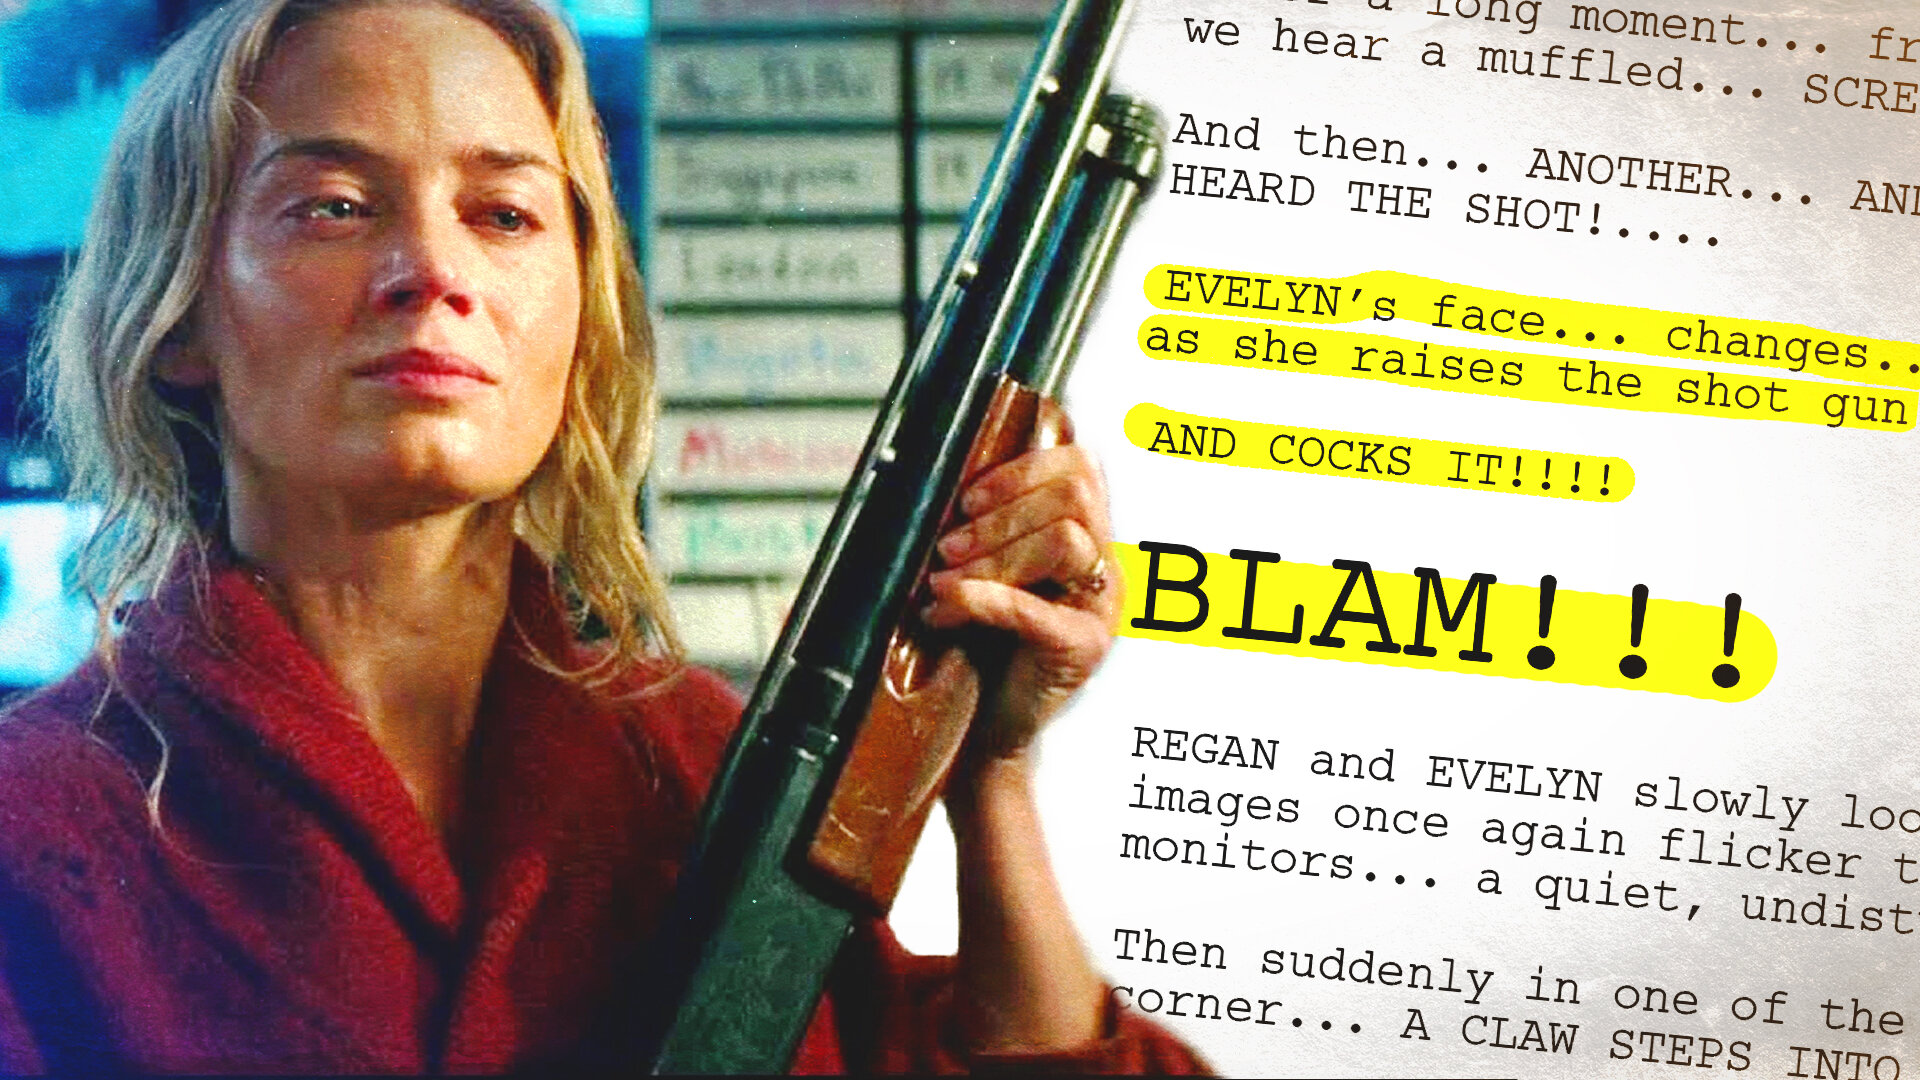
And don’t write anything which jumps into the role of another filmmaker. If you describe a character’s eye and hair colour, the casting director will be limited. If you start describing all of the camera angles, you’re doing the job of the cinematographer.

Once you have a finished draft, it doesn’t have to stop there! A first draft is a good starting point, but there will always be room for improvement. We have a bunch of videos on our channel on ways to improve your script writing. I’ve put a link to our Writing Playlist if you want to check them out.

And once you’ve written your first draft, print it off, and give it to someone to read. They might notice something you don’t.

Free screenwriting software I use: https://www.celtx.com/


This video was Sponsored By

🎵 http://bit.ly/track-rollthedice - Thanks to PremiumBeat.com for sponsoring the episode! Click here to download this episode's track. Check out Premiumbeat.com to discover a huge range of exclusive royalty free music!


Screenplay-Location-INT-EXT

DISCLAIMERS:

Some of these links are affiliate links, if you purchase gear via these links The Film Look will receive a small commission, but there will be no additional cost to you. Thank you!

Diffusion in a can!

We have a few different DIY methods to diffuse sunlight from a window. Most of the time we use a frosted shower curtain. It’s easy to pin up and does a solid job.

If the window is in shot we sometimes cut out sheets of greaseproof paper and place them inside the frame. This is handy for exposure correction, diffusion, or if you want to disguise the view from outside.

But what if the window has 17 visible panes? What if you want to diffuse the light and disguise the view outside and simply don’t have time to cut out every single sheet for every single pane?

Let me introduce YOU to Diffusion in a Can.

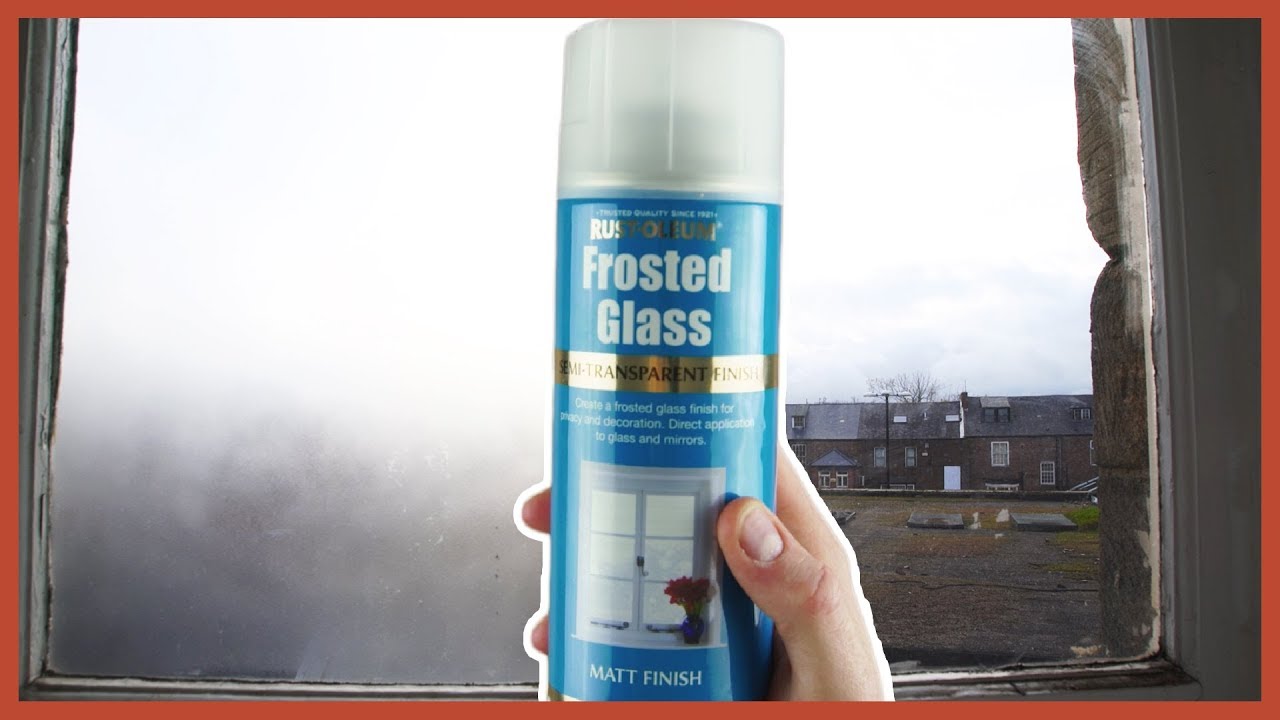
We went shopping for gold spray paint the other day and noticed this, Frosted Glass Spray Paint. Primarily used to give your windows a snowy Christmas feel, we wondered if it could work to diffuse a window from harsh sunlight.

Let’s put it to the test!

To give it a fair test; we blocked out the light in the studio, rigged up a pane of glass, shone an LED light panel through it and recorded a bunch of tests.

We’re going to get a little science-y now with f stops and exposure values. I put a link down below explaining it all if you want to learn more.

NO DIFFUSION is our reference test, and this gives us a light metre reading of f4, 1/48, ISO 200, 24fps, which is essentially same as our settings, so the shot is correctly exposed.

Different Types of Diffusion 1.jpg

Next we added the frosted shower curtain. You see here that it does a good job of diffusing the harsh light. The light metre gives us a change in value from f4 to f2.8 which means that it has halved the amount of light hitting Rob’s face. This is why our shot is a lot darker - we are not changing the camera settings for purpose of the test.

Different Types of Diffusion 2.jpg

Then we swapped the frosted shower curtain for the greaseproof paper. Again, this does a good job of diffusing the light and creating softer shadows. The light metre gives us a reading of f2, reducing the light twice as much as the shower curtain. We currently have a quarter of the light coming in compared to our first shot.

Different Types of Diffusion 3.jpg

The light metre is telling us that in order to expose the image correctly like our very first test shot, we need to add more light; either by changing the settings on the camera, or by adding a brighter light source.

Anyway, let’s see how the frosted glass paint did!

We sprayed several even coats of paint onto the glass and waited around 30 minutes to let it dry.

As you can see, the paint did very little to diffuse this light source. The only difference I can spot is the added roundness of Rob’s shadow. Evidently, the light metre read f4, so it did in fact retain most of the light coming in for our test.

No Diffusion in a Can.jpg
Diffusion in a Can.jpg

But this doesn’t mean it isn’t diffusing the light. So we tested it on a much bigger source!

For our second test, we put the greaseproof paper and the frosted glass paint head to head to see which can seamlessly diffuse the window faster.

Rob uses the roll of greaseproof paper, scissors, and some sticky tack.

And I used the frosted glass paint and some masking tape to protect the paint work.

The greaseproof paper method took 30 minutes and 41 seconds to complete 6 panes.

The paint and masking tape method took 16 minutes and 24 seconds to complete 6 panes - almost half the amount of time.

Rob admitted that to get a completely seamless effect with the paper, he would have been working on the panes for at least another half hour.

Diffusion-in-a-can1

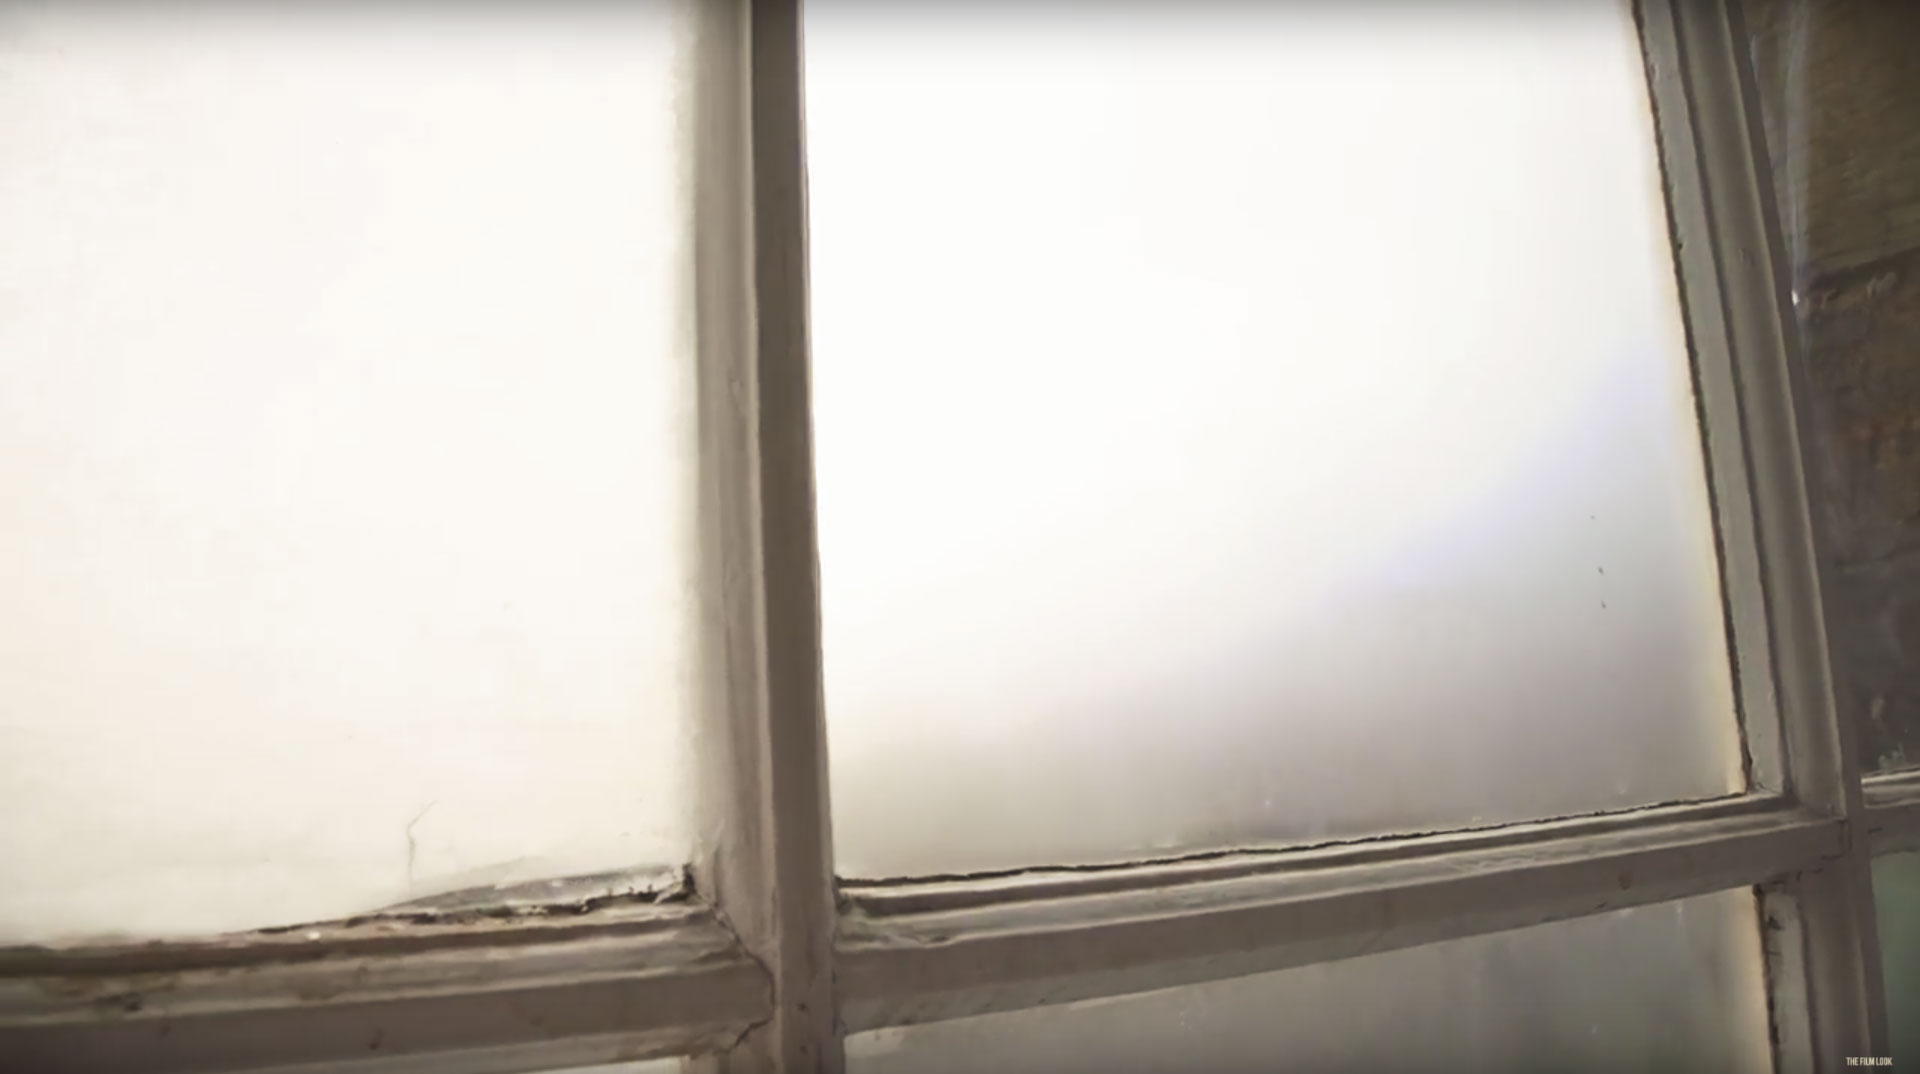
The paint is definitely the quicker option with a more seamless finish. To cap it off, here are some examples of the painted window panes diffusing the direct sunlight. The paint does diffuse pretty well given a large enough surface and a harsh enough light.

Window with No Diffusion.jpg
Window with diffusion in a can.jpg

At this point you might be wondering if frosted glass paint will do harm to your window. Let me show you just how easy it is to remove using a glass scraper and some window cleaner.

Simply spray the pane with a good amount of window cleaner and leave it to soak in for a few minutes. Then take your glass scraper, and with a little pressure, remove the layer of paint. If it’s wet, it should come off like a layer of cellophane. Grab a towel and wipe any residue off - it’s as simple as that.

Diffusion In a can Scrap.jpg

So if YOU need a quick, easy, and fairly cheap way to diffuse and hide the view of a window which is in shot, grab yourself some diffusion in a can.

You can find links to the frosted paint and the glass scraper we used in the description below.


This video was Sponsored By

http://bit.ly/corruption-pack - With glitchy overlays, distorted logo reveals and more, RocketStock’s "Corruption" is an ideal way to give your project a dramatic edge.

http://bit.ly/track-blue-blood - Thanks to PremiumBeat for providing the music for this week's episode. Check out Premiumbeat.com to discover a huge range of exclusive royalty free music!


Equipment Links

🎥 This episode's kit/gear/equipment:

US links:

Frosted Glass Paint: http://amzn.to/2gigxl5

Glass Scraper: http://amzn.to/2z7Kb0e

Masking Tape: http://amzn.to/2xFI1DJ


UK links:

Frosted Glass Paint: http://amzn.to/2yjbNTq

Glass Scraper: http://amzn.to/2xGPUOr

Make Tape: http://amzn.to/2xFCz8Z

diffusion-in-a-can

DISCLAIMERS:

Some of these links are affiliate links, if you purchase gear via these links The Film Look will receive a small commission, but there will be no additional cost to you. Thank you!

When you can't pay your Cast & Crew

When you are funding your own short films, it can sometimes be difficult to find the cash to pay your cast and crew a proper wage.

Instead we rely on volunteer filmmakers and actors. But, this doesn’t mean we can’t offer them something valuable for their time and effort. 

This is what you can do if you can’t pay your cast and crew. 

We aren’t professional filmmakers. Not in the traditional sense at least. We aren’t tied to a studio, we don’t have a budget, we don’t earn a wage from making movies.

We’re amateurs who fund our own short films because we love making them, and the cast and crew who are a part of those films are in the same boat. But this doesn’t mean we can’t offer back something valuable back to those who are helping out.

If you can’t afford to pay your actors, how can you re-pay them for volunteering their time?

Headshots are always a good choice. At our level, most of us are shooting on stills cameras in video mode. Headshots can be expensive for a struggling actor, so if you can shoot them free of charge, you’re on your way to paying back your debt!

DSC00011.jpg

If you want to go the extra mile, shoot a video monologue for them. It doesn't have to be over the top, but something sharp, well lit, and sounding good is a lot better than them shooting it on their phone. You never know, it might help them get their next job!

If they are volunteering in your film, give them a copy of it, without watermarks, for their showreel. In fact, offer to edit their showreel for them! Again, it doesn’t cost you anything but your time, which they gave up to help make your movie.

Paying-your-cast-and-crew

We make our own film posters too, so grab their signature for when they are famous, and print a copy for them to take home too.With crew, it’s a “I scratch your back” sort of deal. Again, if you can’t fork out the cash, make a note of what they sacrificed when they helped you; the hours they worked, the cost and distance of their travel, any kit they brought with them, and their value on set. When they need you, match their value.If you aren’t paying your cast and crew, you should make their time on your film as comfortable and as convenient as possible.

If they need to leave early, they leave early, don’t fight it.

If they can only start late, that's perfect, they start late and you get a few hours with them.

If they need a lift home and there is a car available, taxi them home.

Make their time helping you as simple as you can. Always work around them, not the other way around. If they have to go completely out of their way to help you, they might not bother next time you ask for assistance.

Best of all, feed people. Free food is great, and if you ask them what dietary habits they have beforehand, it's a lot easier to please them. Pizza is a staple student film cliche. But it's not always the best option, so find out what their favorite meal is, and grab the cook book.

When-you-can't-pay-your-Cast-&-Crew.jpg

And when you reach the stage when you CAN pay your cast and crew, remember those who did it for nothing, and maybe give them a call.


This video was Sponsored By

http://bit.ly/illuminate-pack - RocketStock’s light leak pack, "Illuminate", is sure to impress your viewers. Shot using digital cinema cameras in 4K, it’s an unbeatable way to lift your video to new, cinematic heights.

http://bit.ly/track-poolside - Click here to download this episode's track. Check out Premiumbeat.com to discover a huge range of exclusive royalty free music!


When you can't pay your Cast & Crew

DISCLAIMERS:

Some of these links are affiliate links, if you purchase gear via these links The Film Look will receive a small commission, but there will be no additional cost to you. Thank you!
Micro Documentary Breakdown

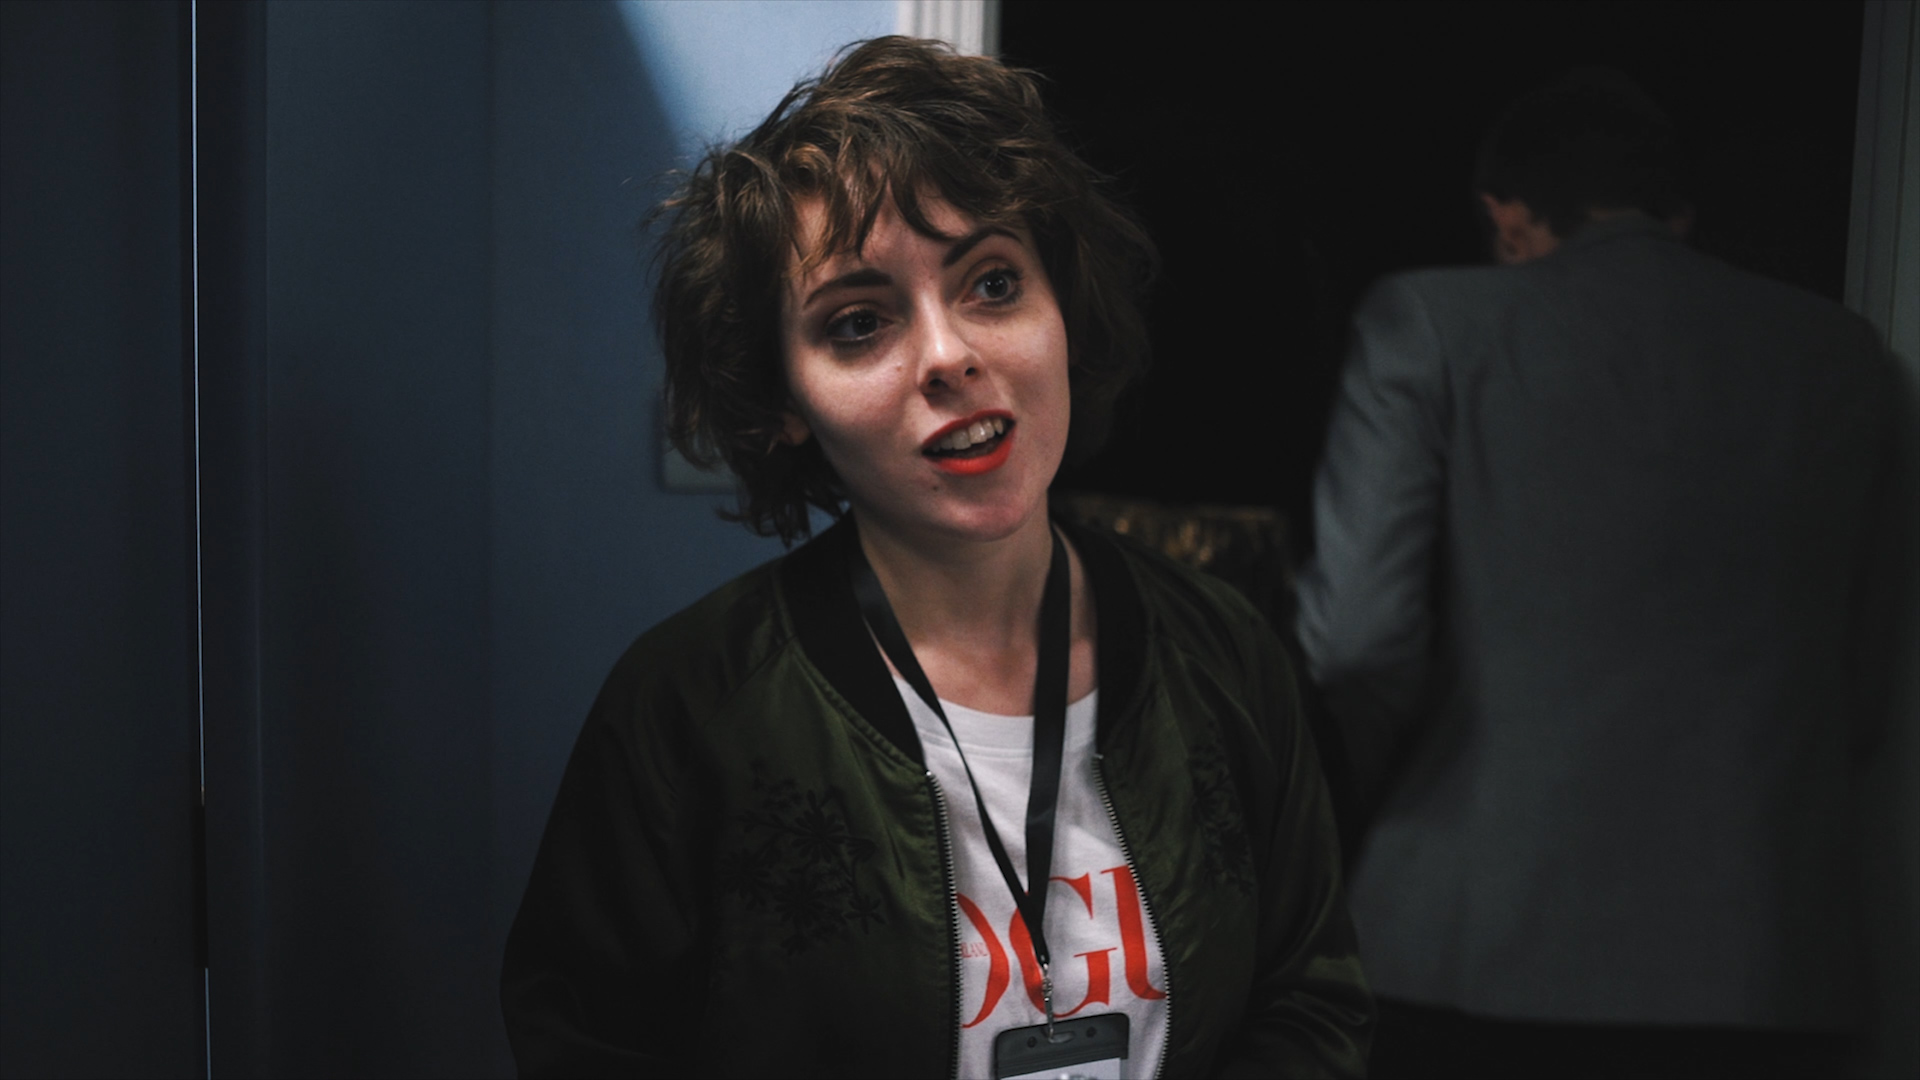
In this video we breakdown how we made our micro documentary Undeveloped. If you want to watch Undeveloped you can find it below.


This video was Sponsored By

http://bit.ly/track-solid - Thanks to PremiumBeat for providing the music in this week's video. Check out Premiumbeat.com to discover a huge range of exclusive royalty free music.


Micro Documentary Breakdown.jpg

DISCLAIMERS:

Some of these links are affiliate links, if you purchase gear via these links The Film Look will receive a small commission, but there will be no additional cost to you. Thank you!
Filmmaking Cliches: Should You Avoid Them?


Everybody wants to make unique and original films.

Nobody wants to be the person who made something predictable and cliché. But this sort of thinking can actually be detrimental. Instead of creating something you really love, you are putting all of your effort into making sure it ISN’T something!

In my personal opinion, I think cliché is something we should embrace in the early stages of our filmmaking careers.

Chances are, your new film is pretty similar to something someone has already made, and avoiding cliché is just another worry you don’t need to be concerned with.

Creating cliché or predictable films is a filmmaker’s way of stretching their muscles and trying out something they haven’t done before, using the existing material as a blueprint for a new exercise.

So in the spirit of this, we’ve compiled a list of indie film cliché moments. We’ve been guilty of many of these in the past, and we have even shot a few extras just for this video.


Filmmaking Cliches - Camera in the Fridge.jpg
Filmmaking Cliches - Zobie Movie.jpg
Filmmaking Cliches - Waking up.jpg
Filmmaking Cliches - No Story [Necuase Guns].jpg
Filmmaking Cliches - Unnecessary Travel Shots.jpg
Filmmaking Cliches - Lens Flares.jpg
Filmmaking Cliches - Melodrama.jpg
Filmmaking Cliches - Black & White.jpg
Filmmaking Cliches - Alcohol.jpg
Filmmaking Cliches - Dutch Tilt.jpg
Filmmaking Cliches - Blue Shadows.jpg
Filmmaking Cliches - Drugs.jpg
Filmmaking Cliches - Morning Routine.jpg
Filmmaking Cliches - Staring at your Reflection.jpg
Filmmaking Cliches - Shot from the trunk.jpg

If you’re having fun making your movie, and you’re learning a lot from the process, you’re making progress no matter what you’re shooting. You might not win any awards , but you’re one film closer to making your masterpiece.

Filmmaking Cliches Should You Avoid Them.jpg

DISCLAIMERS:

Some of these links are affiliate links, if you purchase gear via these links The Film Look will receive a small commission, but there will be no additional cost to you. Thank you!
Condense Your Shotlist | Season 2: Episode 7

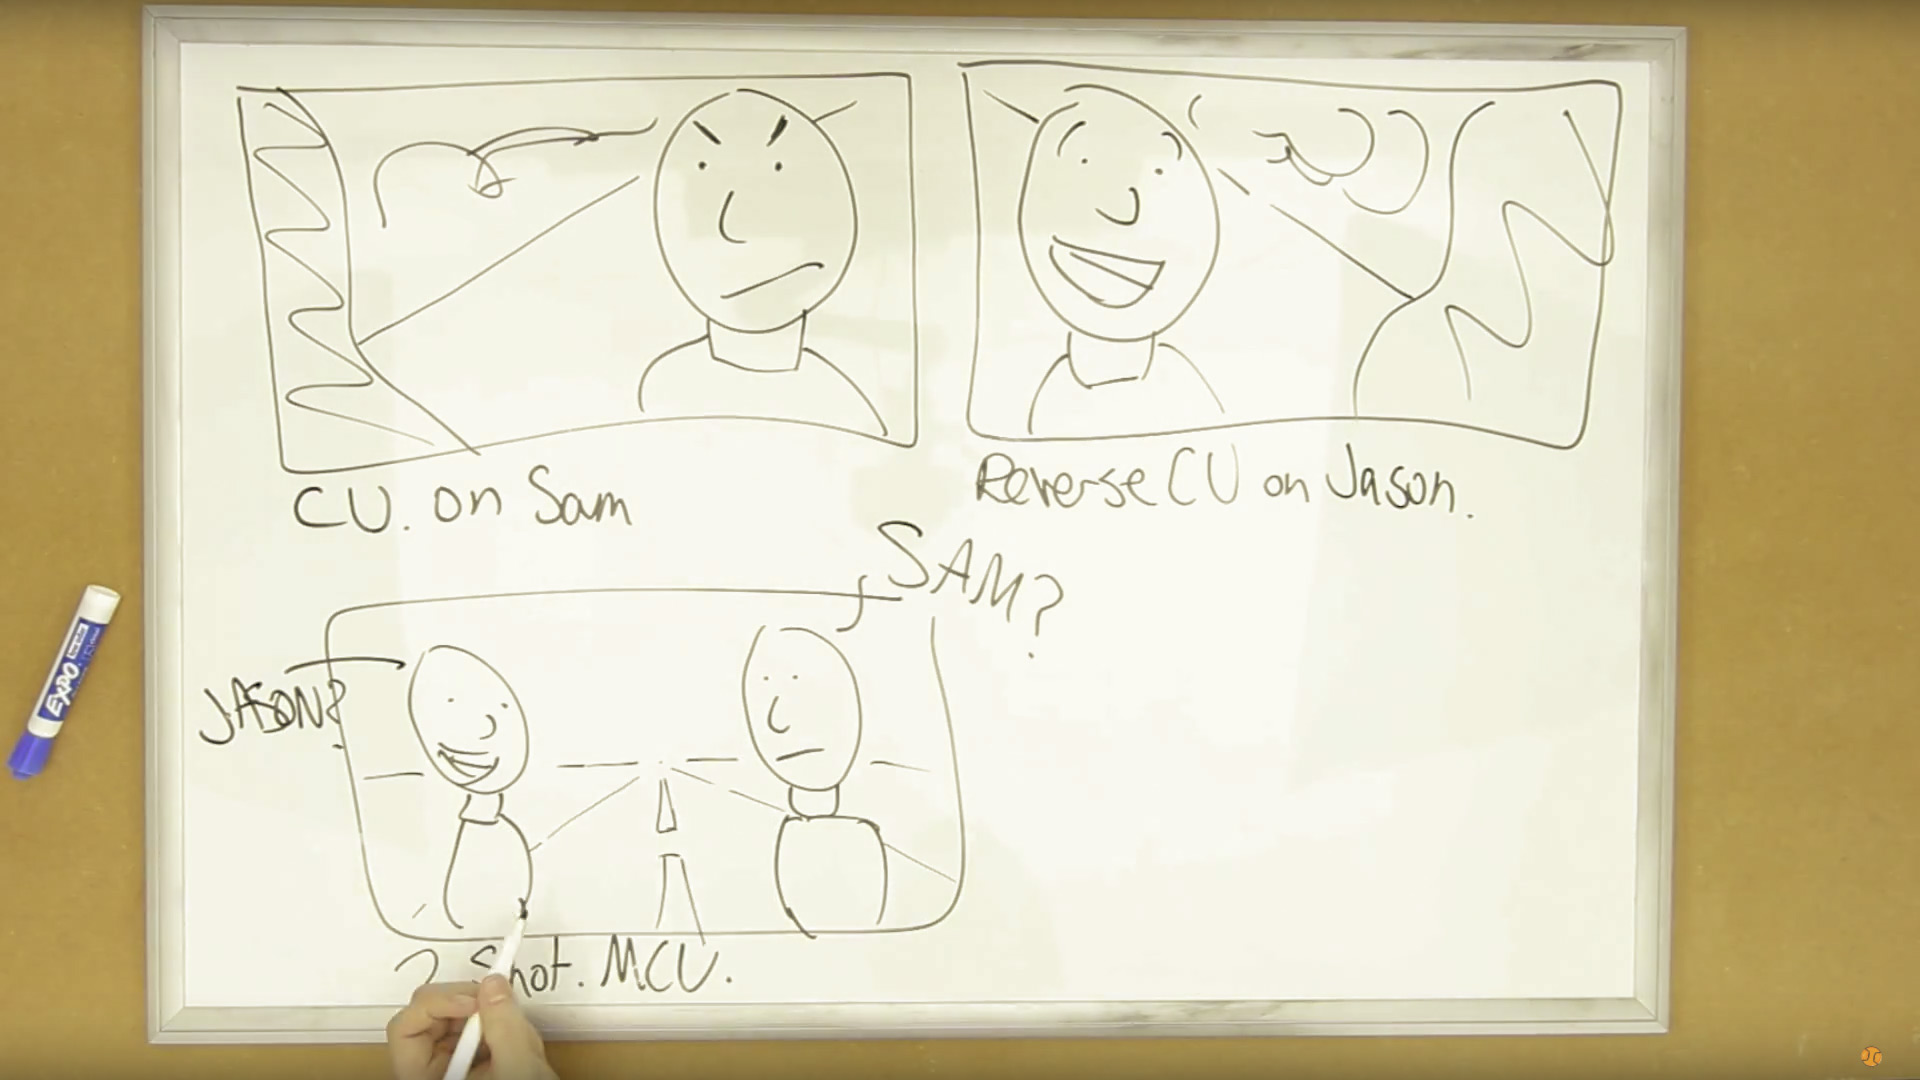
Here are the original storyboards for the gang scene in Corpse.

Poorly drawn and all over the place. We re-created the storyboards using photos taken in my living room.

Story-Boards.jpg

By test shooting it allowed us to find common trends in the shots, which allowed us to combined them, and reduced it down to this. Reducing your shot list is actually a really helpful way to achieve the film look, and today we'll show you how.

Here is a prime example of too many shots in a storyboard. You have 3 close ups in a row here. Gino giving the knife. Tilly's face. Gino eating some pills.

Condense-Your-Shotlist.jpg

But these shot types are to similar to each other and cutting them together would not look right. So we turned these 3 shots into 1 with movement by stitching them together and using a pan and tilt.

Here is another example. The scene in the tunnel:

Jason crouches. CU of pills. Jason picks them up. Jason's reaction.
Or: Jason crouches, and picks up the pills, then we see his reaction.

In a way, you can think of stitching shots together as adding commas to a sentence instead of using full stops. Commas create sentence flow, just like how pans and tilts make the movie flow.

Condensing your shot list will do 2 things:

It increases the efficiency of your shot list, which results in a quicker and more efficient turnaround on set.

And it makes you think about your shots as more than just a compilation of coverage.

As they say, limitation drives creativity.


Condense Your Shotlist.jpg

DISCLAIMERS:

Some of these links are affiliate links, if you purchase gear via these links The Film Look will receive a small commission, but there will be no additional cost to you. Thank you!

Make Your Costumes Look Filthy | Season 2: Episode 5

Our short film Corpse is based in a world of scavenging and depleting resources, and our character's clothing needed to match. Here are a few simple methods to make clothing look worn and dirty.

I've got this simple white t-shirt. To make it look like it's been unwashed for weeks, I grabbed a few simple household items:

  • Teabags
  • A cup of warm water
  • Sandpaper
  • Shoe Polish
  • Newspaper
  • and a Sponge
Make-Your-Costumes-Look-Filthy.jpg

Firstly, for a base weathering, give the clothing a complete sand down.

Once this is done, you can pay close attention to areas like the collar and give them little details.

After you have weathered it down, take a brewed teabag and dab the clothing, giving it stains. I add more tea stain to the collar and underarms to make it look like stale dried sweat.

Grab the sponge and add a bit of shoe polish. Then dab the sponge onto your newspaper until most of the polish is off of the sponge. This method is very similar to dry-brushing with a paint brush. It only applies to the top-most part of surfaces, like the collar here.

Make-Your-Costumes-Look-Filthy-dry-brushing.jpg

We used these methods for all of the costumes in our film Corpse. For some costumes, we cut a hole at the stitching point and ripped it open to damage the clothing.


Make Your Costumes Look Filthy.jpg

DISCLAIMERS:

Some of these links are affiliate links, if you purchase gear via these links The Film Look will receive a small commission, but there will be no additional cost to you. Thank you!

Bone Breaking Sound Design | Season 2: Episode 4

A scene in our recent short Corpse requires a guy getting his head kicked in.

Now WE follow the rule of "working with the resources you have in the best possible way", and getting a fake head to stand on, or doing it with VFX was going to cost a lot of time and money. So instead, we decided we wouldn't show it at all.

Now we could have shown his head being caved in, but what would that achieve? A cheap gimmick, a shock horror moment, sure.

But the story would be the same, so what's the point?

Anyway, here's how we did it.

Try to record audio in the original location. If you can't, find a similar alternative. We shot the scene in forest, but we recorded in my back garden.

They were both outside, the wind levels were similar, and there was very little background noise.

Bone-Breaking-Sound-Design.jpg

We used bell peppers to get a good crunch for the skull crushing sound, and used a water melon for the juicy brain sounds. It had also been in the back of my fridge for a very long time, so it went REALLY juicy!

Bone-Breaking-Sound-Design-with-Melon.jpg

Also...before you start standing on them, don't wear your favourite green chinos like Rob did. It's messy stuff.

I cut up the best sound effects and matched them with the foot stomps. For added brute force, I added a punch sound effect to every kick and stomp. And finally for extra ambience, I added some thunder in the background.

And there you have it. A cheap and effective way to smash your friends skull in!

You can find the sound effects from this video in our store to download for free.


Bone Breaking Sound Design.jpg

DISCLAIMERS:

Some of these links are affiliate links, if you purchase gear via these links The Film Look will receive a small commission, but there will be no additional cost to you. Thank you!

Storyboard Using Photos | Season 2: Episode 3

If you have the same lack of drawing talent like we have, drawing storyboards can be a pain. You don't know who is who, your perspective is all wrong, and only you can understand them.

Bad-Story-Boards.jpg

Here is a really simple and productive way of creating storyboards without having to pick up a pencil.

There was one particular scene in Corpse which needed to be thoroughly planned. 6 cast, 4 crew, a trek to the location, and the likelihood of heavy rain; for us, with was a big deal. With this in mind, figuring out the shots from poorly drawn storyboards was a disaster waiting to happen. So instead, we rehearsed.

We all got together in my living room and rehearsed the scene. The actors, the crew, everyone. We tested the make up, we tried different lines, and we shot the scene.

"You shot the scene!? In your living room!? Are you mad!?", ahh, but this is where storyboards come in. We worked around the actors as they rehearsed, positioning and finding our shots. Then it was a case of getting the footage on the computer, and exporting the frames.

Story-Boards.jpg

Line them up in Photoshop, add some shot info, and there you have it; you got a visual shot list ready to take out on location.


Storyboard Using Photos.jpg

DISCLAIMERS:

Some of these links are affiliate links, if you purchase gear via these links The Film Look will receive a small commission, but there will be no additional cost to you. Thank you!