Blocking a scene is an essential part of filmmaking, but to help keep your shots consistent and make sure your actors and camera are hitting the correct marks.
You can use some inexpensive tape and t-marks to allow you to work more efficiently on set.
Blocking is the process of working out where your actors need to stand and move throughout each scene of your film to help tell the story.
Some questions you need to ask yourself when blocking a scene is: Where are the actors in the scene? Do they move? Where do they move? Is the shot achievable?
We have a video that goes into more detail about the theory about blocking here if you want to check it out.
Blocking is done in three different stages. Firstly, you can pre-block the scene before the shooting day. This will allow you to work out if the location is suitable to shoot the scene, and if it is, work out the best way to use it.
If you can not get into the location before the shoot, don’t worry. Most blocking is setup on the day and is one of the first things you should do when you turn up to set. This is also the second stage of blocking.
Depending on the length of your scene, you can walk through the whole scene with your actor and DOP so they know how it is going to playout.
This will allow your actor to know how they need to move physically throughout the scene and where they need to be when delivering certain lines of dialogue.
It allows your camera team to know where the camera and lighting equipment needs to be, but also flag up any issues they have regarding where they can place the camera.
This also allows for others to have a creative input about the blocking.
The first two stages of blocking are there to work out the general movement of your actor and camera, but the third stage of blocking is where you set the specific marks for where you need you actor, camera, and focus to hit in order to capture the footage.
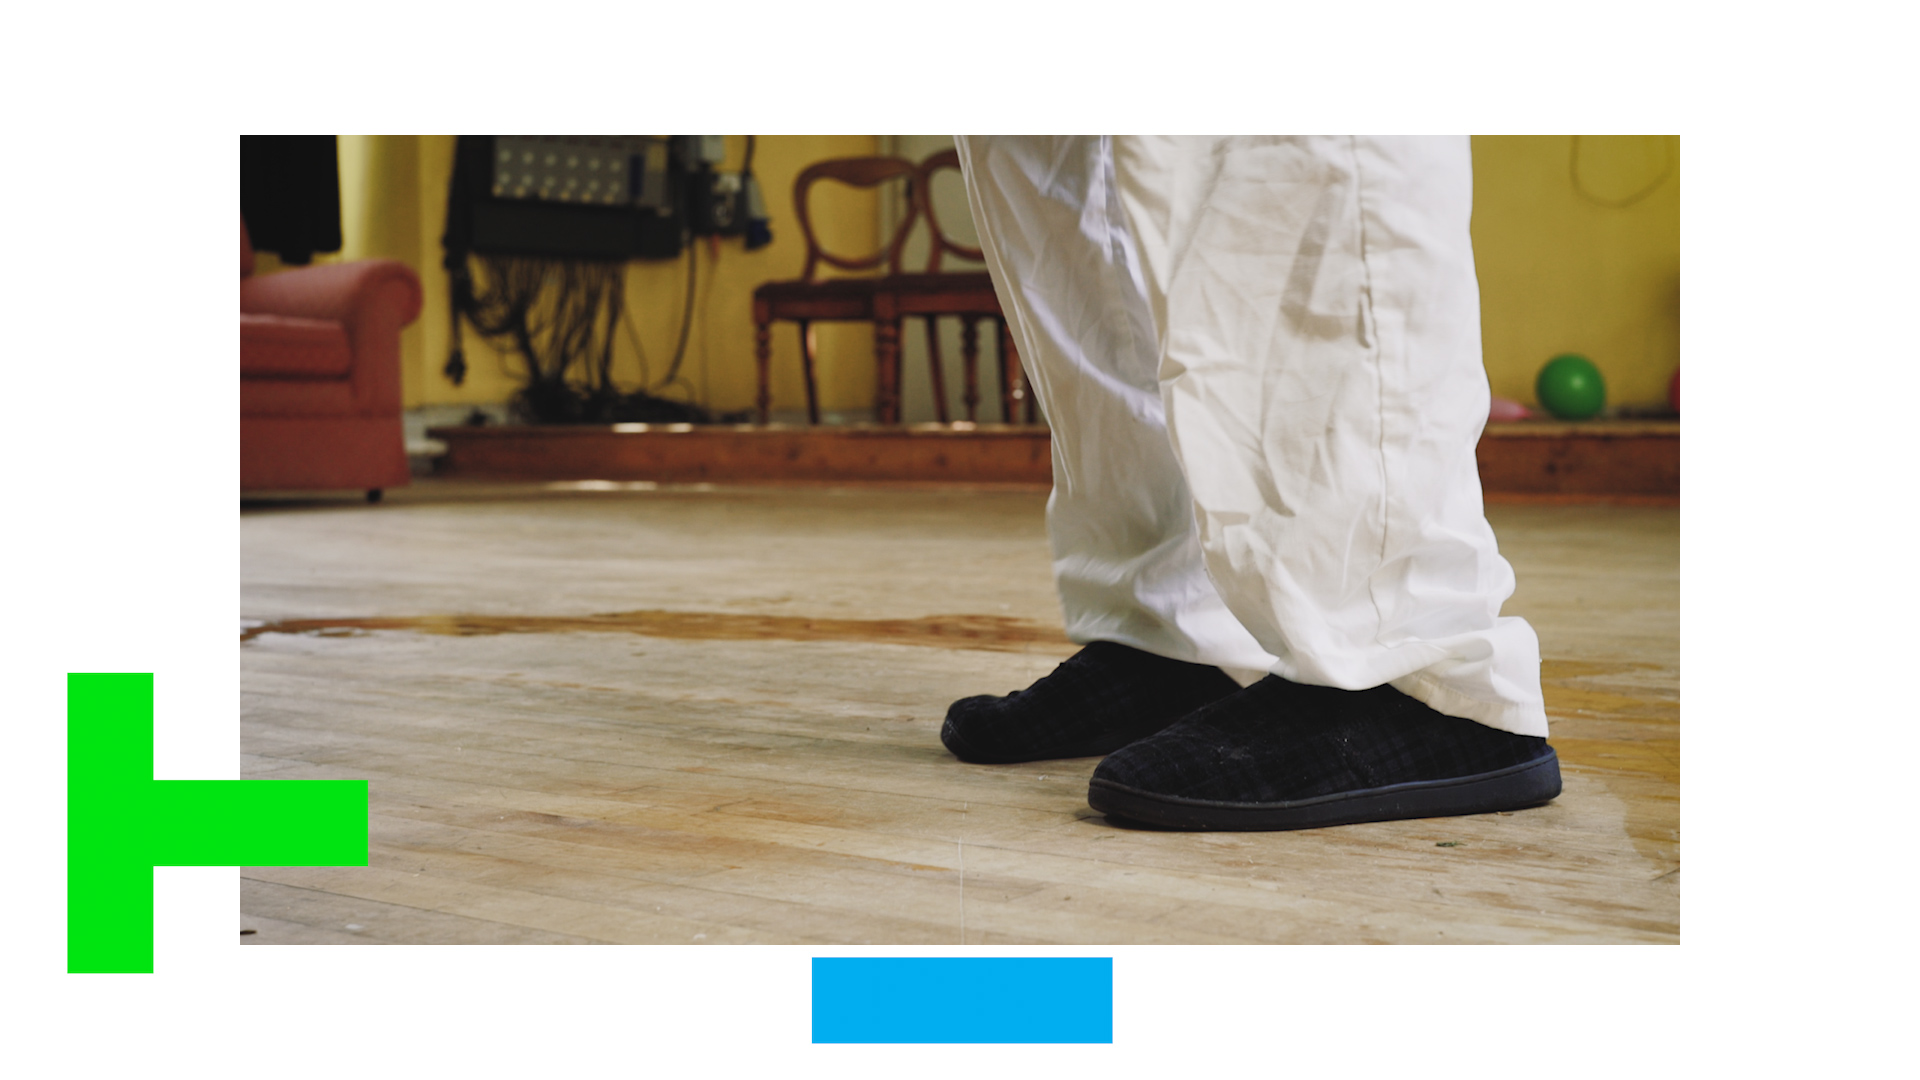
Our actor had their starting point and moved towards the camera, keeping the position of his feet on frame right.
The camera tilts down whilst the 1st AC keeps the focus tracked on the feet. The actor lands on his end point and places the mop down.
This may not look like a complicated shot, but there are a lot of points for both the actor and camera team to hit.
To achieve this shot, we placed the camera low down on the floor and asked our actor to perform the action from point 1 to 2. Then we asked the actor to stay at this position as we adjusted the camera angle, and placed a number of different marks on the floor.
Firstly we placed a blue piece of gaff tape at the bottom of the frame to indicate if the shot has over-shot the tilt of the camera.
Next we placed a t-mark just off screen to the left of frame. This shows the actor where his end mark is and where his feet need to line up with and where he need to place the mop down. This also allows the 1st AC to set their focus marks on the follow focus.
The reason T shapes are used is because it tells your actor how far left and right they need to be, but also how far forward or back they need to be.
You can place t-marks down by making them out of tape or by using these metal t-shaped brackets you find in DIY shops.
Then you can use gaff tape to tape them up so they are nice and bright so people can see them. You can now reuse them, and place them on surfaces like concrete where tape would not stick.
The last mark we added was a focus mark which was just off camera right. This mark was set halfway between point one and two so the 1st AC could see the halfway point and determine the speed the focus.
We used t-marks and tape throughout the whole shoot, sometimes for the actor to know where they need to stand or mop to and others for focus marks.
Having T-marks and tape helps to improve accuracy when shooting as the actors, camera and focus puller know where they need to be to hit their marks. If you need to do many takes, the technical side of the filmmaking will be consistent and it will help save time when shooting.
Check out our video on blocking if you want to find out more information about it. If you want to help this channel grow give us a thumbs up or down if you don't, hit that orange lens cap to subscribe, and remember achieve it one shot at a time.
This video was Sponsored By
🚀 http://bit.ly/pack-emulsion - Make your video look like it was tailor-made for the silver screen with RocketStock’s film grain overlay pack, Emulsion!
🎵http://bit.ly/track-tell-me - Click here to download this episode's track. Check out Premiumbeat.com to discover a huge range of exclusive royalty free music!
DISCLAIMERS:
Some of these links are affiliate links, if you purchase gear via these links The Film Look will receive a small commission, but there will be no additional cost to you. Thank you!


