Editing is a particularly interesting process. After long days of shooting, you are finally placing down the building blocks for your film, and you can begin to see how it all flows.
But with a lot of things to complete including the picture lock, sound edit, music, and colour grading, it can sometimes feel like a mammoth task, especially when working with a lot of footage and sometimes with multiple post-production collaborators.
So today we are going to share with YOU some tricks WE’VE learned along the way which will help give you a smooth workflow and divide and conquer your post-production elements.
Everyone’s post-production workflow is a little bit different. Today we are going to share ours, but we’d also love to know your post-production workflows. If you have any useful advice, drop them in the comments below!
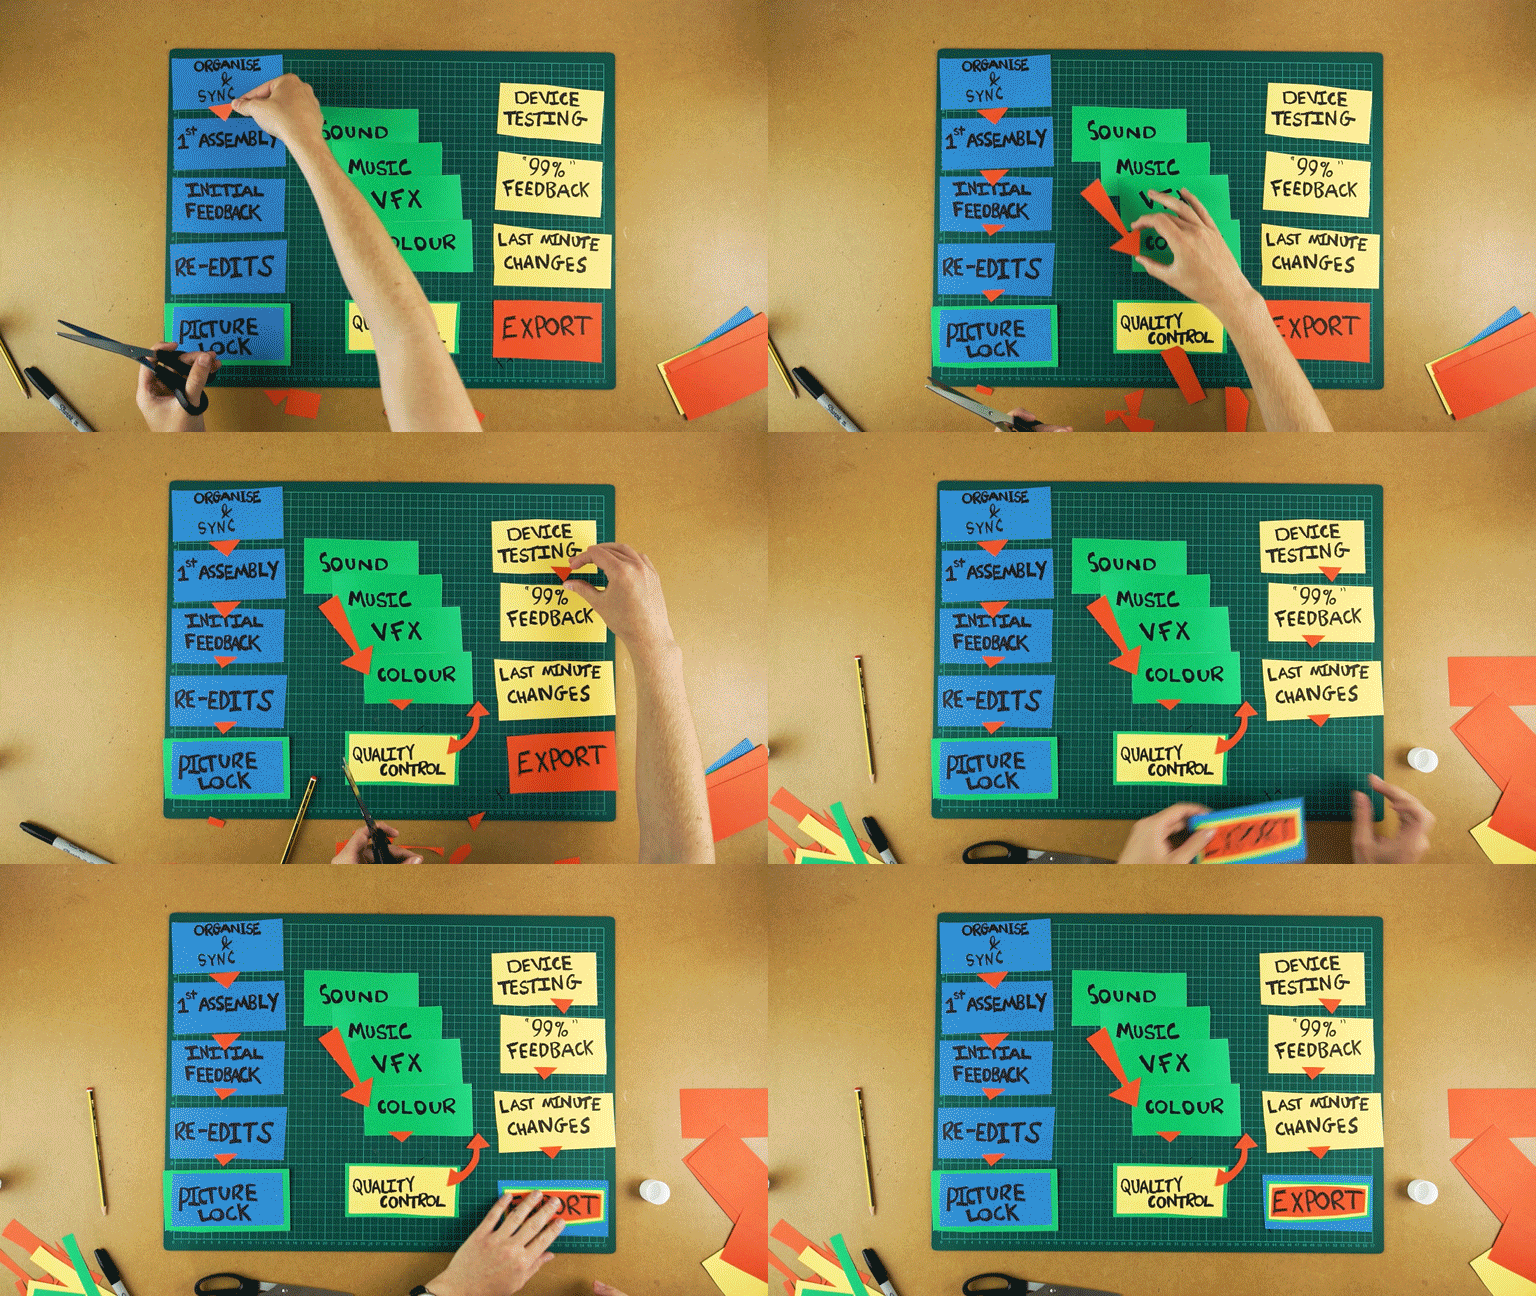
First things first, let's map out the whole post-production process:
We’ll be covering organise and sync, first picture assembly, initial feedback, re-edits & picture lock, sound, music, VFX, colour, quality control, device testing, a 99% feedback stage, last minute changes, and EXPORT.
You can see that this isn’t a linear process - as it is stackable in places. This is to accommodate multiple artists working at the same time. But we will get into that once we reach these stages.
Let's get the boring one out of the way: organise and sync
Have you ever been working on a film, then suddenly you are greeted with a message telling you it can’t find a bunch of footage?
Or, did you think that because it's only a short film you don’t need to put anything in folders, to then discover you regret the complex mess you’ve now made?
Getting organised before you edit will prevent any of these headaches from happening.
We’ve covered organise and sync in a previous episode.
One more thing we’d like to add to organise and sync is labelling usable takes.
On our recent short film The Asylum Groove, the 2nd AC Mr. Adam Opie, took note of every take from the shoot and noted down bad takes, good takes, and great takes, including if there were any particular things to look out for.
During organise and sync, we followed Adam’s notes and labelled each take using different colours. Red being unusable, orange as emergency spares, blue as good takes, and green as the best takes.
Next up we have the first picture assembly.
If post-production was compared to building a house, this would be laying the bricks. The first assembly is there to build a foundation on the timeline.
Take your footage, cut yourself an edit, and get it to a watchable standard, but don't start working on colour grading or VFX yet, as you may end up working on shots which will be cut short or cut all together during the next editing stage.
You CAN spend as long as you need on the first assembly, but just remember that the next stage is FEEDBACK, so don’t worry about working on frame to frame details just yet, and be open to your peers’ interpretations and opinions on the cut.
If you are looking for creative advice on editing check out the channel THIS GUY EDITS. He’s got plenty of educational and entertaining videos all about how powerful editing choices can be for your films.
If there was one mistake made by some of us zero budget filmmakers, it’s not letting people see the edit before upload!
This is the next crucial stage in post-production, initial feedback.
During the editing process for a short film, there may be some things which you don’t notice, and when you are looking at the footage for a long time, you start to become “edit-blind”. You start to anticipate the cuts and the edit no longer feeds you new information which means you are no longer watching the film from an audience perspective.
Find your filmmaker friends, buy them a coffee, sit them down, and ask them to review your edit.
Find a mix between people who know the story, such as the crew who helped work on the film, but also find some filmmakers who know very little about the project so they can give you a accurate first impression of the film.
And if you need to, ask your family to watch it. But just make sure they understand that this ISN’T the finished product, and ask them specific questions to gauge their feedback as they might not know what to say until you ask them.
Next up we have re-edits.
The first thing you should do once you have a list of feedback is step away from the edit. Step away for a few days and come back with fresh eyes and a fresh perspective.
When you come back, watch the current draft of the film and make notes. Then compare these notes to the feedback you were given and start to work on the next draft of the edit.
A lot of the time, you’ll be given technical feedback: “This could be cut shorter”, “This shot was jarring” “The montage was a little too quick.”. This is feedback you can use to help give the audience a better viewing experience.
You might also get feedback from a storytelling perspective. “I didn’t understand why this character did this”, “the character's motivations are unclear”, “why was he mopping?”. This is feedback which is harder to fix in the edit, but if you have enough coverage, you might be able to solve it by extending the length of a shot or placing that insert back in.
If you can’t solve it in the edit, and it’s a MASSIVE detriment to the film, please consider shooting some pickups and retakes.
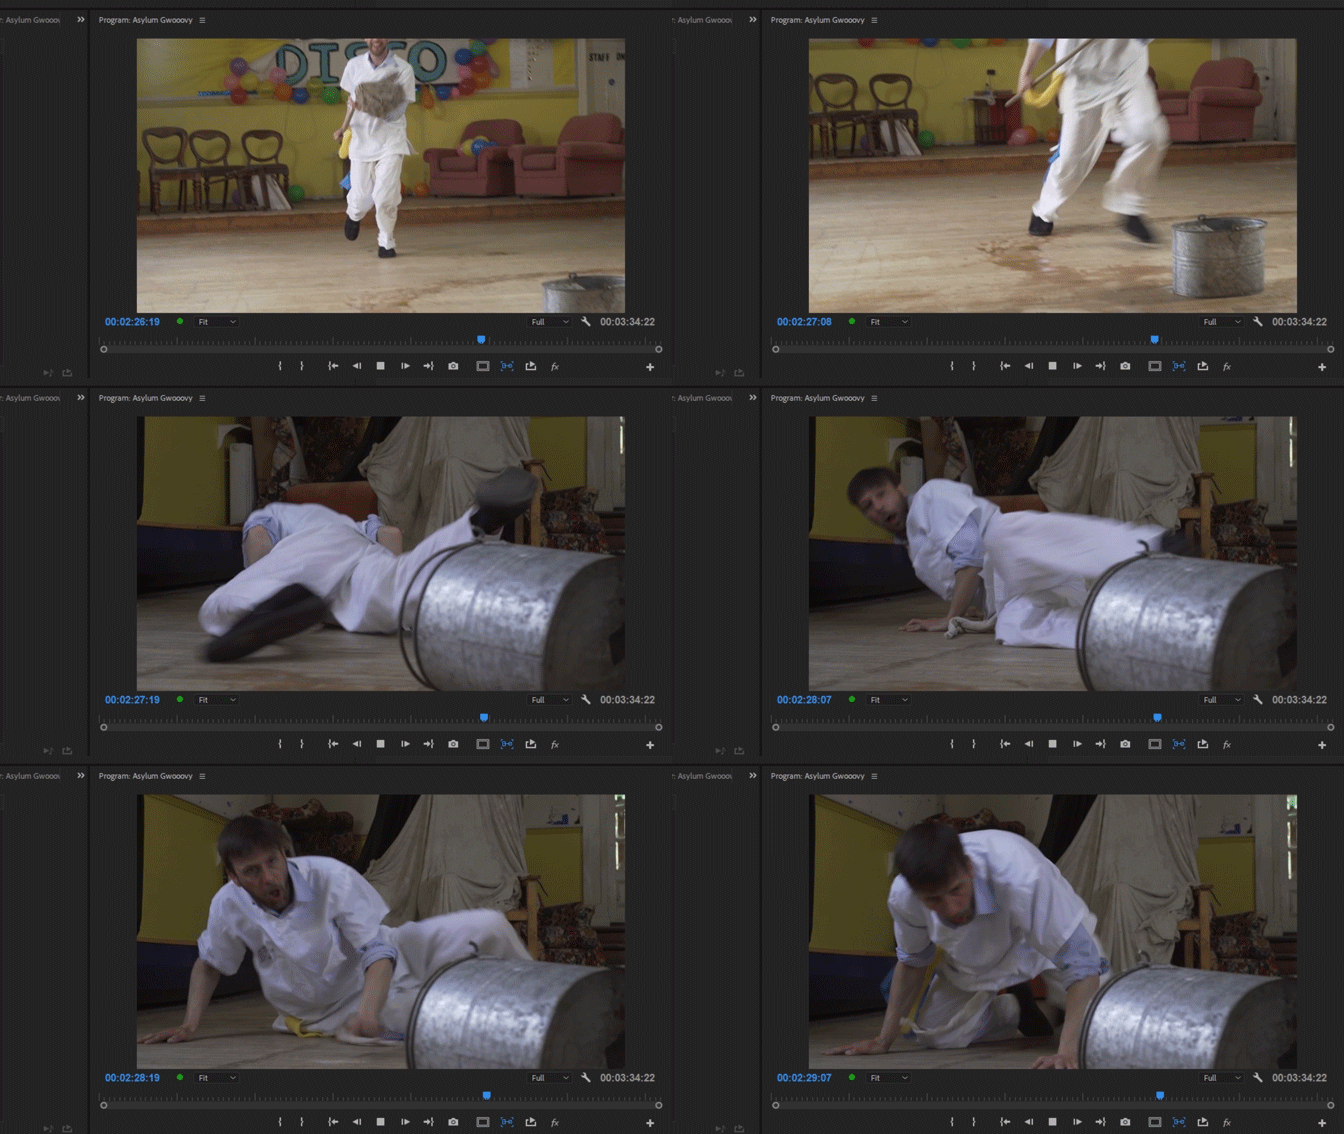
We actually had this issue with our short The Asylum Groove. There’s a moment when the character trips over a bucket and hits the floor. We had coverage of the fall but no takes where we see our Actor Chris actually make contact with the ground, which made the edit very jarring.
So we scheduled a day to return to the location and shoot it. Without it, it just looked weird, so shooting those pickups were worth the extra time and effort.
The feedback you get will be VERY subjective: sometimes it's invaluable, sometimes it is just a matter of different taste. But this is your film, and it’s your decision. If you wholeheartedly believe the cut works the way it is, then keep it. But, if multiple people point out the same thing, consider changing it up.
This leads us to the picture lock.
At some point, you have to make the decision that you can’t do any more to the edit! A picture lock is a promise NOT to change the edit. This is so departments such as sound design, music, VFX, and colour grading can begin to work.
I say “departments”. I imagine most of you, and us included, are just a bunch of people trying to make cool films. But officially, these are “departments”, so let’s stick with that.
All of these departments will need a finished picture to work with. And by “locking” the picture, it means each department is working from the same source, which means when they are finished, they can simply plonk their work into the edit.
This video was Sponsored By
🎵 http://bit.ly/tflpb-paranormalsynths - Click here to download this episode's track. Check out Premiumbeat.com to discover a huge range of exclusive royalty free music!
DISCLAIMERS:
Some of these links are affiliate links, if you purchase gear via these links The Film Look will receive a small commission, but there will be no additional cost to you. Thank you!


