Diy

Store your Light Stands using Bungee Cords

Light stands. We have more than we need, and certainly have more than we can comfortably store in our micro-sized studio.

We needed a way to utilise the space, storing the light stands so they aren't taking up much room while keeping them on-hand and easy to grab.

We came up with a pretty good solution.

As you can see our studio is pretty small. Because of this, we have tried our best to not buy anymore bulky storage shelves like this one here.

The-Film-look-Studio.jpg

Piling up light stands in the corner is messy and they usually fall over. Lining them up against the back wall behind the door does use that space effectively but we would knock over the light stands whenever we opened the door.

So we needed a way to brace them against the door. How about bungie cords? They are strong, elastic, multi-functional, and come in a bunch of colours and sizes.

By drilling in a strong wall plug and screwing in hooks on each side, we can string the bungie cords across the wall and give the light stands a wall support.

Store-your-Light-Stands-using-Bungee-Cords.jpg

The hooks stand no further out of the wall than the light stands so they aren’t intrusive, they are tight enough to hold them in place without them falling over, and elastic enough for easy access to the stands.

We liked this setup so much we added another one on this wall here (ref: on screen). We use it to store mic stands, tripods, gel bags, pretty much anything that is long and thin.

Something like this keeps our micro-studio tidy and just that little bit bigger.


This video was Sponsored By

http://bit.ly/track-funk-fever - Thanks to PremiumBeat for providing the music for this week's episode. Check out Premiumbeat.com to discover a huge range of exclusive royalty free music!


Store your Light Stands using Bungee Cords

DISCLAIMERS:

Some of these links are affiliate links, if you purchase gear via these links The Film Look will receive a small commission, but there will be no additional cost to you. Thank you!
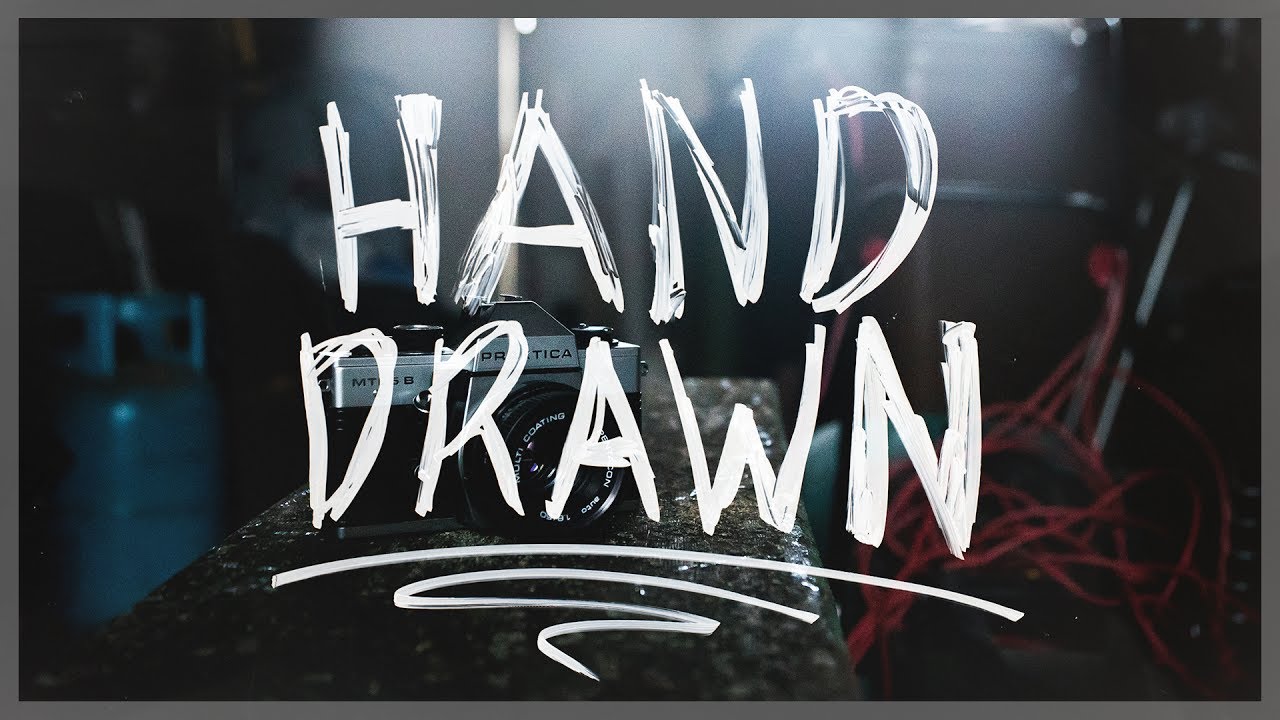
Hand Drawn Animated Lower Thirds

Some lower thirds can be a bit slate. We wanted something a bit different for the vlogs, so I grabbed a whiteboard, a pen, and used a little post-production magic.

Firstly you’ll need a whiteboard. Place it somewhere it is going to get a lot of light, or if you have some lights, blast them at the whiteboard as evenly as you can.

Animated-Lower-Thirds.jpg

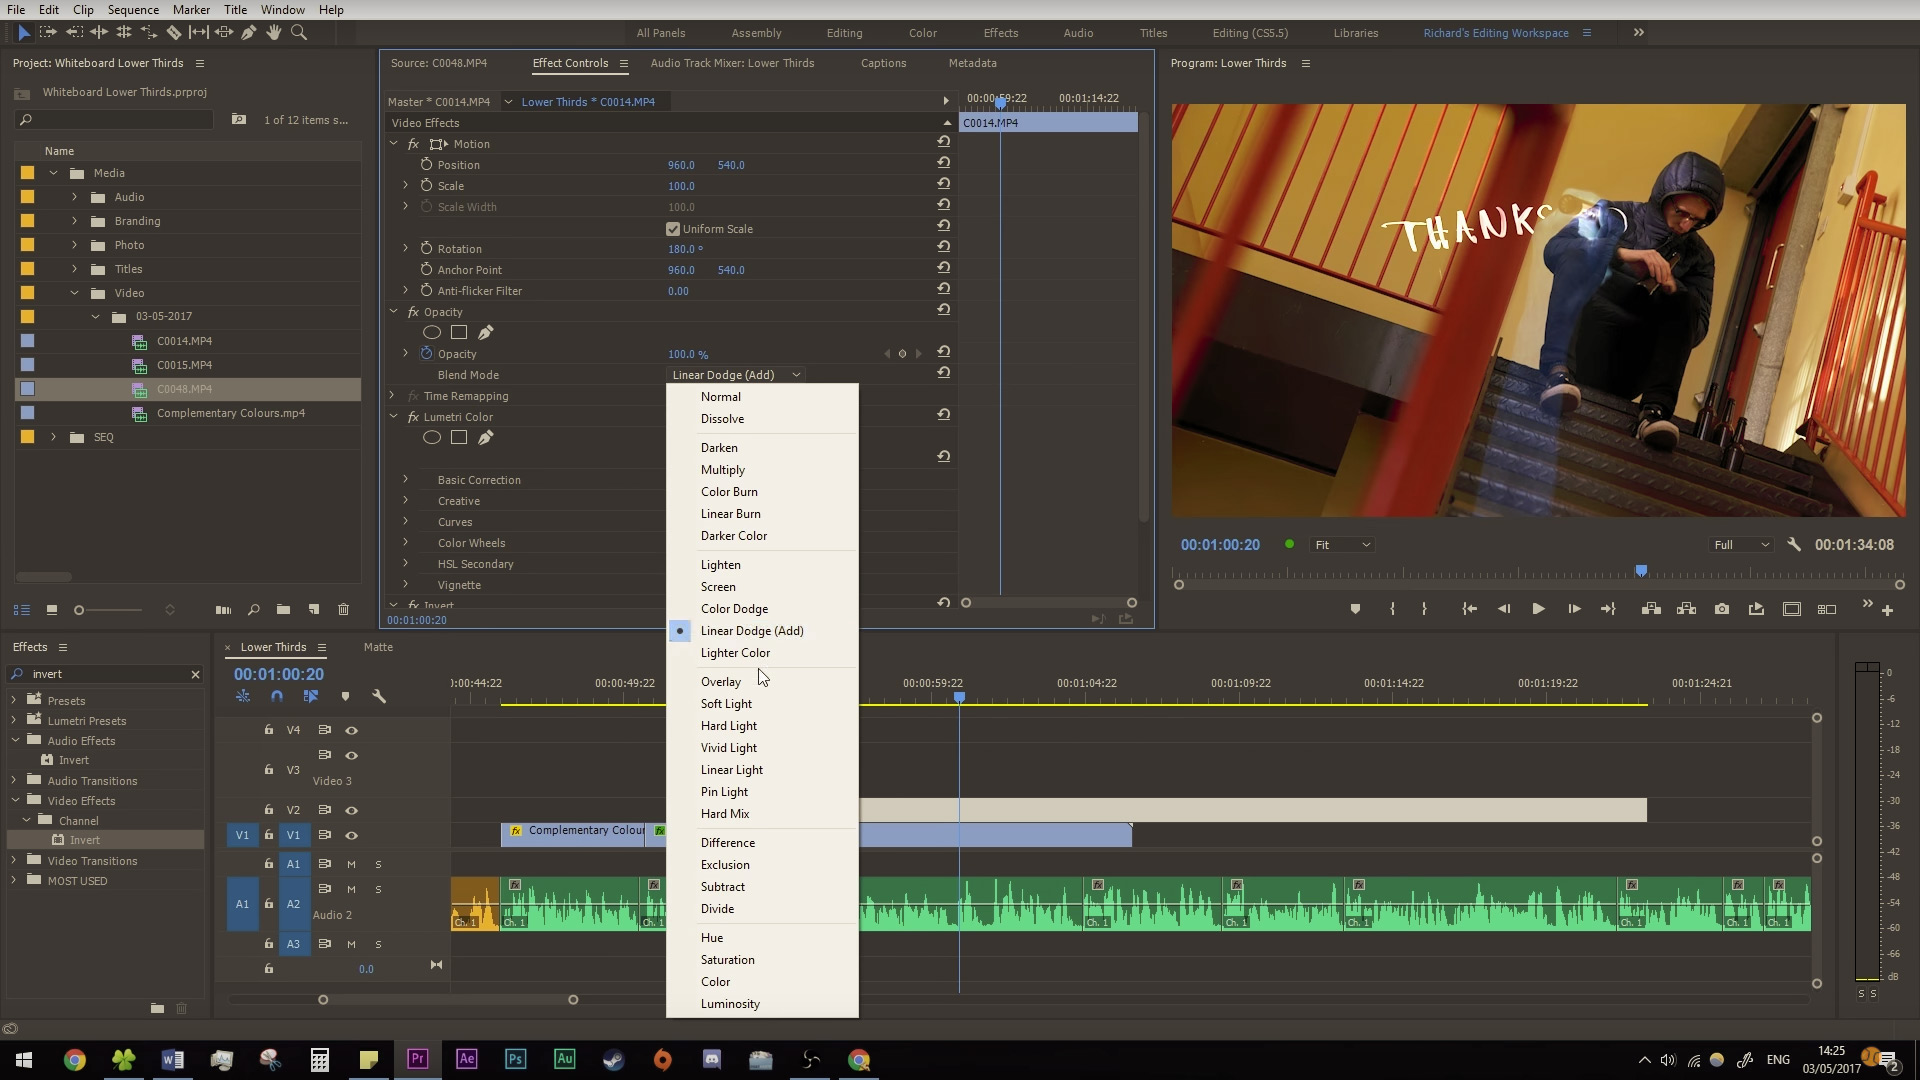
We want to overexpose the image of the whiteboard until it goes completely white. When we invert the footage in post-production it will go completely black which means we can utilise blending modes that turn the black pixels transparent, revealing the layer beneath it whilst retaining the pen strokes.

Because we are inverting the image, you will have to take into account that all of your colours will invert too. A black pen will turn white, a red pen will turn green, etc. etc.

You can find out which colour you will need by searching for complementary colours and finding the inverse.

Then it’s a case of hitting record and drawing out what you need.

In the editor, layer your whiteboard art clip above your footage, invert it, and then change the blending mode to lighten, screen, or colour dodge. Have a play about and find the right blending mode for your project.

Animated-Lower-Thirds-Blend-Mode.jpg

This can be used for lower thirds, title cards, transitions, and loads more. You don’t always have to shoot video – you can even do it with stills if you wanted something static.

There is a link in the description where you can download all of the samples I have made to use in your projects.

Simple stuff really, but if you want something a bit more practical and different, it’s a pretty cool visual element that we certainly going to use in our vlogs and even offer our clients.

You can download these Lower Thirds from our store for free.


This video was Sponsored By

http://bit.ly/synergy-pack - If you need some sweet corporate video elements, check out "Synergy" by Rocket Stock! Head over to RocketStock.com for professional assets for your next video!

http://bit.ly/track-brooklyn-drive - Thanks to PremiumBeat for providing the music for this week's episode. Check out Premiumbeat.com to discover a huge range of exclusive royalty free music.


Hand Drawn Animated Lower Thirds

DISCLAIMERS:

Some of these links are affiliate links, if you purchase gear via these links The Film Look will receive a small commission, but there will be no additional cost to you. Thank you!

DIY Overhead Shooting Rig


Nearly every video we shoot for this channel uses our top down shooting table in some way. We use the setup when we are trying to explain something on the white board, to show something we are building, it helps when you need to be hands free or just as an extra table to work and shoot on.

The Table

Let’s start off with the table, the top is made out of MDF which has been varnished so it can be easily cleaned. The best thing about the table is that is folds away into the wall when we need more space.

The legs are on hinges and have a magnetic catch, so they fold away under the table and stay in place. The table top is also connected to the wall by hinges and folds flat against the wall.

This comes in handy as we can put our big pop out back drop on the wall when we are taking head shots for example.

DIY-Overhead-Shooting-Rig.jpg

Backdrop

Since the colour of the table is not the best, we have a few different backdrops to use depending on what we are shooting. The backdrops roll off a metal bar we have setup and clip on to the edge of the table. We also us a white board so we can write and draw, also we use one of these cutting mats as the green gives a nice contrast.

DIY-Overhead-Shooting-Rig-Backdrop.jpg

TV Table Mount

The way we mount the camera is using a monitor stand that you would normally use on your desk. We modified it by connecting a quick release plate to a piece of wood, the one we used is a Manfrotto 323 RC2 Quick Release Adapter. Then we attached this to the monitor stand just like you would if you were attaching a monitor to the stand.

Since the cameras we use on the shooting rig are small mirrors cameras, there is no weight issues as this stand is built to hold monitors that are much heavier than our cameras.

With the arm you can adjust the height, move it backwards, forwards, and tilt it left and right to adjust the framing of your shot.

DIY-Overhead-Shooting-Rig-Mount.jpg

Monitor

After testing we worked out which settings are best to use on your camera when shooting on the table. So we can see what we were shooting we use our feel world monitor mounted onto the shelf.

DIY-Overhead-Shooting-Rig-Monitor.jpg

Lights

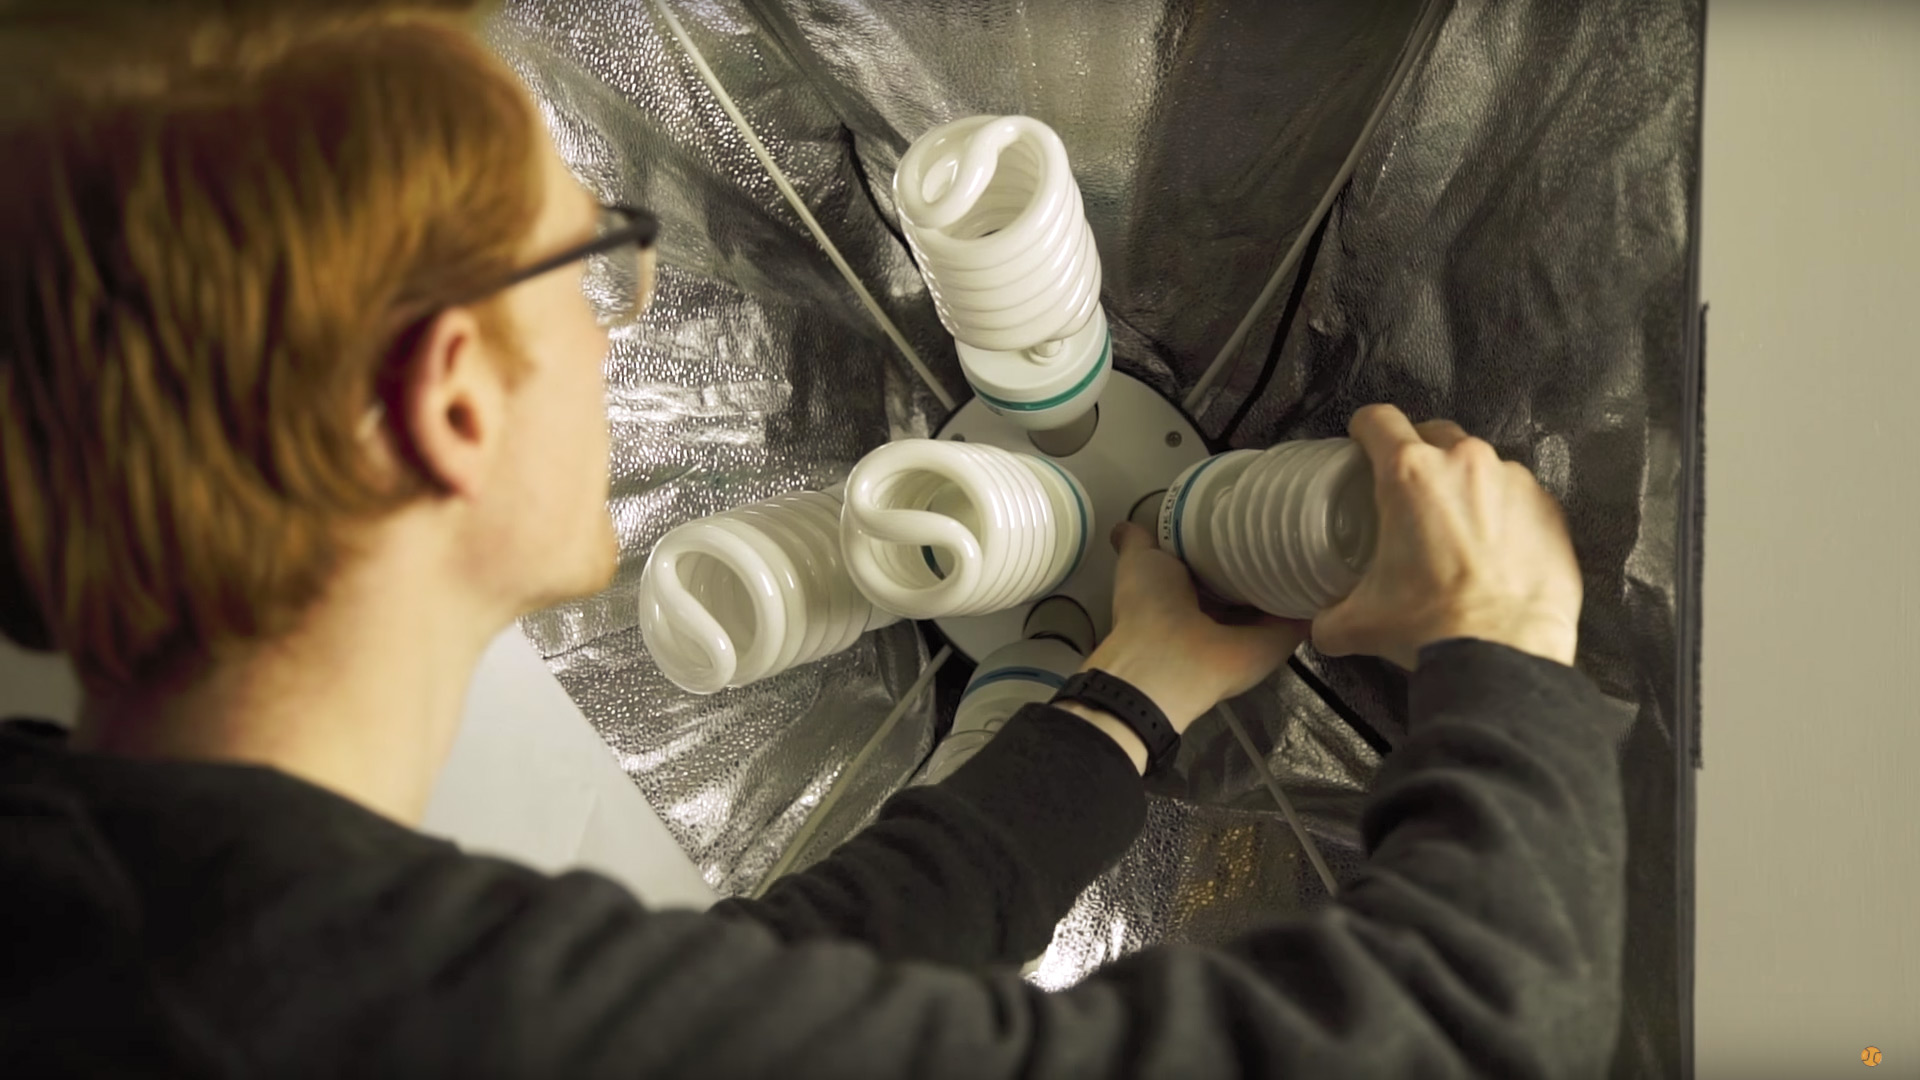
Lastly we use 2 soft boxes which have 5 115w bulbs in each of them, at a colour temperature of 5500K. 

DIY-Overhead-Shooting-Rig-Lights.jpg

This shooting table comes in handy for many different things and there are many different ways you can set up a shooting table just like this, just work out what is best to the space you have.


DIY Overhead Shooting Rig.jpg

DISCLAIMERS:

Some of these links are affiliate links, if you purchase gear via these links The Film Look will receive a small commission, but there will be no additional cost to you. Thank you!

Upgrade Your Camera Battery


The Sony a7s is a mirrorless camera with some great video capabilities. We’ve been using them for about a year now and would recommend them to anyone who is considering buying one.

The problem is, with it being a camera primarily built for photography, the batteries only last about 40 minutes. If you are shooting all day, you’ll need a hand full of these batteries to last the whole day.

So we needed to find a solution to this problem. It’s time to customise.

So this is the standard Sony a7s battery; the NP-FW50. It’s nice and compact to fit in the small form factor of the camera, and has a charge of 1020mAh.

This is plenty if you are shooting photos, but for video, it sucks the juice out in less than one hour.

Compare that to this, the Sony NP-F750. This has a charge of 5200mAh, over 5x that of the standard a7s battery. These are the batteries we use to power the LED panel and the camera monitor.

Sony-a7s-Battery-life2.jpg

So finding a way to use this battery to power our cameras will give the most compatible solution to our kit. This is what we did.

Firstly, we bought a Sony a7s dummy battery. These can be found online, we picked this one up on eBay for a few quid, and what it does is allow you to plug in an external power source into the camera by using a dummy a7s battery on one end, and a female jack on the other.

Secondly, we picked up a battery plate adapter for the Sony NP-F750, the big guy here. So by connecting the parts together and putting in the battery, it all seems to work!

Sony-a7s-Dummy-Battery.jpg

The voltage difference between the original battery and the big sony battery is only .2 volts, so this will be safe to run your camera.

Lastly, we needed a mounting solution. We already have cages for the Sony a7s, so by utilising the 15mm rod mount on the top, we bought a cheese plate, a small 15mm rod, and a strip of Velcro to mount it onto the camera.

Tidy up your cables with a rubber band or some tape, and you’re all set!

We have shot using this solution for months now, and using this battery works just fine. We also have a larger battery, the Sony NP-F970.

Sony-a7s-NP-Battery.jpg

This works too, but every now and then the camera likes to stay idle instead of waking up. We haven’t figured this issue out yet, so we suggest if you do plan on hacking your Sony battery, stick to the F750.

On an all-day shoot, we have got up to 6 hours out of this battery.

Another advantage of this external mount is being able to replace the batteries incredibly easily when it is on a tripod. Sometimes taking the original a7s batteries out when it is locked on a tripod can be difficult as it is accessed from the bottom. This rectifies the issue.


Upgrade Your Camera Battery.jpg

DISCLAIMERS:

Some of these links are affiliate links, if you purchase gear via these links The Film Look will receive a small commission, but there will be no additional cost to you. Thank you!

DIY Light Diffusion


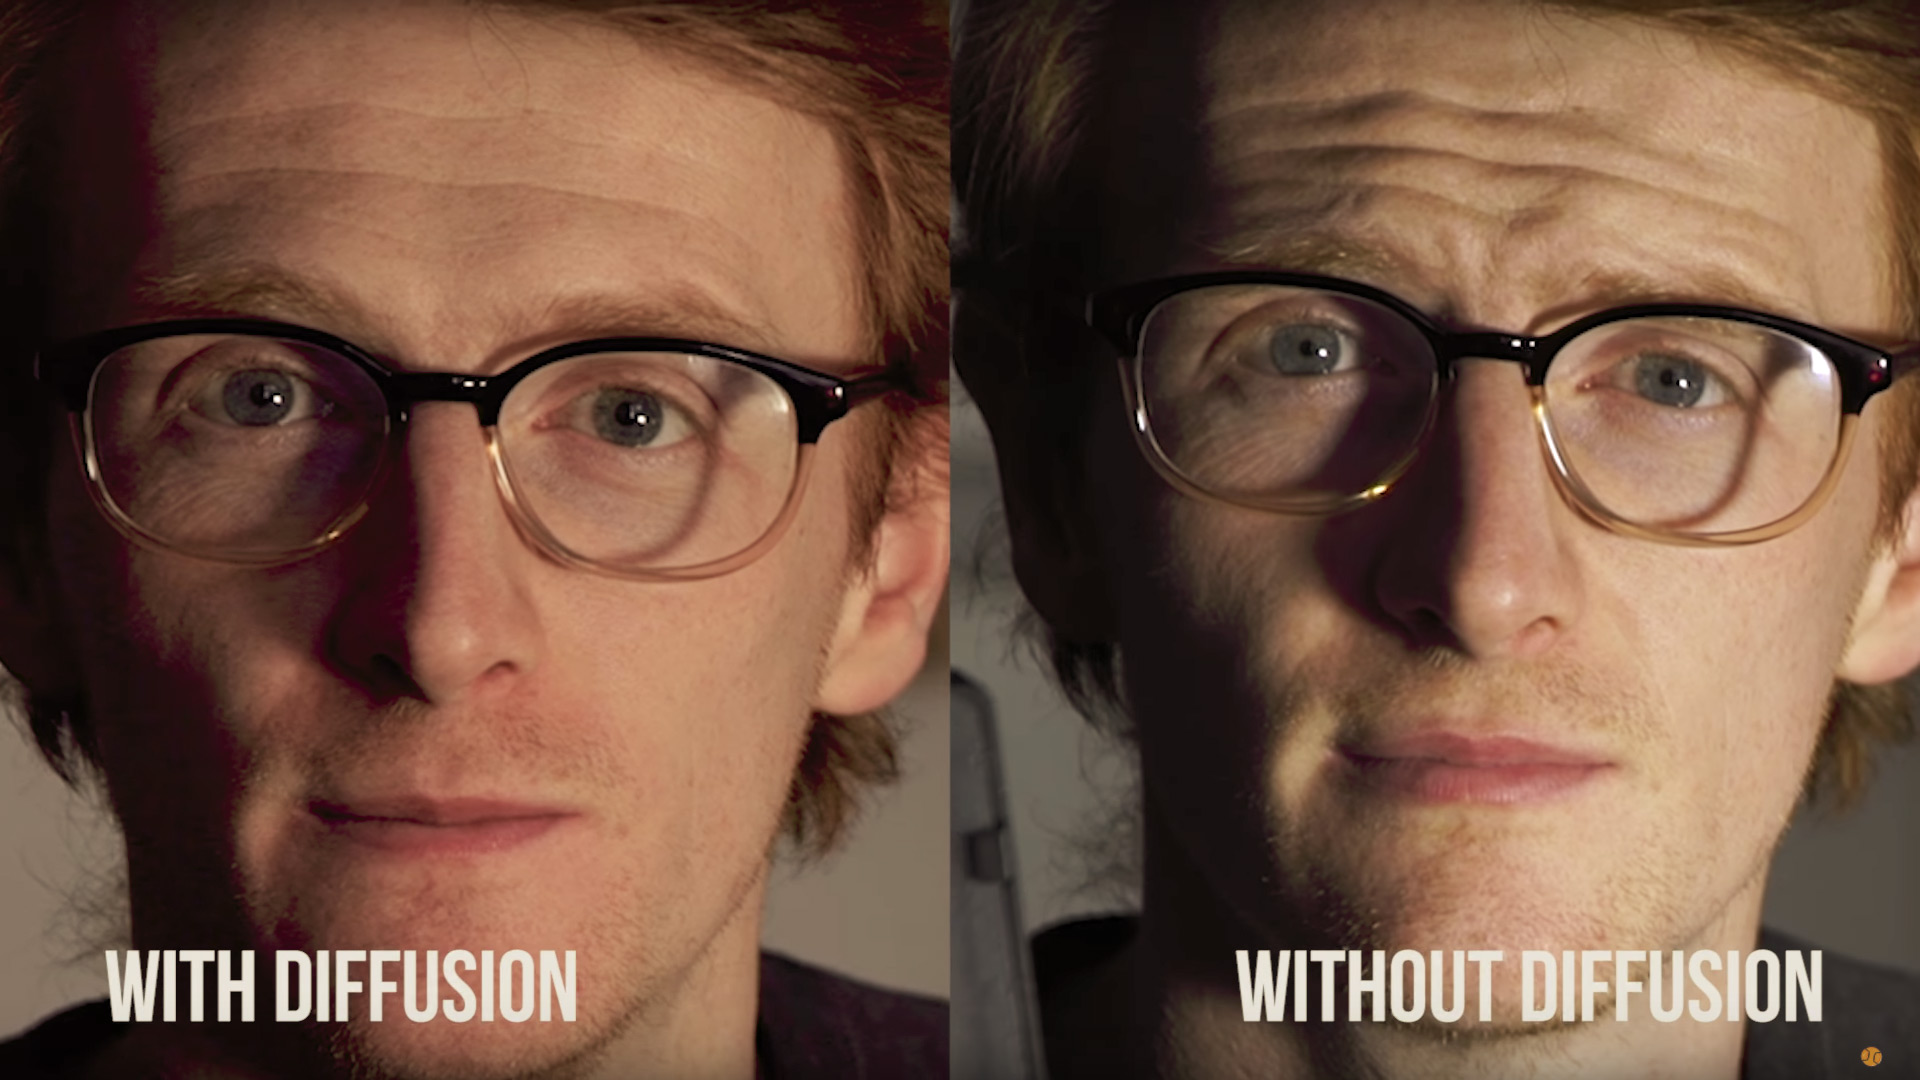
Diffused light (or soft light) is one of the easiest lighting methods to help achieve the film look. It’s a straight forward technique that you can use to reduce those hard shadows. We have a few ways to get diffused lighting on the cheap, so let’s talk about them.

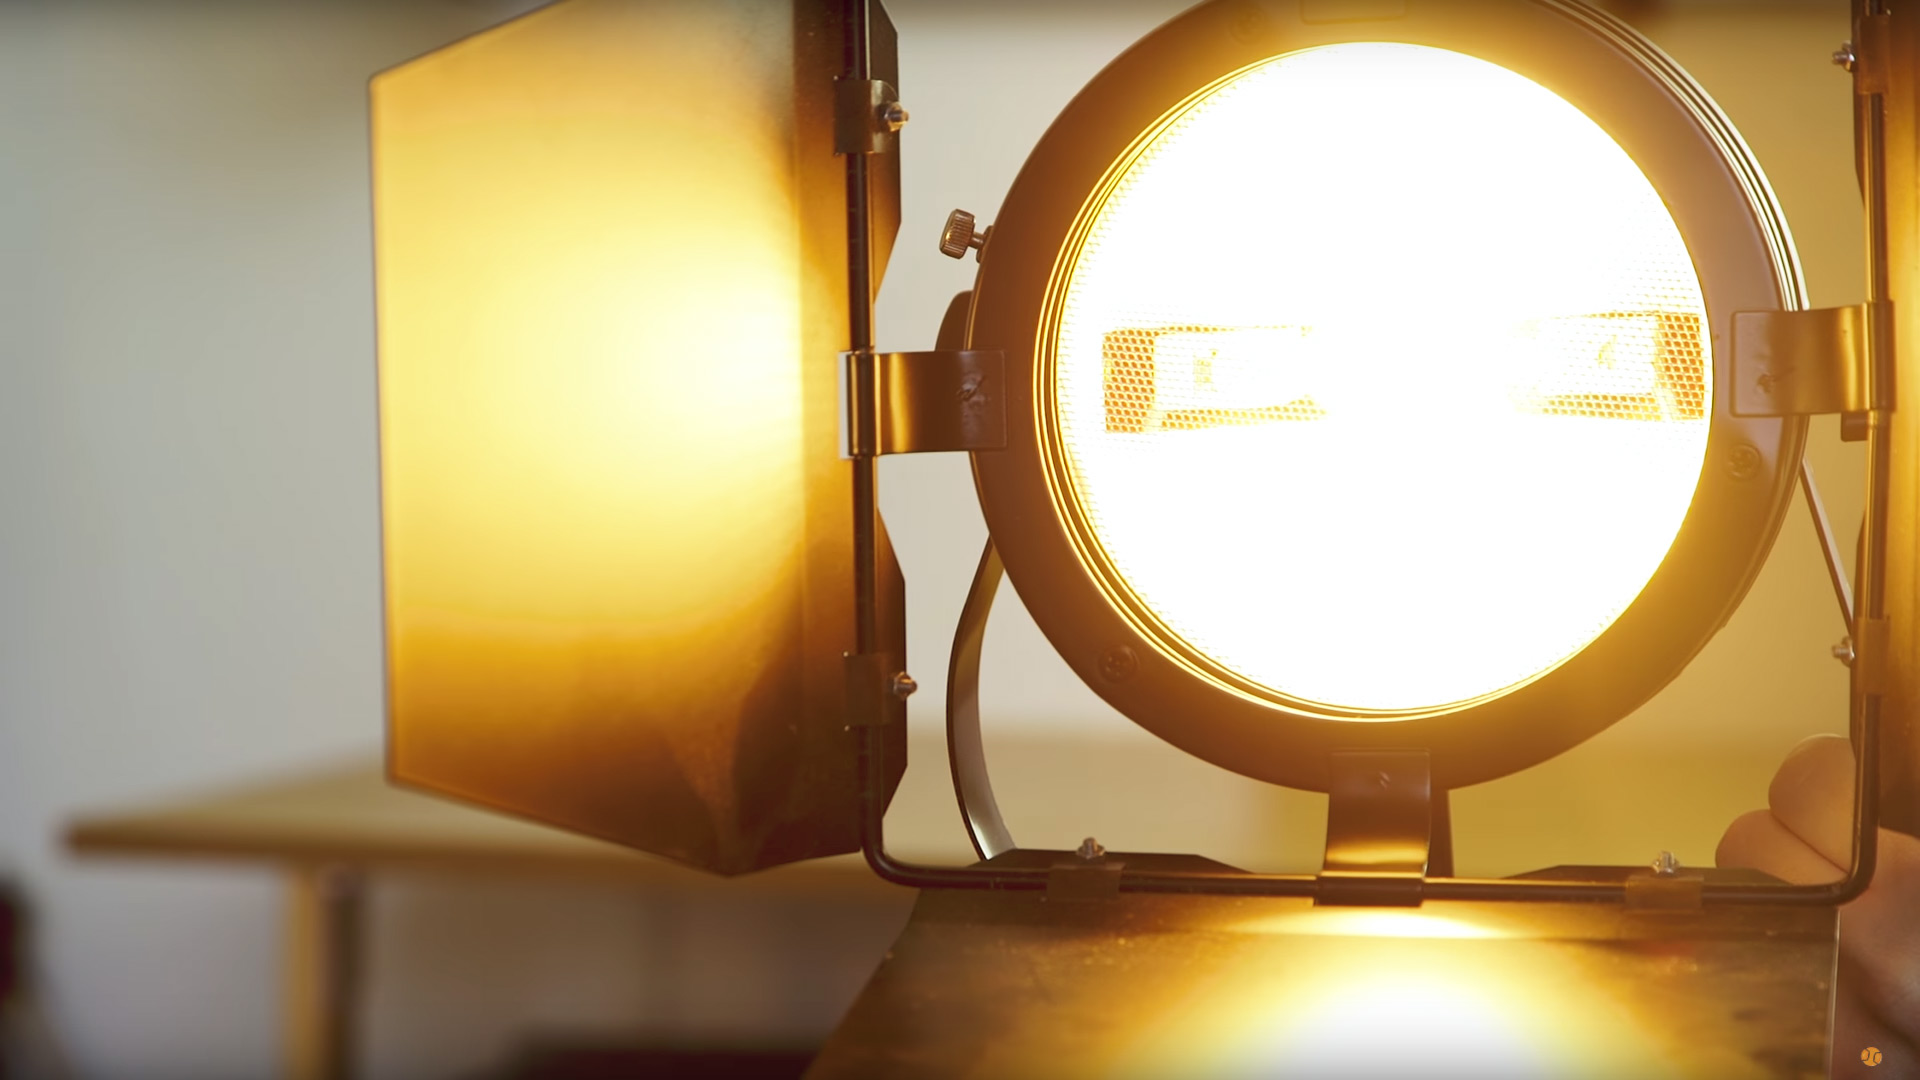
One of the main lights we use here at Film Look HQ are a set of 800 watt lights. They are super bright and you can even dim them! Problem is, they produce a very powerful hard light.

800w-Lights.jpg

After buying these, I knew straight away the light needed to be softened. This is usually where diffusion paper comes in, but have you seen how expensive this stuff is!? For what is essentially just paper!

At this point I needed to find something that did the same thing but for a fraction of the price.

Easy, printer paper! I have a stockpile for my printer, the light can shine through, and it doesn’t cost an arm and a leg. But wait…those 800 watt lights get hot, REALLY hot! We have to use gardening gloves to touch these lights when they are on, and sticking paper to the front of them was just playing with fire…literally!

So printer paper was out of the question. What I needed was something cheap, easy to get, but something that also withstand a lot of heat. Grease proof paper! It’s made to be used in an oven, so it’s perfect. I picked up a roll for £1.

Cheap-DIY-Light-Diffusion.jpg

Cut it to shape and peg it to your lights. If you have to replace it, it only costs pennies. Just remember to get the white grease proof paper, not the brown stuff. I made that mistake.

So how well does grease proof paper work? Well here are 3 examples of using it in front of 3 of our lights.

Firstly, the 800 watt light. Here it is without…and here it is with it.

With-and-without-Diffusion-800w-light.jpg

Next is the a 70w blub. Again, here is it on its own…and with the greaseproof paper.

With-and-without-Diffusion70w-blub.jpg

Finally, our little 160 LEDs.

With-and-without-Diffusion-160LED.jpg

Another way we use it is to cover windows in your scene. If you have bright direct sunlight coming through, it can sometimes give you trouble in terms of dynamic range and exposure. If your window is out of frame or out of focus, you can throw some greaseproof paper on the window panes with some sticky tack to soften the light.

Here at The Film Look we often give our equipment nicknames. So what do we call this stuff? Over to Richard.

It’s greaseproof paper. There is a musical and a motion picture called Grease. The main character in Grease is called Danny Zuko. So how about Dannies? “Can we throw a Danny on this!?” Yeah, that’s work.

So what if you need to diffuse a lot more light? The paper isn’t massive, so we have a few other cheap DIY and super low budget methods.

If you don’t already have a 5 in 1 reflector panel, get one. They are really cheap and can be used in a million different ways. It has: White fill, negative fill, silver sheen, and Hip Hop Video Mode.

In terms of diffusion, if you remove the cover you have a large translucent panel. With something bigger you can create distance between the light and the panel, which makes the light even softer.

We also use a blind from Ikea. You can peg it to a light stand or a mic stand, like we do. This one is super lightweight and always in my lighting bag.

With-and-without-Diffusion1.jpg

If you need something even bigger, a shower curtain is the way to go. This one is frosted so it works really well. It does need a bigger area to setup, but you can easily fit 3 800 watt lights behind it and blast soft light into your scene.


DIY Light Diffusion.jpg

DISCLAIMERS:

Some of these links are affiliate links, if you purchase gear via these links The Film Look will receive a small commission, but there will be no additional cost to you. Thank you!

Customise Your Lens Caps


Lens caps not the most exciting pieces of camera crew equipment but still important. I always seem to misplace mine so how to find a solution for this. It's time to customize.

First thing I had to tackle was the colour. As all film equipment is black so I chose a bright colour that really stands out and for me that's always orange.

Camera-Equipment.jpg

I didn't want to spray the original lens caps, so I bought some cheap ones or maybe I took them apart, sanded them down, so the paint would have something to hold on to.

Then spread them apply multiple coats after each layer dried, then I put them back together so I could start using them.

Orange-Lens-Cap.jpg

The first attempt didn't actually work and the reason for this is because I sprayed all of the different sections of the lens caps. This caused them to stick together as there was not enough room for them to move around.

Thinking about it I should have known this and it's pretty obvious this would happen. So I decided to start work on Mark 2.

I ordered more lens caps, took them apart, this time I masked around all of the edges that touched each other, sanded them down, spread them with a primer and give them multiple light coats with the orange.

Once dry, I took the masking tape off, but them together and hope this time it would work.

Working-Orange-Lens-Caps.jpg

My first impression was they look pretty cool they definitely stand out, but most of all they work

To further customise the lens caps I added labels to each of them so I will know which lens they belong to. Then I add a strip of Velcro to each of the cups so it would stick to this section of my bag.

Now on the lens caps are visible, quick and easy to find. So let's see if this stops me from losing them.

Customise-Your-Lens-Caps.jpg

Customise Your Lens Caps.jpg

DISCLAIMERS:

Some of these links are affiliate links, if you purchase gear via these links The Film Look will receive a small commission, but there will be no additional cost to you. Thank you!