
Today I want to share with you ONE absolutely class lighting trick that will give you the film look by simply moving your lights around. Welcome to The Film Look.
We’ve shot a lot of sit down interviews for client jobs in the past. The basic setup for a video production client interview looks like this:
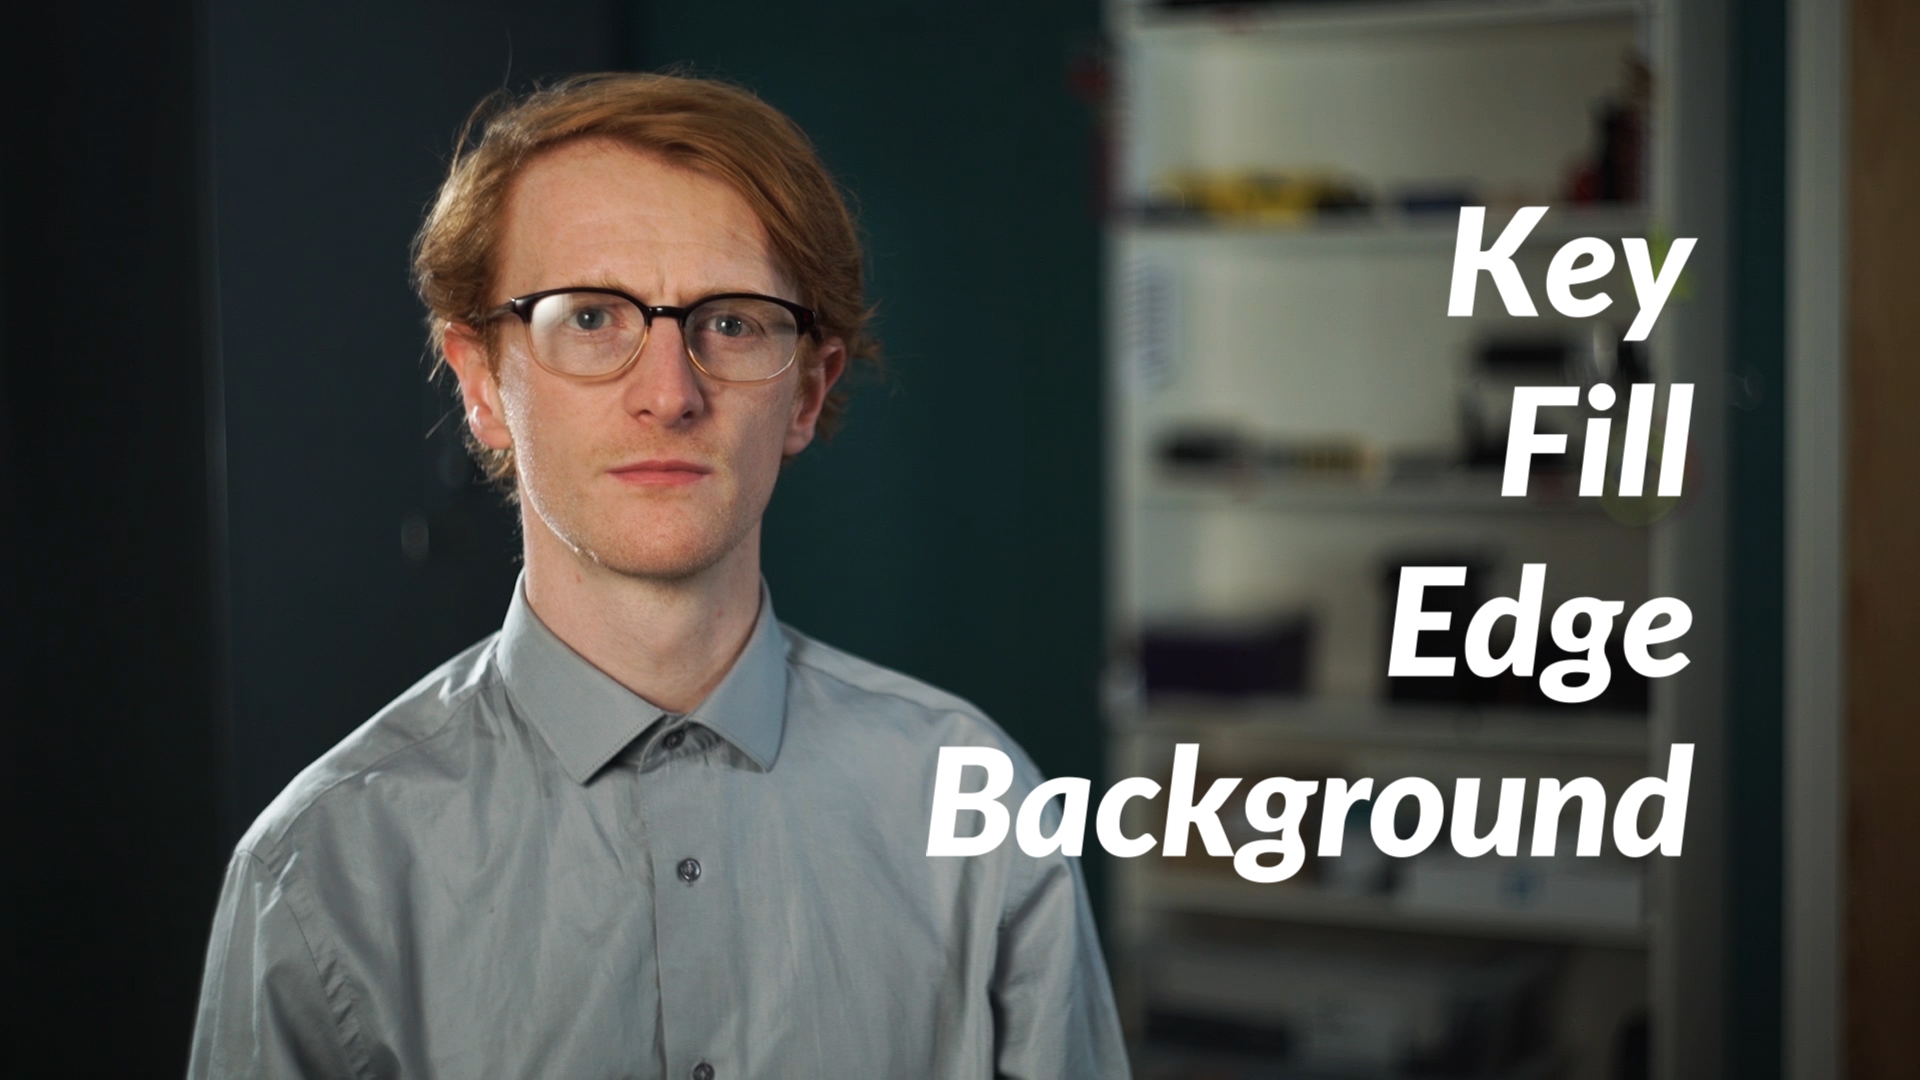
sit them down with some distance from the background so you can get it nice and blurry
Place in a key light to brighten up their face
Place in a fill light on the other side to reduce the shadows
While we are at it, we will pop in a hair light to make them pop off the background
And a final background bounce light to brighten UP the background
This looks great for bright, positive messages in videos from a business point of view. But it doesn’t look like a film!
So take all of your video production lighting knowledge and throw it out of the window! We’re starting from scratch and this time we are going to make it look like a movie!
So before we start changing the lighting, we will bring in some set dressing, props, and Rob is going to dress as Bobby Carrot, a criminal accountant from the victorian era.
Now let's set up the lights again!
Sit your subject down with some distance from the background
Frame up your shot
...and place in a key light to brighten up their face…

This is the first thing we can change!
It feels natural to place the light so it points in the same direction that the camera is pointing. This means the light will never end up in the shot. This is a habit grown from videography shoots, but it doesn’t look very film-like.

Instead of lighting the broadside (the side where you see most of their face), we are going to move the light 180 degrees around the subject and light up the short side.

So instead of the light sitting at the 8 o’clock position to the subject, we will move it to the 2 o’clock position.
This small lighting change transforms the shot into something a lot more dark and sophisticated.
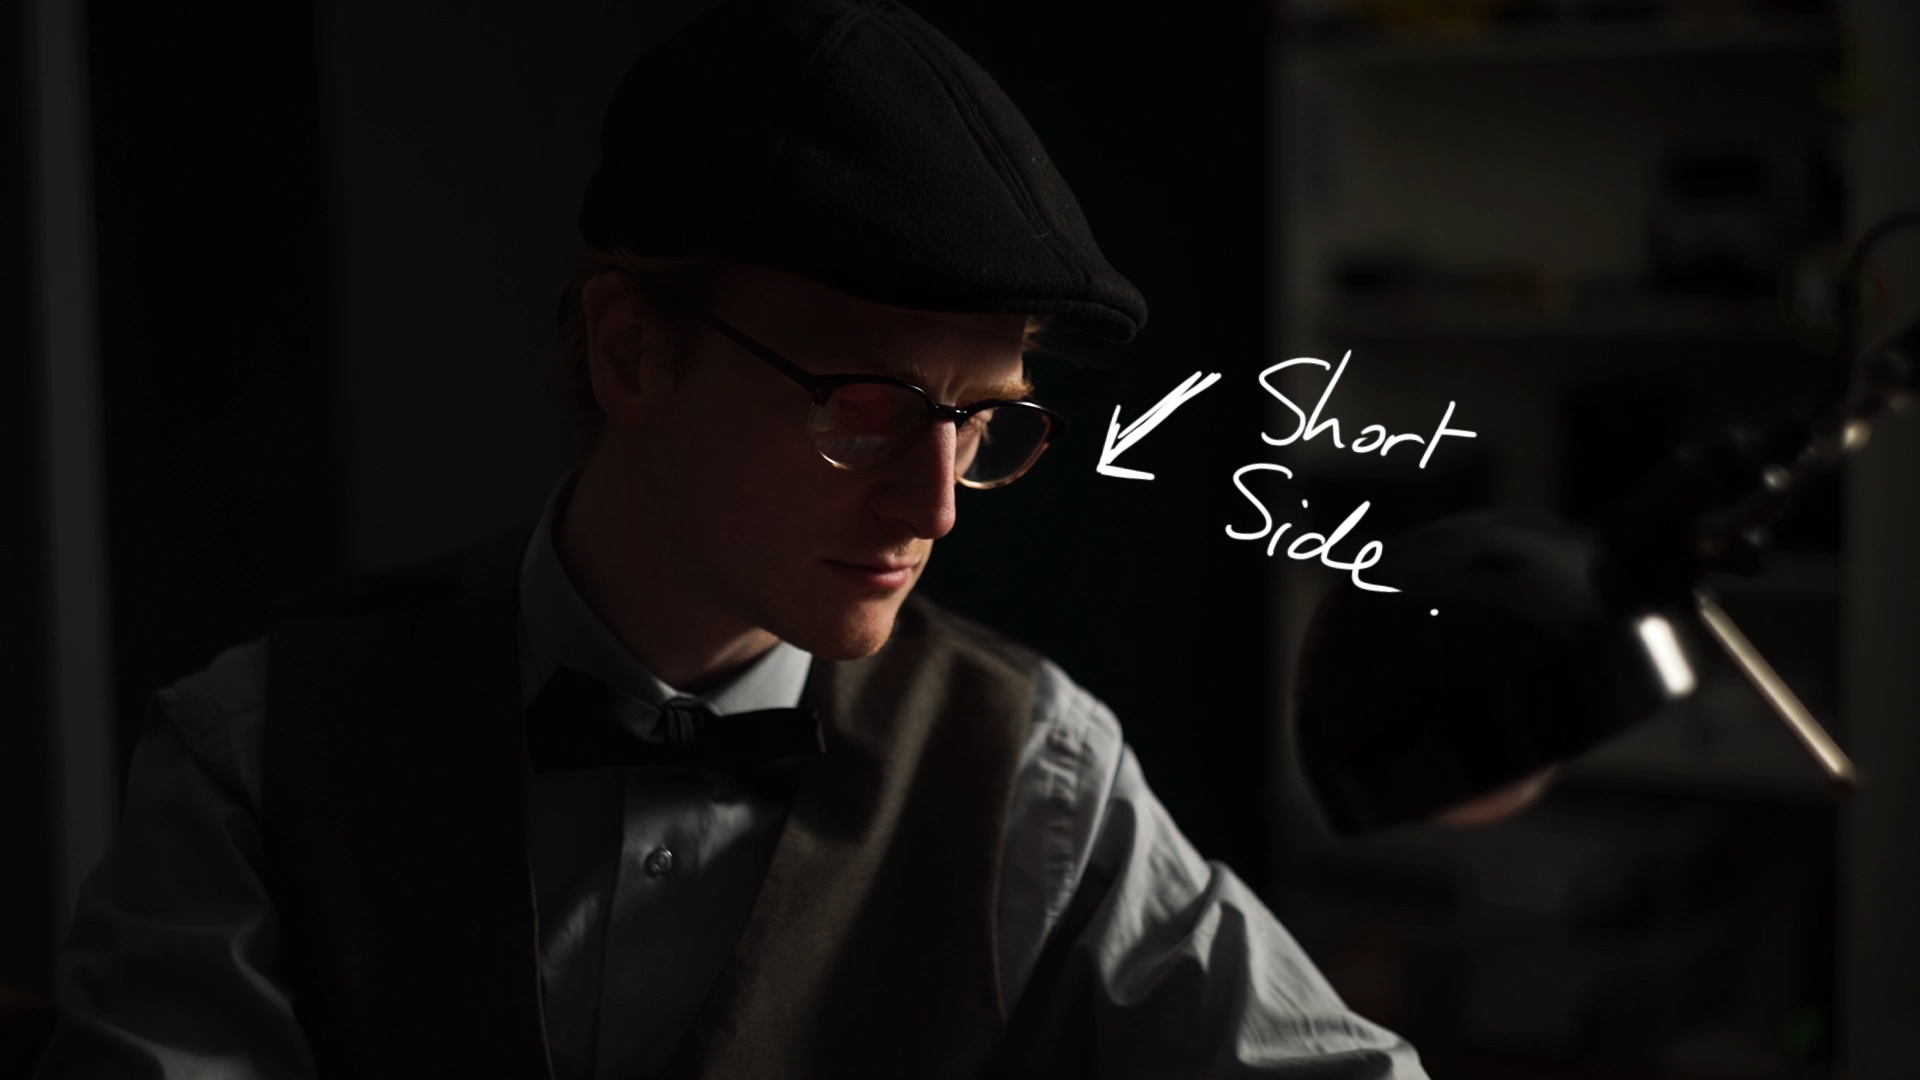
It’s called short side lighting because the key light is pointing to the short side of the subject (the side where you can see less of the face).

As well as getting something which looks instantly more film-like, you also have the benefit of very little light hitting the background because the key light is facing the opposite direction. So the background stays nice and dark.
Now you know about short side lighting, you’ll notice pretty much every film or TV drama will use this type of lighting in most of their scenes.
You can achieve short side lighting with window light as well. The window doesn’t have to be in the frame, you can always frame it out, but you still achieve something with great contrast and shadows.
Let’s carry on with our setup!
So they are framed up
Lit on the short side this time
...and now we can place in a fill light to reduce those shadows...
Except we aren’t going to do that!
If you asked Roger Deakins about fill light he’d probably say “Phil who!?”.

Instead, we are going to embrace these deep shadows in the shot. Filling in those shadows can spoil the film look and make it look more like a rom-com.
If you need to create more shadow, you can add some negative fill by placing something like a blackout curtain or 5-in-1 reflector on the subject’s broadside.
We have an episode talking about blackout curtains if you want to find out all the different uses for them!
And if you want to add more light to the broadside of the subject, you can always position the light down the clock: so instead of 1 or 2 o’clock, put it at 3 or 4 o’clock. This will let more light cast on their broadside but will still produce a dramatic, contrasty shot without having to resort to fill lighting.

Lastly, we ARE going to add an edge light in order to bring the shape of the subject back into the shot and give them some contrast from the background.
Basically, we want to create an outline using light. Otherwise, the back of the head will meld into the background because they are both very dark.

Alternatively, you can light up the background, so it's brighter than the back of their head and then you can forget about the hair light. We are just looking to retain the shape of the subject.

“But now we have lights in front of the camera, won’t they get in the shot when the camera moves around?” Well, this is where you can employ some movie magic.
Start with a practical light, like a desk lamp, to act as a physical light source which is in the shot. Then you can add in a sneaky key light out of frame to boost up the lamp, also known as motivating the light. This will work just as long as the colour temperature and quality of light is the same as the practical.


In this case, we have a tungsten bulb and it’s diffused so we matched it with our production light by matching the colour temp and diffusing with a show curtain.
We have an episode of DIY diffusion:
On wider shots, the production lights can sit further back, out of frame. It’s wider, so we won’t need perfect detail on faces because we are shooting the bigger picture. In close-ups, you can bring them closer and get perfect exposure on the subject’s face.
This is something which I wish my University taught me. Sadly, I had to learn this through my own trial and error. Next time you watch a film or TV show, have a look at which side the lighting is positioned. You might be surprised how often short side lighting is used!
📺 How to support the channel
🚀 bit.ly/artlistfilmlook - The music you heard in this episode is from Artlist. Click the link to receive 2 extra free months on when you purchase an Artlist subscription!
🎵 https://www.joelfamularo.com/colour - Use discount code "TFL" at checkout to get 20% off your LUTs purchase!
🎬 In case you missed it
10 Ways to use Blackout Curtains for Filmmaking - https://youtu.be/nf2Cxz8H4CU
DIY Light Diffusion: https://youtu.be/zFqAo7Ic538
How to Shoot an Interview: https://youtu.be/8TRdmj0Ao4k
🎧 Listen to our Podcast!
iTunes: https://goo.gl/hikhGF
Android: https://goo.gl/fmsp4s
📞 The Socials
Website: http://thefilmlook.com
Twitter: https://twitter.com/TheFilmLook
Facebook: https://www.facebook.com/TheFilmLook
Instagram: https://www.instagram.com/thefilmlook
DISCLAIMERS:
Some of these links are affiliate links, if you purchase gear via these links The Film Look will receive a small commission, but there will be no additional cost to you. Thank you!